How to Cook a Flank Steak for Fajitas—5 Steps to Perfection
John D Lee is a chef and restauranteur living and working in Chiang Mai, Thailand. He's always loved to cook.
Making beef fajitas? Well you can use just about any cut of steak—but if you want to make real-deal really really good fajitas, you’re going to have to use either flank or skirt steaks.
Both cuts hide on the bottom belly of the cow, well away from the more glamorous top side cuts like tenderloins and T-bones and what have you—and if prepared incorrectly, both cuts will turn tough and mean and make you wish you’d paid a bit more for those more forgiving tender steak options.
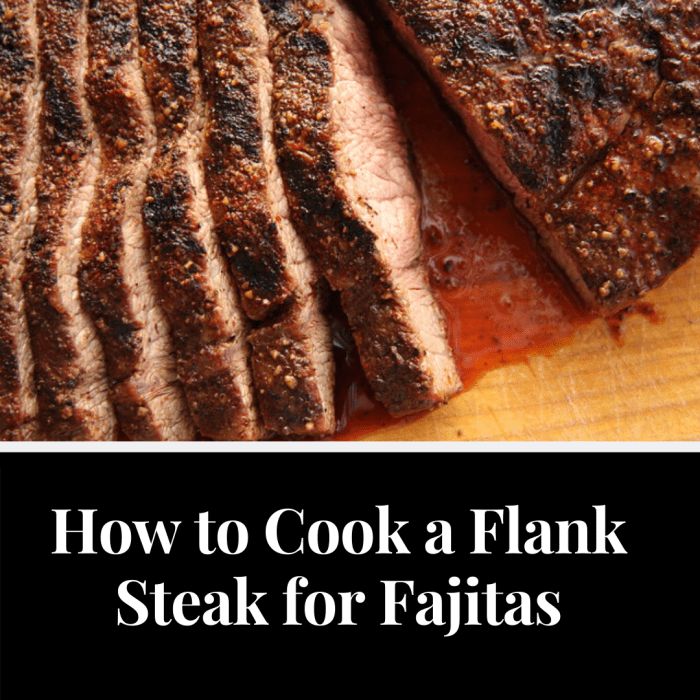
But, if cooked correctly, if seared hard and fast on both sides and cooked to medium rare, if allowed to rest properly and then sliced across the grain, the pay-off is in big beefy taste and a perfect fajita.
Note: While the flank steak takes very well to marination, For fajitas I like it best cooked simply, with just a little salt and pepper. In the fajita what I want to taste is beef—the salsas, guacamole, veggies etc provide the extra flavors necessary to complete the package.
Here Are 5 Easy Steps to a Perfect Flank Steak Fajita
- Heat a grill or cast iron pan (or other heavy frying pan) over high heat (if using a cast iron pan, make sure to give your pan a few minutes to truly preheat before you start frying.
- Season the flank steak all over with salt and freshly cracked black pepper and then use some paper towels to dry the meat off well. The drier the meat when it comes in contact with the hot pan or grill, the better the brown crust that will form. Wet meat creates steam—and steamed meat isn’t what we’re after here!
- Add the meat to the lightly oiled pan or to the grill and cook for 3 or 4 minute on each side. What you’re probably going for here is between medium and medium rare. Flank cooked beyond medium gets a little dried out and flavorless, and flank cooked less than medium rare can be pretty slippery-chewy (Even if you like a very rare rib-eye steak, you probably only want a medium rare flank.)
- Take off the heat and let it rest, covered, for between 5 and ten minutes. This step is crucial. If you slice the meat before allowing it to rest, much of the meat juices will run out onto the plate, leaving you a dry and bland hunk of used-to-be-tasty meat! Let the meat rest for a few minutes so the juices which run to the hot exterior have a chance to re-penetrate to the interior.
- After 5 or 10 minutes of resting, slice the meat thinly across the grain. Flank steak is a wide grained steak and so it’s easy to see which way the grains run—make sure to cut perpendicular to the grains, or you’ll wind up with pretty chewy fajitas! (For the nicest presentation, slice into very thin slices across the grain on a 45% diagonal bias)
Comments
Tessa on December 22, 2018:
Just cooked (grilled)mine exactly the way you said. It was not cooked, basically raw. The fire was very hot. I had to scape some of the scorch off one side.
It was pretty thick for a flank steak so I cooked for 4 mins per side. Just so you know:)
Vespa Woolf from Peru, South America on July 11, 2012:
This really is the best method for fajitas. Before reading your hub, I insisted on marinating the meat. Now you've won me over. With this method, the beef takes center stage and the guac, salsa, etc. add extra flavor. Awesome! Thanks so much.
Spencer Camus from United Kingdom on September 26, 2011:
I've been a chicken fajita fan for a few years. Never really thought of trying beef. I will now though. Another useful Hub, John. Cheers.
Wil C from United States of America on May 16, 2011:
Thanks for the tips. I am new to this cut of meat so this article helped a lot. I pretty much cooked it the way you said before reading this, but the drying of the meat was a step I had left out. I look forward to trying again with that adjustment.
kafsoa on March 31, 2011:
Really useful tips, thank you john.

