2 Ways to Make Candied Citrus Peels
Foodstuff is a freelance food writer and published author who has been exploring various recipes.
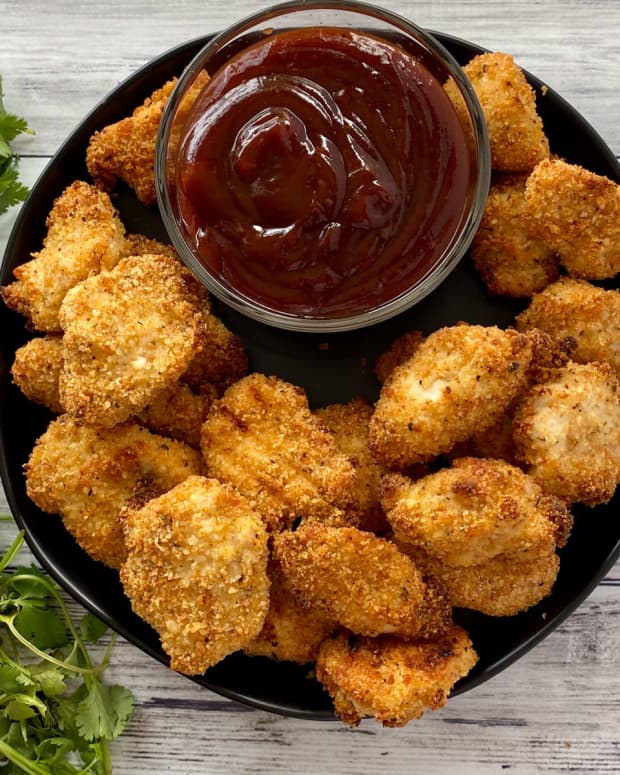
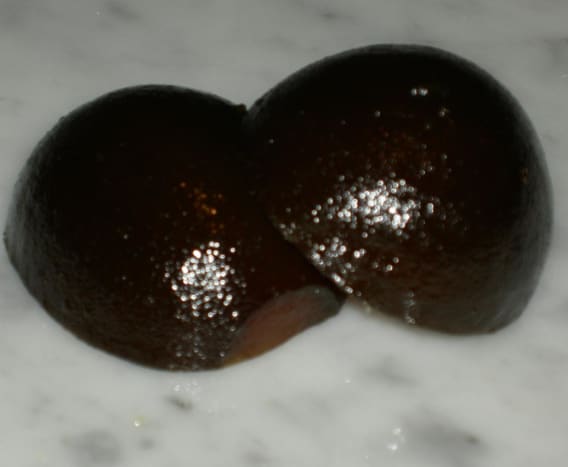
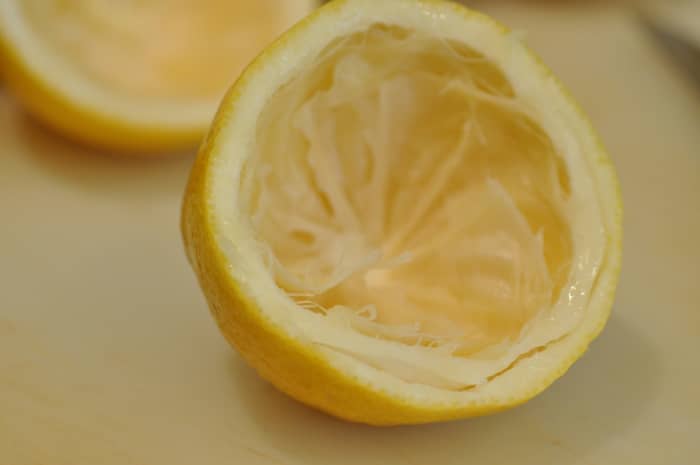
Finished candied lemon peel.
Siu Ling Hui
The Pleasures of Homemade Candied Peel
Candied orange, grapefruit, and lemon peels are wonderful treats. The candying process transforms their flavour and scent. The lemon peels develop intriguing spice notes.
These peels can be used for a whole range of sweet treats. They are delicious eaten as they are. You can cut them into thin slices and roll them in sugar or dip in chocolate for an after-dinner treat. They're also a wonderful addition to cakes and cookies.
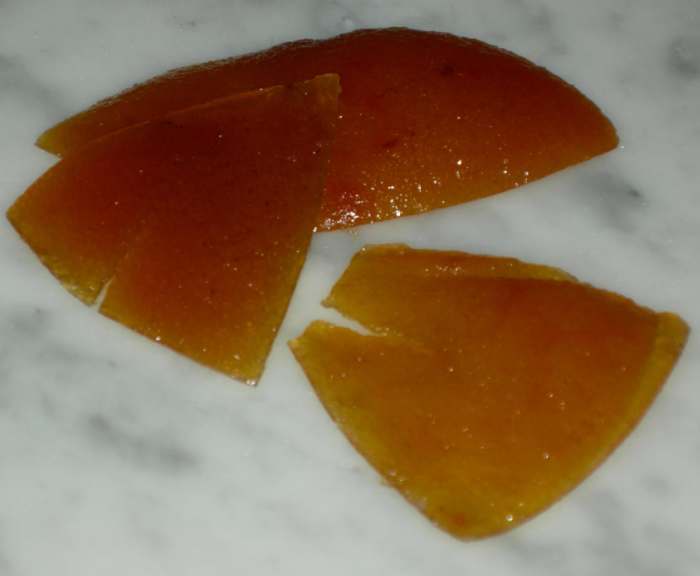
Italy is famous for its candied citron, also known as cedro, which is used in cakes and cookies. The citron (Citrus medica) is grown specifically for its thick rind. However, it is difficult to find the tree in garden centres or nurseries. I happened to be lucky enough that I managed to locate two trees over a decade ago. The candied cedro pictured here are made from fruits from these two trees. (Recent attempts to buy additional trees—just in case my current ones die—have been unsuccessful.)
The key issue I have with commercial candied peels is the smell and taste of the preservative E220, or sulphur dioxide (SO2). For whatever reason, this preservative has a very discernible effect on the scent and flavour of the peel. Given that sugar is itself a natural preservative, the addition of sulphur strikes me as unnecessary. Read the small print to check if S02 or preservative E220 has been added if you are buying a commercial version of these treats.
There are two methods for making candied peel. The quick method does not keep well but is very useful way to make this treat with short notice. The slow method simulates the commercial process but without need for specialized equipment (other than a sugar thermometer). The eating and keeping qualities using this slow method make it well worth the extra effort. As the saying goes, good things take time!
3 Types of Candied Citrus Peels


How to Prepare Your Peels (For Either Method)
After this set of text instructions, you'll find a set of step-by-step pictures.
- Juice the citrus, as it is easier with work with citrus "shells." If you're using lemons, be sure to save the juice. There are plenty of other uses for it, and we'll discuss those later.
- Cut the shells in half.
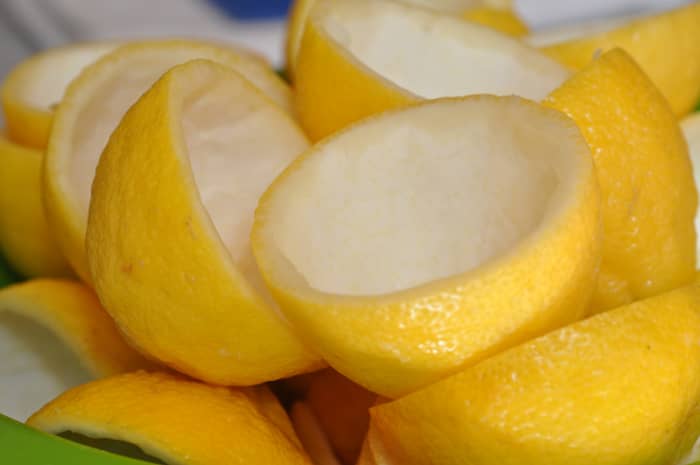
- Place each quarter on a chopping board, and using a filleting knife, remove all the membranes so that you have a peel and some white pith. If you wish, you can cut the quarters into thinner slices. (Note: You can work with shells, but it can be hard to remove the membrane from the shells and is easier to do with quarters.)
- Put the peel in a large stockpot with cold water. Use at least 1 litre of water for every 250 grams of peel.
- Bring to the boil.
- Simmer for about 20 minutes.
- Drain, rinse, and repeat the process. The peel should be tender. If it is not, repeat the process and cook for longer period until it is tender.


Tips for Removing Citrus Membranes
- Run the tip of a small sharp knife (a fillet knife works best) around one-third or half of the shell. The slit should be about 1 cm deep.
- Using your fingers, ease the fleshy part and the pith apart. The fleshy interior will come away easily from the outer portion.
- Work your way around the lemon half, pulling the inner fleshy portion away from the outer part. Discard the extracted flesh. You will have a neat lemon.
Method 1: The Quick Method
Ingredients
- 250 grams fresh peel
- 250 grams sugar
- 600 ml of water
- 3 tbsp liquid glucose
Instructions
- Prepare the peel as described.
- In a large, heavy saucepan over moderate heat, dissolve the sugar and liquid glucose in the water. When the syrup is simmering, add the drained peels.
- Simmer the peel in the syrup until there is only a small amount (around 125 ml) of syrup remaining, and the peels are shiny and translucent. Care needs to be taken towards the end of the process to prevent burning: stir frequently and lower the heat.
- Drain the peels in a colander. Spread in single layers on wire racks. Leave them to dry in a cool, airy place until they are firm and only slightly sticky. If you have a food dehydrator, spread them in single layers on the racks and dry at the lowest temperature setting overnight until they are firm and only slightly sticky.
- Store your finished treats in an airtight container if not using immediately.
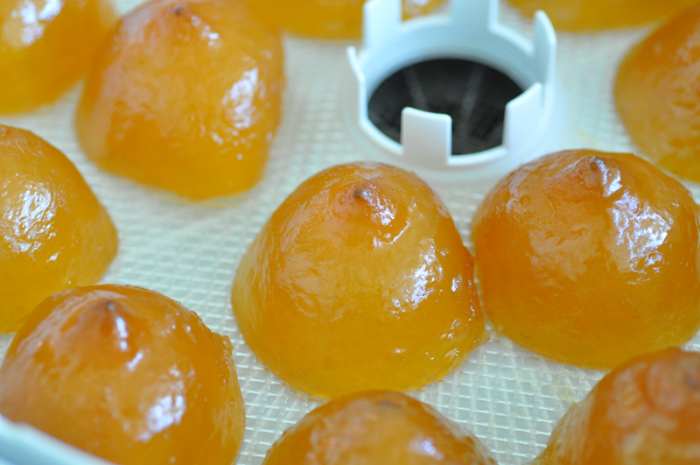
Homemade candied orange peel.
Siu Ling Hui
Method 2: The Slow, Multi-Day ("Proper") Method
Ingredients
- 1 kilogram fresh peel, prepared for candying
- 900 grams granulated sugar
- 180 grams liquid glucose (1st addition)
- 370 grams liquid glucose (2nd addition)
- 1 litre water
Day 1
- Prepare the peels.
- Put a dry chopstick into the pot of water before you add the sugar and liquid glucose. Mark the chopstick at the point which equates to 1 litre of water in the pot. Use this 'water mark' to check whether your syrup has reduced to 1 litre on Day 2.
- In a large stockpot over moderate heat, make a syrup with water, sugar, and 180 grams liquid glucose. Bring to a boil and add the prepared peel.
- Bring the syrup back to the boil.
- Lower the heat, cover the pan, and gently simmer covered cook for 10 minutes.
- Leave to stand one day, covered.
Day 2
- Remove the peel from the syrup using a slotted spoon or meshed skimmer, and place them in a colander that is set over a bowl. You want to save the syrup.
- Bring the syrup to a boil, and concentrate it by rapid boiling it until it reduces to 1 litre. Use the marked chopstick from Day 1 to help here.
- Whilst the syrup is reducing, add any drained syrup collected in the bowl back to the pot. When the syrup has reduced to 1 litre, return the drained peels back to the syrup. Bring the syrup back to the boil, and leave to boil, uncovered, for 3 minutes.
- Remove from heat, let it cool a little, cover, and let it stand overnight.
Day 3
- Remove the peel from the syrup as per the instructions in Day 2. Stir in the 370 grams of liquid glucose and bring the syrup back to the boil. As in Day 2, add any drained syrup collected in the bowl back to the pot whilst it comes back to a boil.
- Boil the syrup until it reaches 103ºC.
- Return the peel to the syrup and boil, uncovered, for about 3 minutes.
- The syrup should be 103ºC during this cooking time. Set aside, covered, for a day.
Day 4
- Repeat the process of removing the peel from the syrup and bringing the syrup to a boil again.
- Once the syrup reaches 105ºC, add the peel and boil, uncovered, for about 3 minutes.
- The syrup should be at 105ºC during this cooking time. Set aside, covered, for 2 days.
Day 6
- Repeat the process of removing the peel from the syrup and bringing the syrup to the boil again.
- Add the peel and cook, uncovered, until the syrup reaches 107ºC.
- Set aside, covered, for 1 day.
Day 7
- Bring the syrup and peel to boiling point over moderate heat.
- Remove peels from the boiling syrup to a large colander.
- Leave peels to stand in the colander until it is thoroughly drained of syrup.
- After they are thoroughly drained, spread it out to dry until they are no longer sticky and can be handled easily. The candied peels can be dried in a dehydrator at the lowest temperature setting. If you don't have a dehydrator, spread the peels onto wire racks or on greaseproof paper, and leave to dry in a cool, airy place. You will need to turn them every so often to ensure that they dry evenly. Drying time depends on the room temperature, humidity, etc. Judge by look and feel.
- Store them in single layers, separated with greaseproof paper, in air-tight containers.
How to Use Your Leftover Lemon Juice
If you are making a large amount of candied lemon peels, you'll probably have a lot of lemon juice. What should you do with it? You could just pour it into ice cube trays and freeze it. But an even better alternative is to turn the juice into a concentrate for use in cakes, cookies, tart fillings, ice creams, etc. By using the concentrate, you can pack a really powerful lemon flavour into whatever you're making without upsetting the liquid quantities in the recipe. I use this concentrate in the custard filling for Torta Della Nonna.
Here's what I did when I was preparing a large batch of candied lemon peel recently.
Method
- Squeeze the juice out of your lemons; I used 16 lemons (about 3.4 kg). I attached a strainer to my juicer to minimise the amount of pulp in the juice. I ended up with 1.2 litres of juice and 1.39 kg of peel.
- Put the lemon juice into shallow dishes (I used pie dishes) to allow the maximum amount of surface area to be exposed. Having a greater surface area will help accelerate dehydration.
- Place the dishes into the dehydrator. I had to add 2 separator rings to the dehydrator. These are the rings that allow you to space the drying racks further apart when drying large items.
- Set the dehydrator to 60°C. After about 6 hours, the juice had reduced by about a third.
- Dried juice will stick on the sides of the containers as the juice reduces. Brush down the sides of the containers with cold water. Lower temperature to 45°C, and leave the juice in a dehydrator for another 12 hours.
- The juice is very concentrated (you should have about 200ml remaining when it's all done) and intensely sour by this stage. Pack into small plastic thimbles or an ice cube tray, and put into the freezer for later use.


© 2010 Foodstuff
Comments
Lena Durante from San Francisco Bay Area on May 19, 2017:
I've always candied my peel in strips, but I'm loving the presentation of the whole halves. I will definitely be doing some this way in my next batch... Gorgeous!
Foodstuff (author) from Australia on May 10, 2011:
HI Andrew, I can't believe you still have them! I need to get some new stock to you!!!
Andrew Dwyer on May 09, 2011:
I remember you gave me a bag of orange peel you had made. They were so delicious, I would dip into them for a special treat. I treasure them, and still, believe it or not, have a few in the cupboard, and they are still as good as the day I first tasted them. I commend this recipe to everyone!