Artisan Sourdough Bread Recipe
Lemonkerdz was once a baker by profession. Now she enjoys baking at home for family and friends.

Lemonkerdz
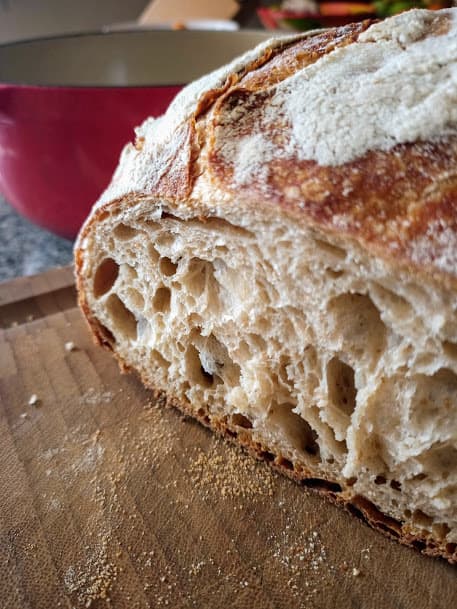
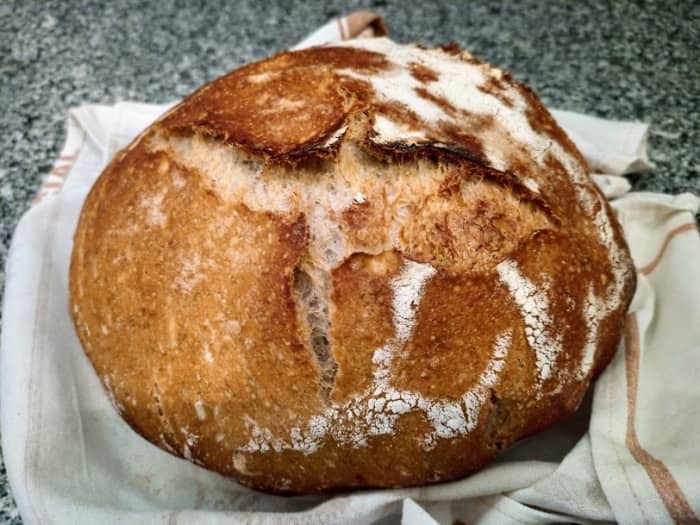
Disaster! That's how I would describe my first attempts at making a sourdough loaf. I imagined making an Instagrammable golden crusty loaf with carved designs to impress even the most advanced bakers. The reality was a flat discus that any Olympian athlete would be happy to throw and leave where it landed.
At first I was overcome by disappointment. But then the challenge was on to achieve that dream loaf to be proud of.
I have now found success, and I want to share with you the recipe and processes I've discovered. Master these first and then venture out and start creating your own variations, like cinnamon and raisin sourdough.
Every good loaf starts with a good sourdough starter that you can make at home. All you need are flour and water.
Sourdough isn’t a flavor—it's a process. You won’t be eating your loaf within a few hours like a standard yeast bread. Making artisan sourdough bread takes time and craft, but it comes with big rewards and a huge sense of achievement.
The whole process takes about two days, but the actual hands-on time is fairly minimal. Once it becomes part of your weekly routine you will begin to get the feel for when to make your leaven, and when to make your loaf.
As a side note, we all know people who are gluten intolerant, or at the very least feel discomfort after eating bread. This is because the body suffers an inflammatory reaction to the gluten, a protein found in wheat, barley, rye, etc. Here’s the good news: A long fermentation process breaks down the gluten protein, which makes it easier for the stomach to digest.

Lemonkerdz
Why Homemade Rather Than Cheaper Store-Bought Loaves?
Read the ingredients and find your answer. A real sourdough contains just three ingredients, flour, water, and salt. If the loaf you buy has more than three ingredients you should worry and ask why. Sometimes other ingredients are added like commercial yeast, vinegar, or even bacteria—and although not harmful it defeats the whole purpose of a long ferment. A proper artisan long-ferment sourdough can be eaten by many people who are gluten intolerant. The same cannot be said for store-bought sourdough, since the gluten hasn't had time to break down.
Learn how to make your own sourdough starter and you will be ready to make your first loaf. You can also use the discard from feeding your starter for making sourdough crumpets.
Make it like Granny did in the good old days
Artisan sourdough has no need for commercial yeast since a simple mix of water and flour left out over time is allowed to catch all those good bacteria in the air that help break down the gluten protein.
Lemonkerdz
Cook Time
| Cook time | Ready in | Yields |
|---|---|---|
1 hour | 1 hour | 1 (500-gram) loaf |
Ingredients
- 500 grams all-purpose flour
- 10 grams salt
- 250 grams tepid water
Instructions
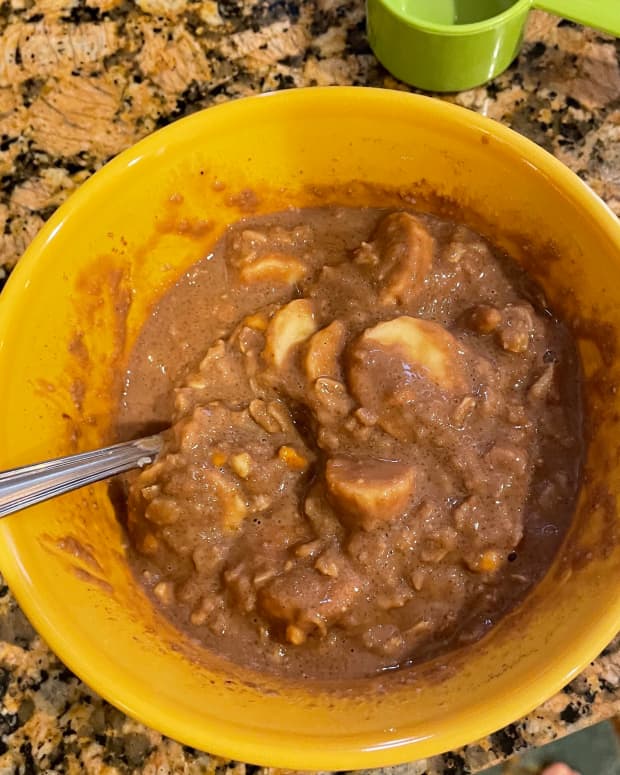
- In a large bowl add your sourdough leaven (sponge) that you made the night before. (Check out my sourdough starter recipe to learn how to make the starter and the leaven.) Add the tepid water to the sourdough leaven and stir well to combine to a milky looking water mix with no lumps. Leave for 15 mins to rest.
- Add the flour to the water mix containing your leaven and mix well with a stand mixer or by hand just using your fingers to combine together until you have a smooth soft dough. Do not worry too much if it appears wet, the flour will hydrate drying up the mix.
- Leave to rest for 30 minutes covered with a cloth or plastic wrap. This is called autolysis (see note below).
- Add the salt and mix in well, (use your stand mixer or hand knead) Leave to rest for around 40 minutes and then mix again. I recommend the lift and stretch method by hand (see note below). Repeat this step for the next 3 to 4 hours.
- Turn out onto a lightly floured surface. Now for the final shaping. Grab one side of the dough furthest from you and fold it over itself towards you and repeat on each side, this creates a tighter dough that will stop it collapsing and spreading flat. Place upside down in a floured banetton proofing basket. (Most of us don't have a banneton when we are starting out; I don't own one yet either. Simply line a bowl with a floured tea towel and put a Banneton on your wish list). Place in the refrigerator overnight for a slow fermentation.
- Preheat your oven to 280 degrees C. It’s a great idea to preheat your Dutch oven or Crock-Pot on the middle shelf; this helps the bread base crisp up better.
- When heated, carefully remove the Dutch oven, place a liner inside it to stop the dough sticking to the base and lightly sprinkle flour or corn meal on the liner.
- Turn out your proved dough into the Dutch oven. At this point if you are feeling brave, score the dough with your own personalized design. Because the dough is cold it makes it easier to score. With a bread razor (another wish list item) or sharp knife score about 3mm deep.
- Spray the top of the dough with water and dust with cornmeal.
- Cover with the lid and bake for 40 minutes on high heat then remove the lid and bake for a further 15 minutes or until desired coloured crust is achieved. (Remember: Each oven is different so you may have to adjust cook time accordingly.)
Note: Autolysis
Autolysis is a process in bread making which involves mixing flour and water together for a period of time, before adding other ingredients. This hydrates the flour, which encourages enzymes to begin gluten development. Dough can be left to autolyse from 10 minutes to 5 hours or more.

Lemonkerdz
Note: Lift and Stretch
This method stops you bursting all those nice air bubbles you want in your sourdough. Wet your fingers on one hand and slide your hand down the side of the dough then with your fingers lift the dough and fold over the top to the opposite side. Repeat this action on each of the four sides of your dough. Each time you repeat this action you will notice the dough will stretch further without tearing.
How to Fold and Stretch the Dough
Lemonkerdz
Comments
lemonkerdz (author) from LIMA, PERU on November 10, 2020:
Thank you coleen. I will be posting a recipe for cinnamon raisin sourdough bread that uses this recipe as a base. It’s a great breakfast bread. Enjoy.
Colleen on November 09, 2020:
Thankyou for sharing. I cant wait to try this and hopefully enjoy it pain free!!
lemonkerdz (author) from LIMA, PERU on November 06, 2020:
Thank you Maria, Each one has to give it a try but i have a few friends with Gluten intolerances and this is a life saver. All things in moderation.
We should all be getting back to how food used to be, real food not fast processed. Most slow fermentations like cambucha,sourdough bread are great for the gut.Thanks for leaving a comment.
Maria Giunta from Sydney, Australia on November 06, 2020:
I eat sourdough bread but didn't know it was good for people with gluten issues. Glad they can enjoy it too.