The Secrets of Baking Real, Artisanal Breads
Foodstuff is a freelance food writer and published author who has been exploring various recipes.
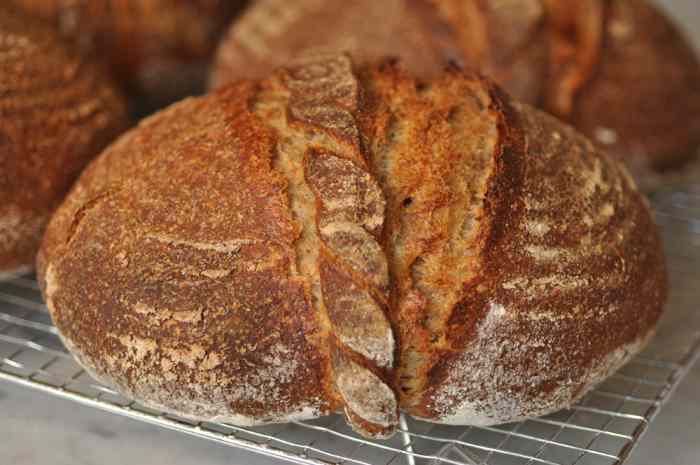
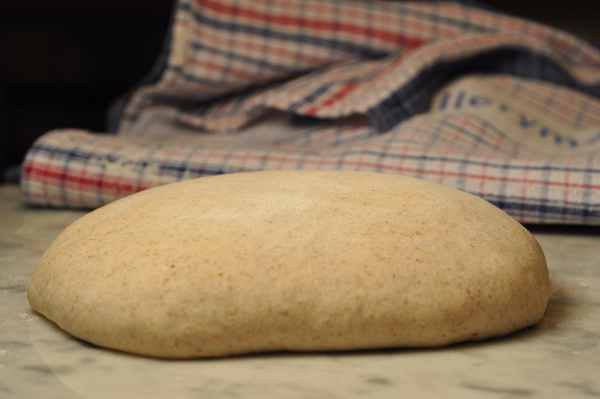
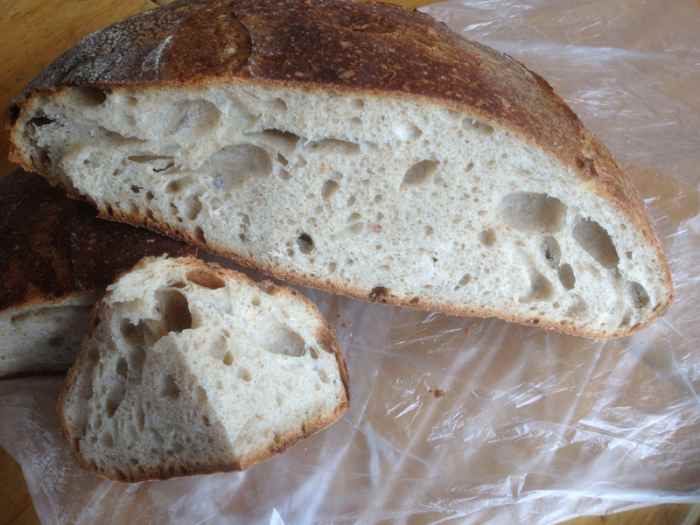
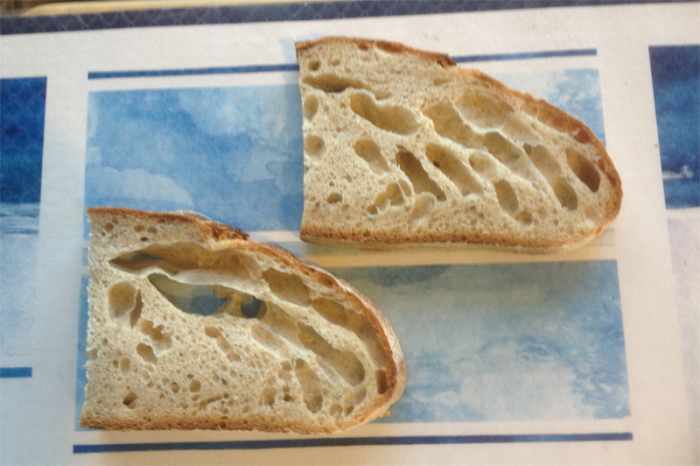
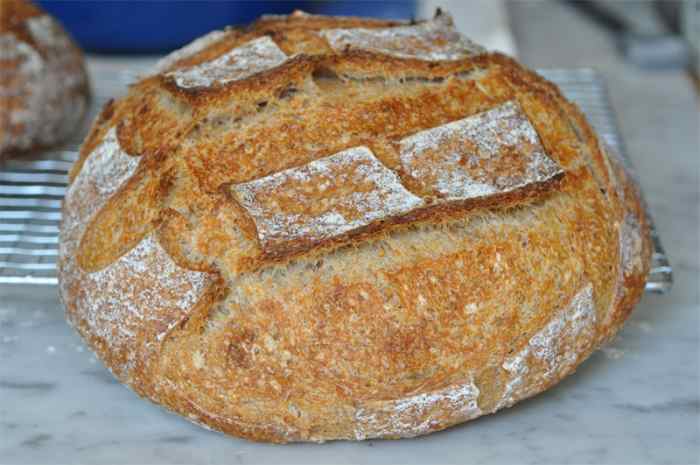
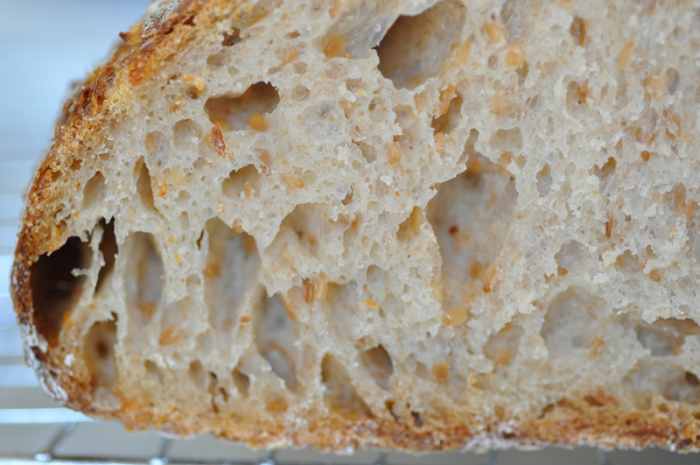
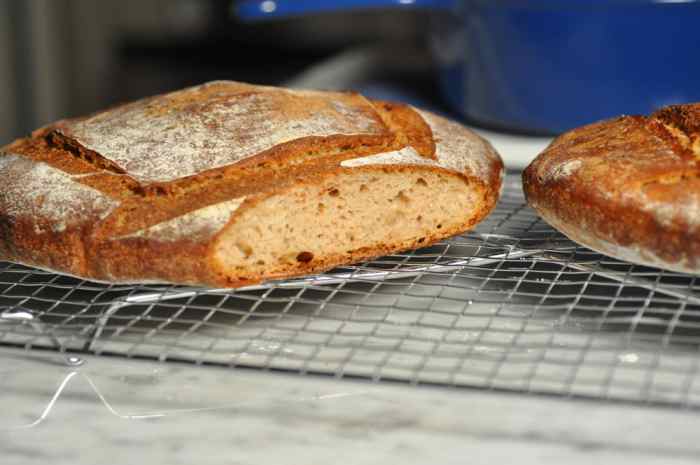
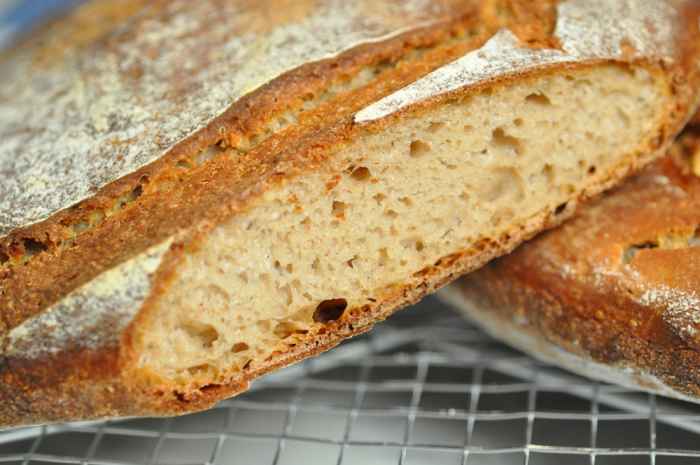
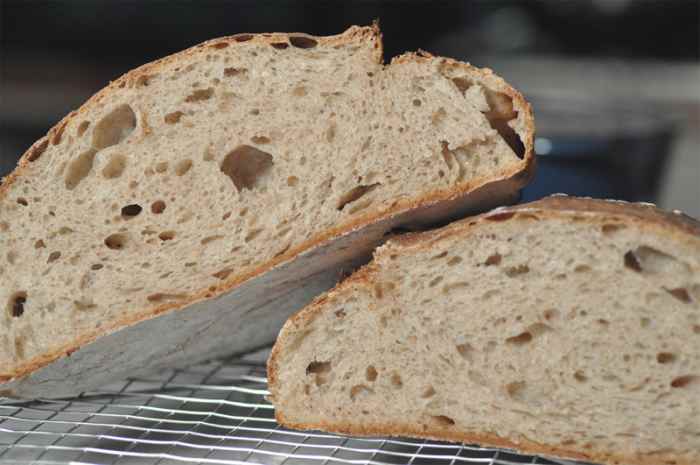
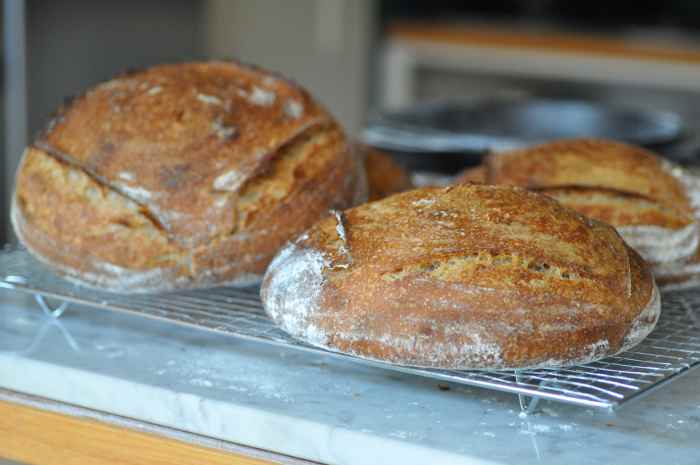
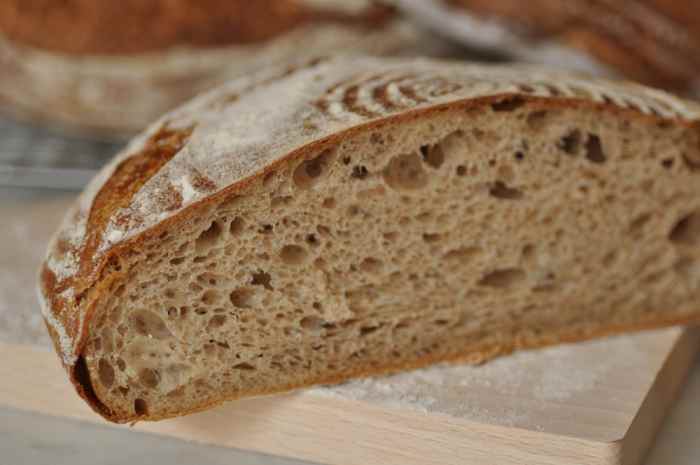
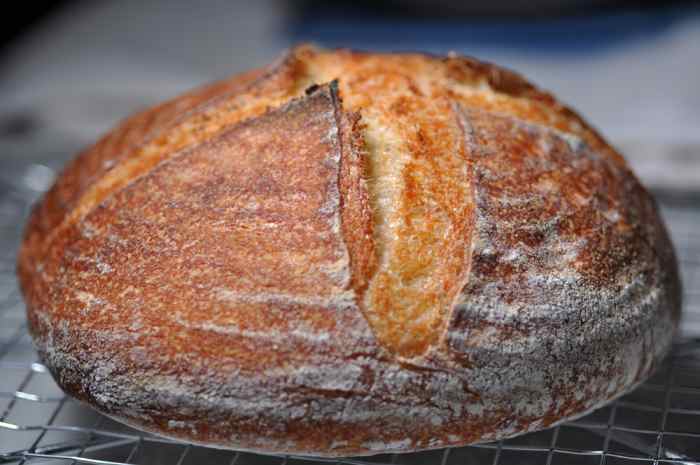
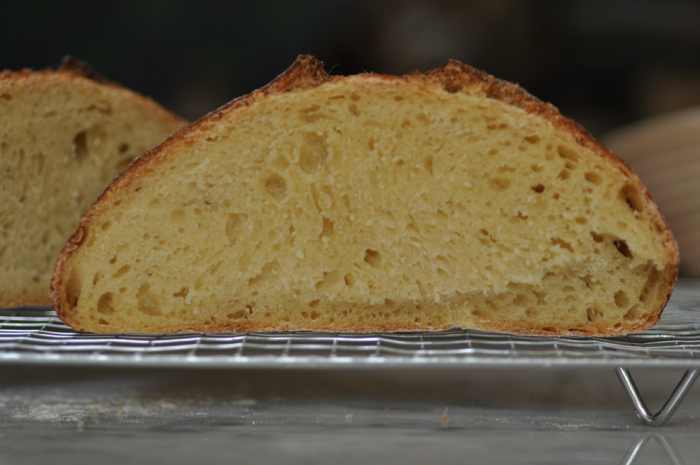
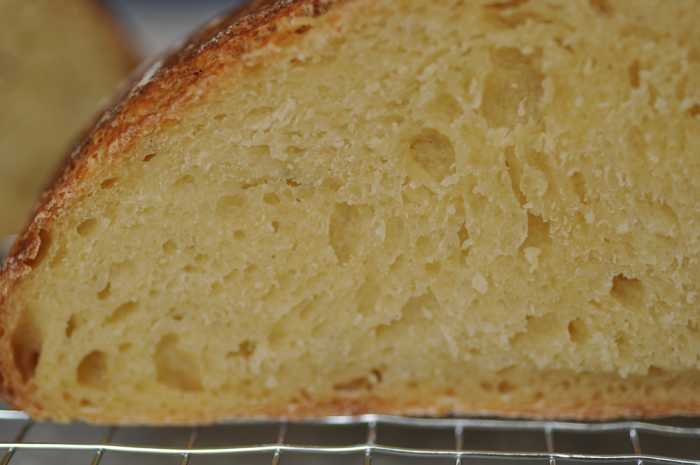
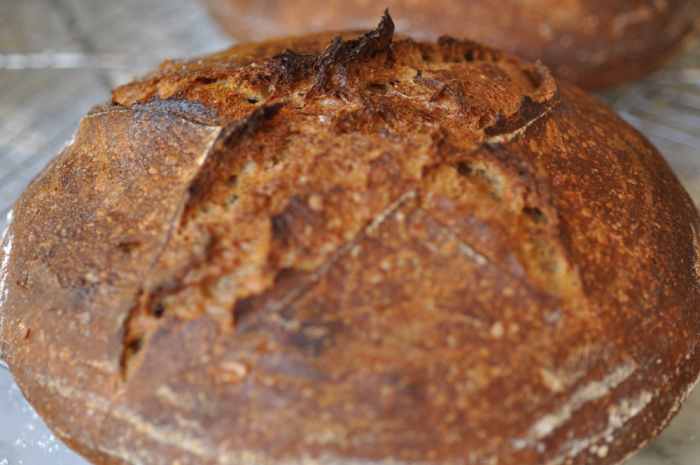
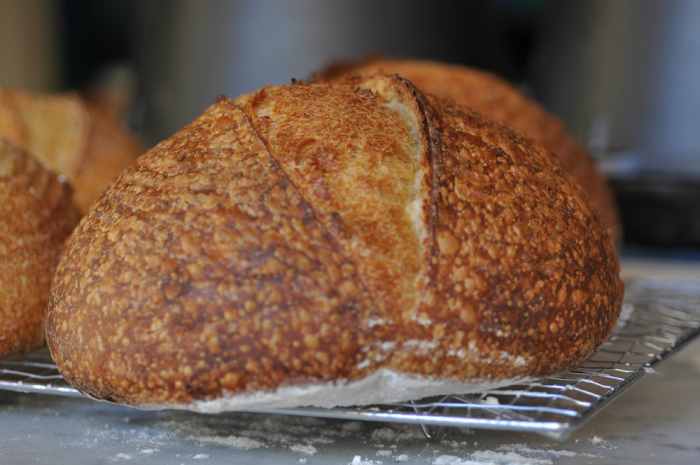
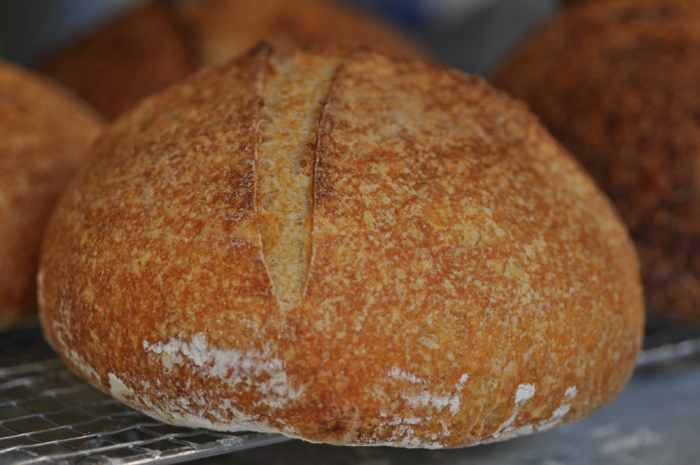
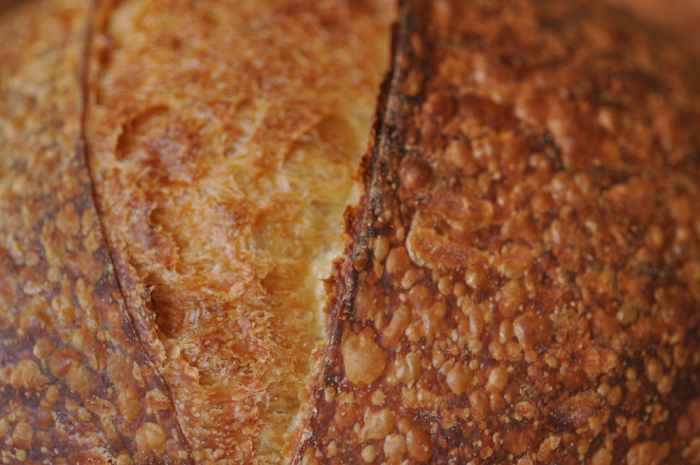
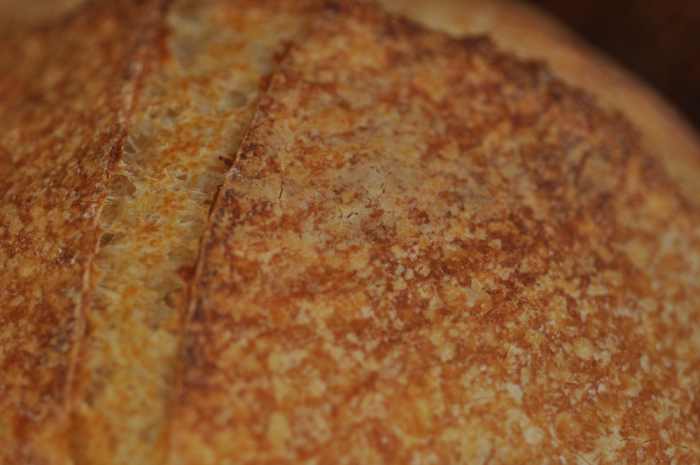
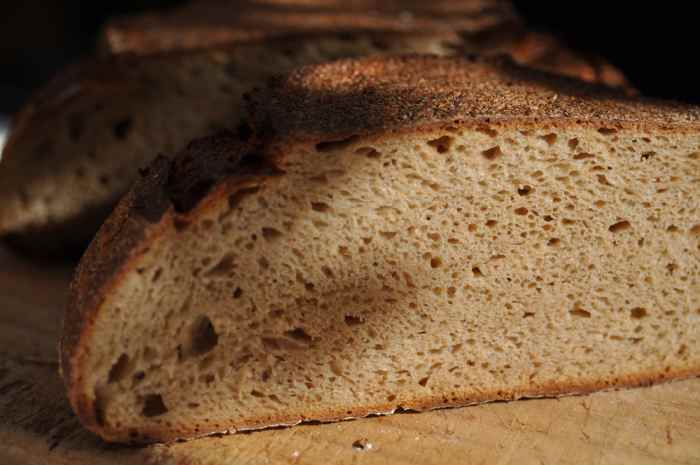
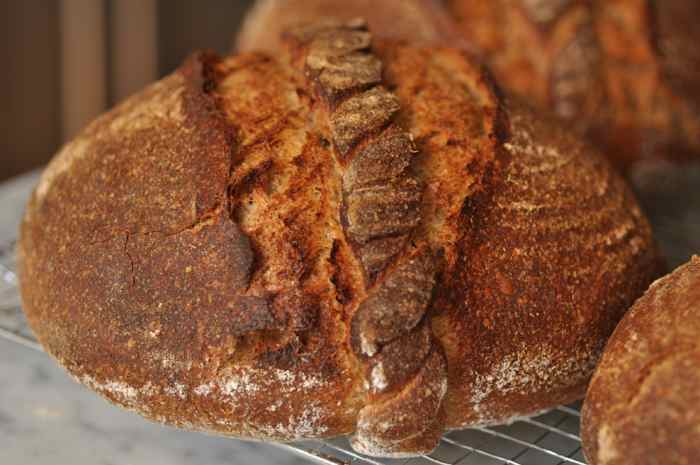
One of the first of my home-baked sourdough loaf done around Aug 2012. Not perfect but delicious.
Image: © Siu Ling Hui
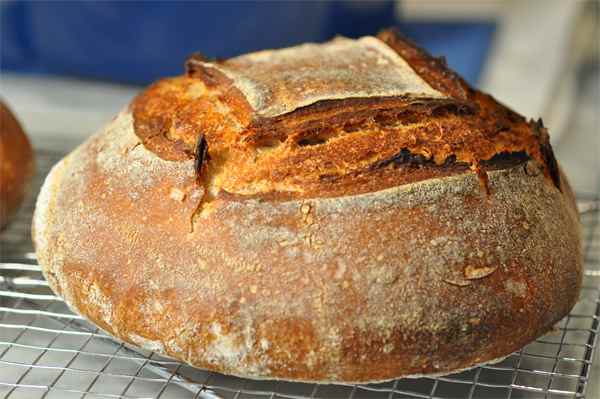
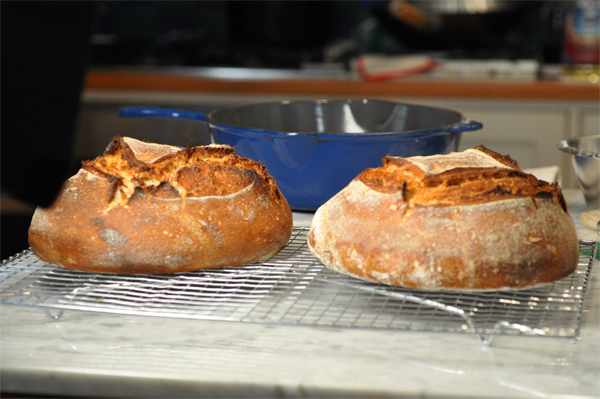
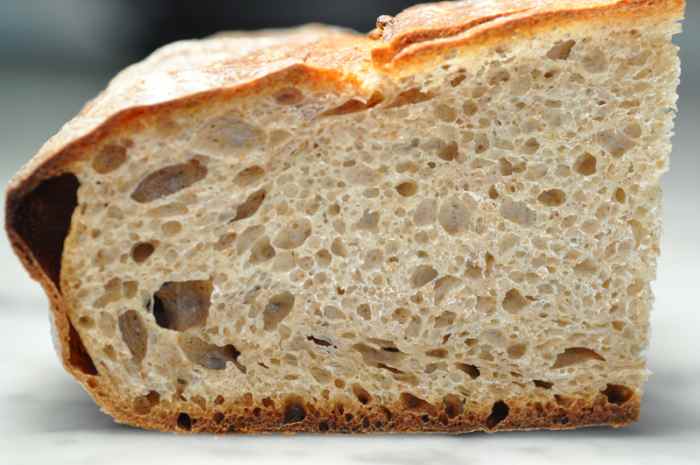
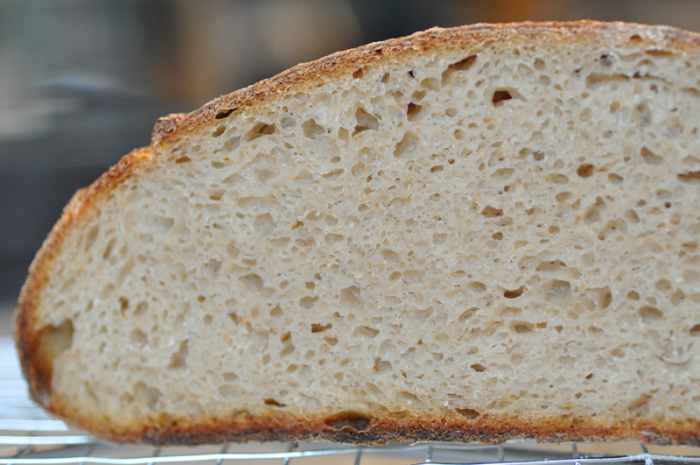
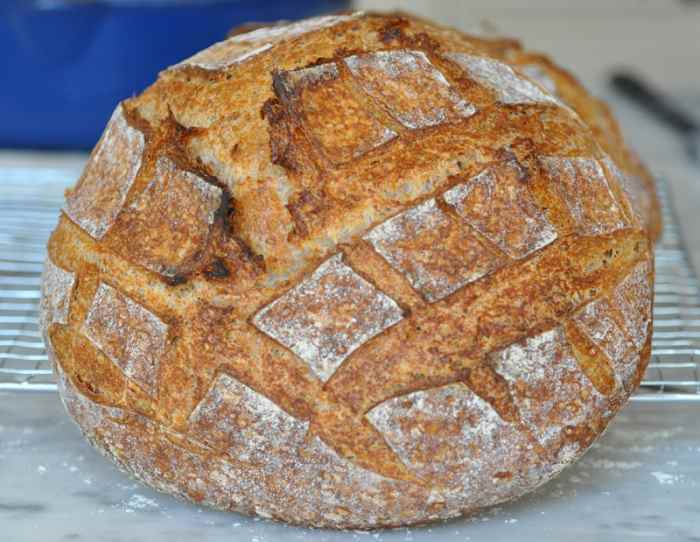
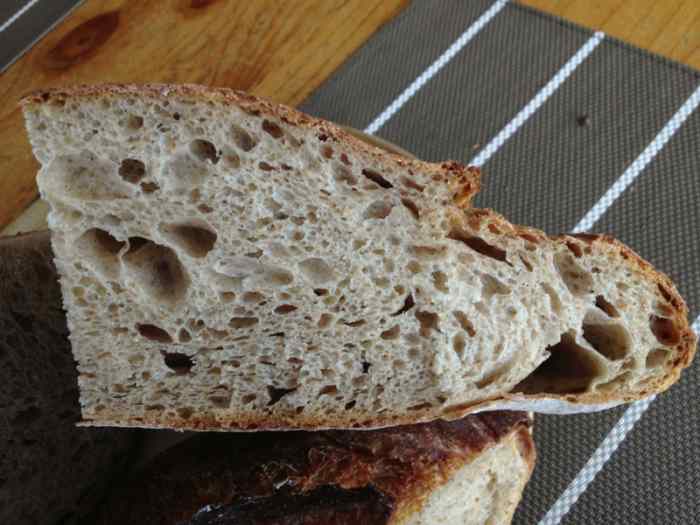
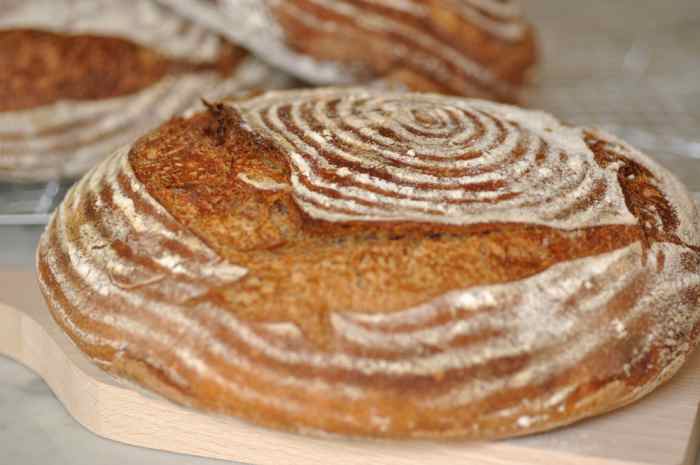
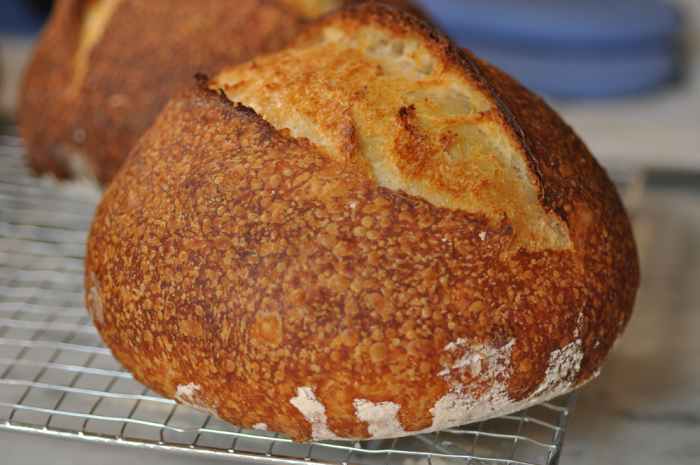
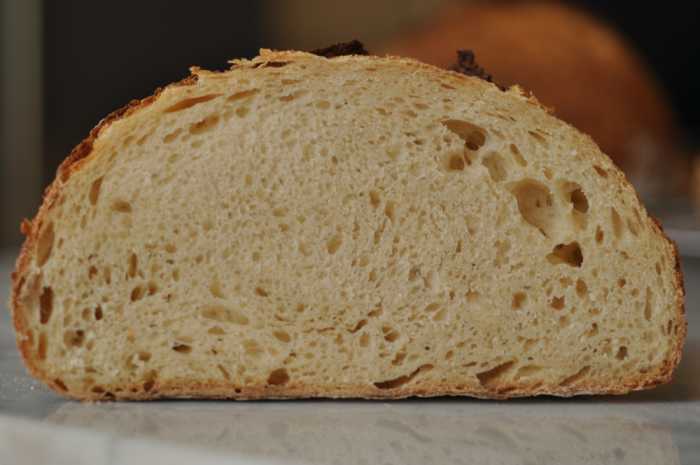
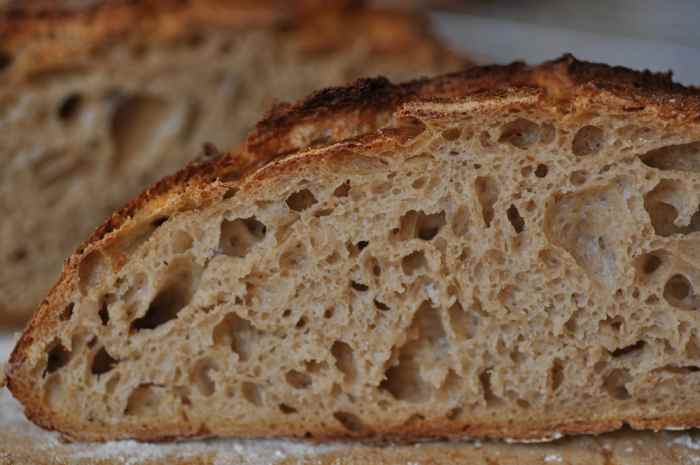
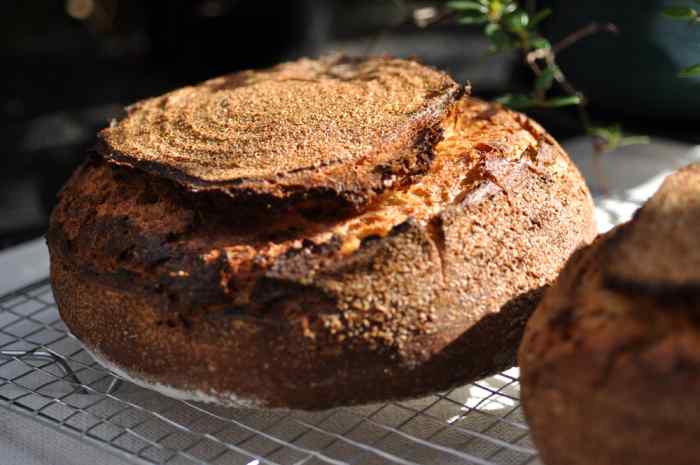
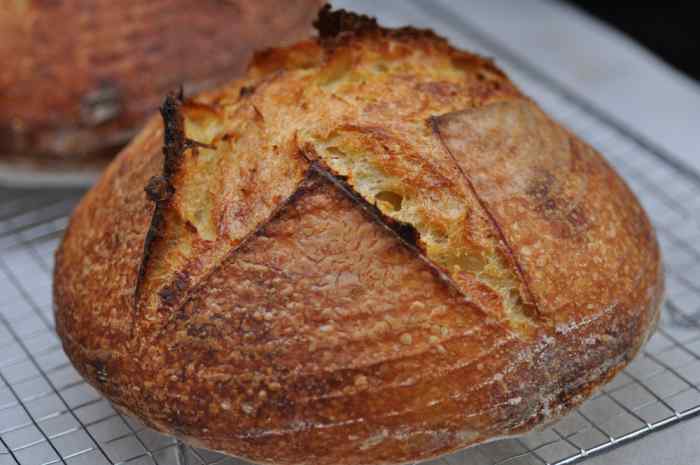
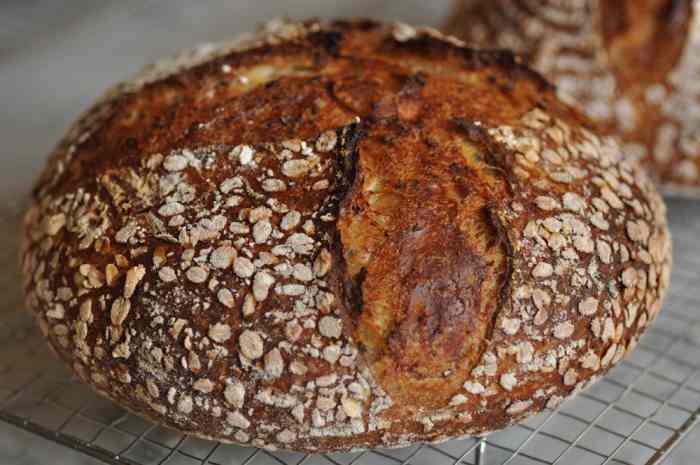
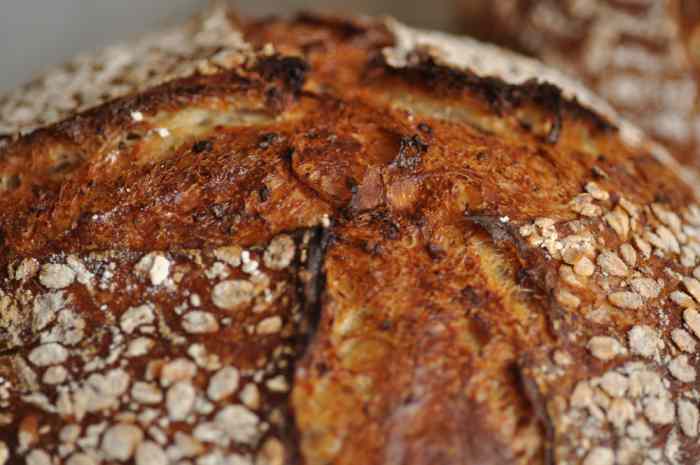
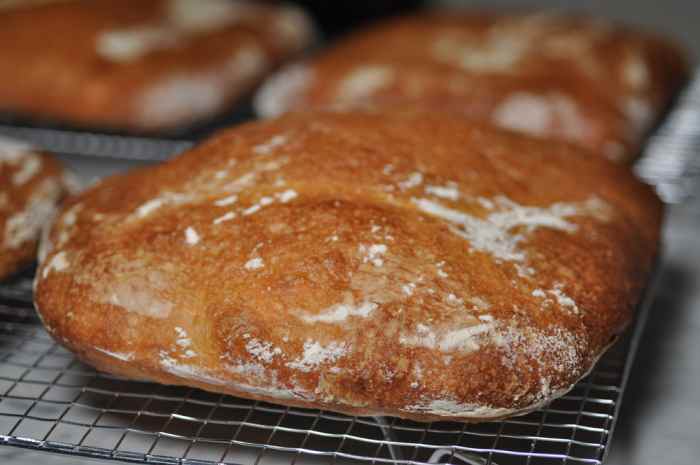
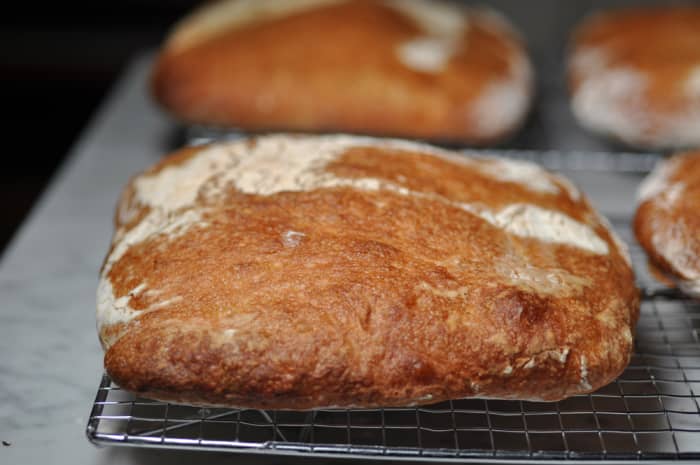
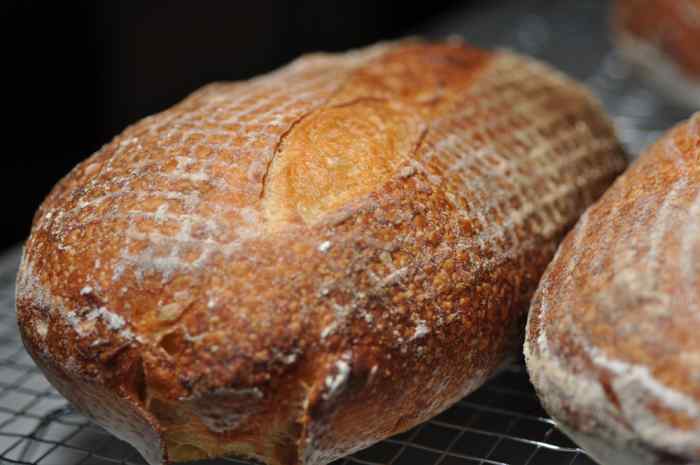
Pain Cordon de Bourgogne baked in Sept 2014. What a difference two years of bread-making practice makes!
Image: © Siu Ling Hui
Time Is the Secret Ingredient
Time is the key ingredient that separates the artisan's loaf from the cotton wool-like apology found in the franchise bread shop and supermarket.
In the baking trade, real bread is made with 'time' doughs whereas industrial bread is made from 'no time' doughs where time is substituted by a hotch-potch of additives such as improvers (often chemical rather than natural), stabilisers, emulsifiers, humectants, lubricants, protein conditioners, preservatives etc., etc.
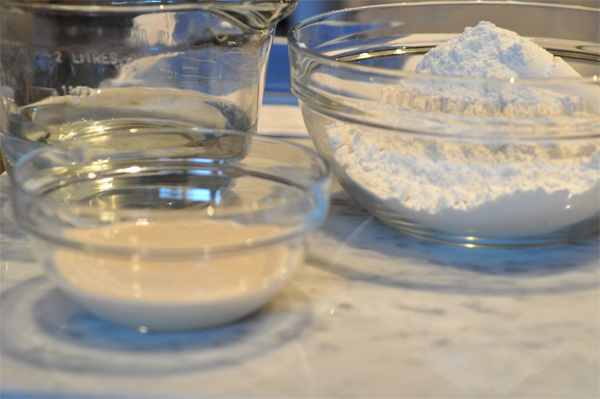
Starting a dough: only flour, water, and leaven. Salt added later.
Image: © Siu Ling Hui
The Other Four Basic Ingredients
The starting point for all bread is to make a dough by mixing together four basic ingredients: flour, water, yeast and salt.
Water is the catalyst that activates starch enzymes in the flour that break down the starch to a variety of sugars including glucose and maltose which become the 'food' for the yeast.
Salt, apart from enhancing flavour, strengthens gluten, but because it inhibits yeast activity, the artisan baker only adds it in the last five minutes of the mixing process, thus allowing the yeast a head start.
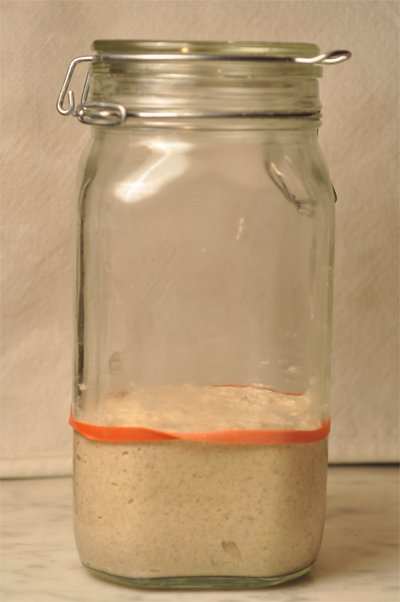
My Sourdough Starter
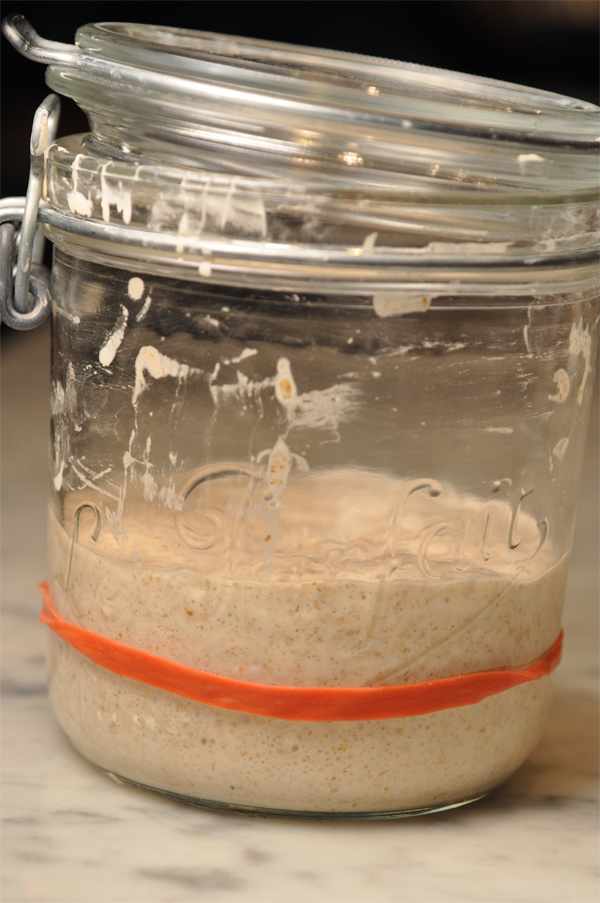
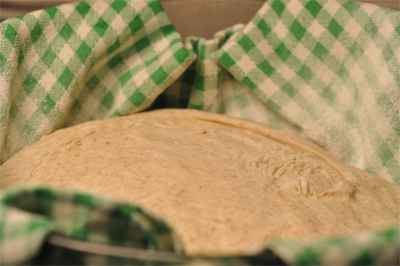
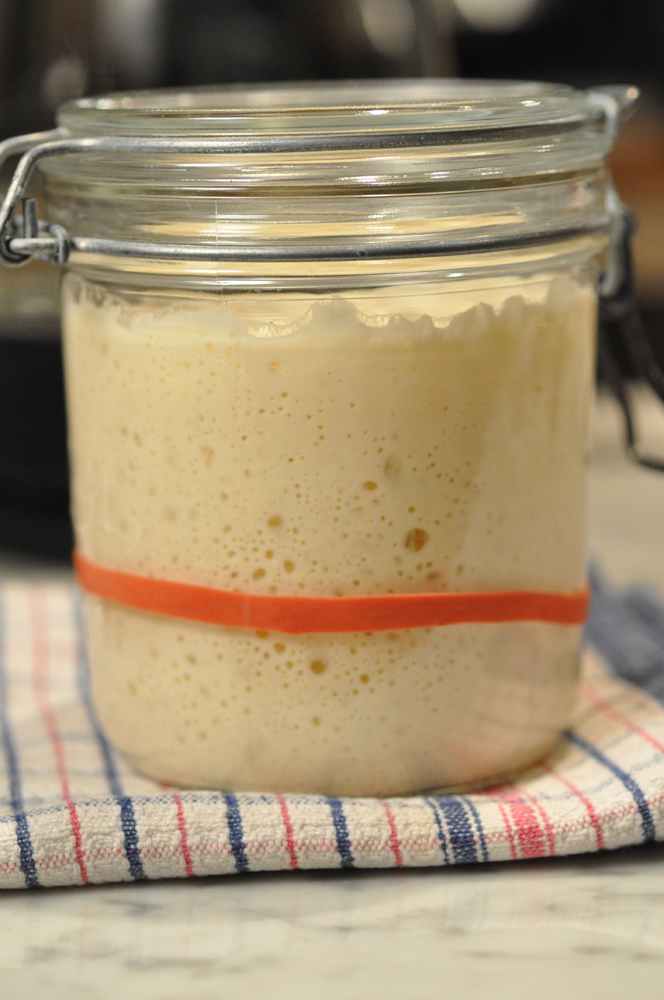
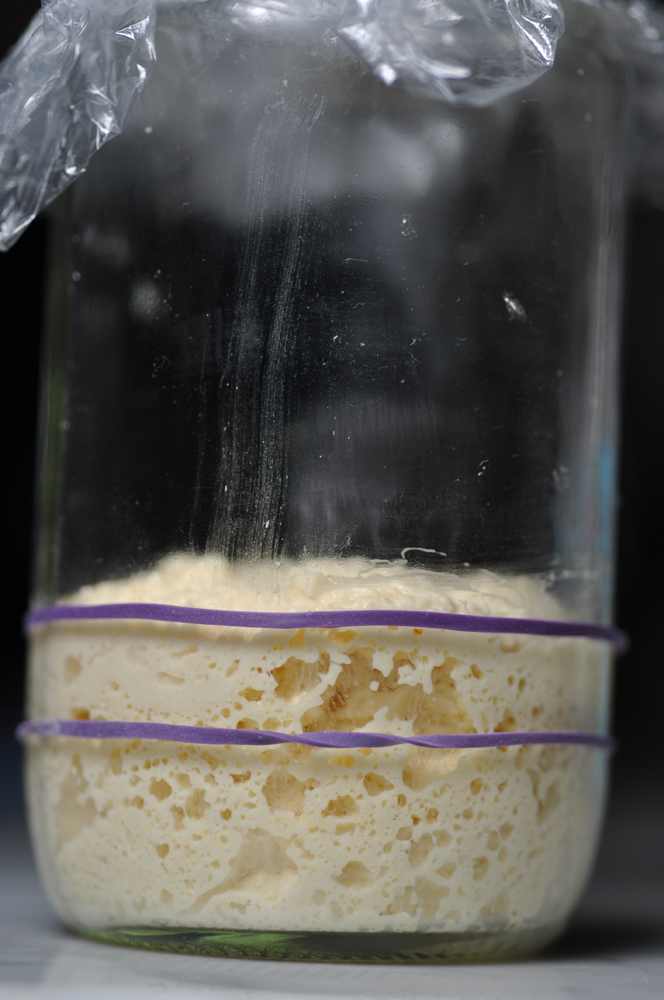
A starter that I made with baker's flour, organic wholewheat flour, and light rye flour, and water. Took over 1 week to mature so that it rises (above rubber band marker) and falls reliably.
Image: © Siu Ling Hui
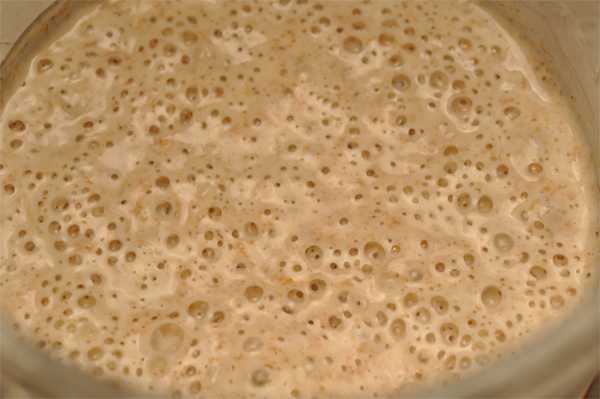
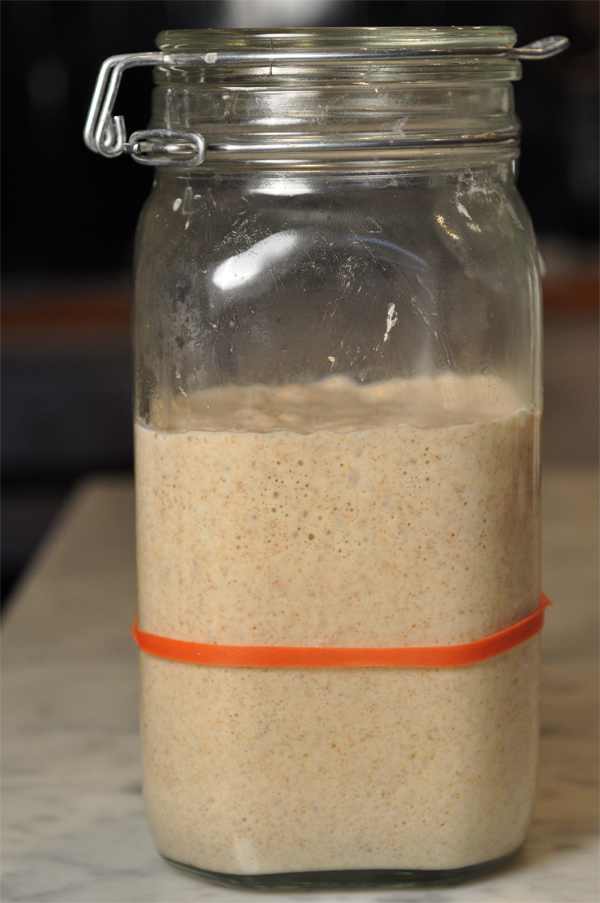
Mature starter. Lots of bubbles indicate very active wild yeasts.
Image: © Siu Ling Hui
Wild Yeasts vs Commercial (Baker's) Yeast
It is important to understand the basic differences between the wild yeasts of sourdough and commercial yeast (also known as baker's yeast).
Perhaps the first is the fact that sourdough yeasts grow best in a slightly acid dough, while commercial yeast performs best in a neutral or slightly alkaline one.
Commercial yeast is represented by a single species, Saccharomyces cerevisiae , while sourdoughs are usually leavened by multiple strains of wild yeast (of the genus Candida ) in the same dough, none of which are baker's yeast.
This mixture of yeast types contributes to the distinctive sourdough texture. The wild yeasts in sourdough are anything but uniform, and they can vary from country to country, indeed even from region to region.
Iain Bamfield, from Fruition in the Yarra Valley, Victoria, notes that both wild yeast and bacterial strains have regional variations and believes that no one can really call a sourdough made in Australia a 'San Francisco sourdough' [one of the world's most renown sourdoughs]. Rather, it should be a Sydney or Melbourne sourdough and accordingly, he labels his sourdough bread 'Yarra Valley sourdough'. Similarly, Richard Tollenaar, from Pandora Panetteria in Auckland, labels his sourdough bread 'Auckland sourdough'.
My Sourdough Leaven
Leaven is made with a small "seeding" of flour and water with the mature starter.
Image: © Siu Ling Hui
The same leaven left overnight to 'mature' at ambient temperature of around 17°C. It was still sweet smelling (as distinct from acidic) at this point.
Image: © Siu Ling Hui
What Is Sourdough?
Sourdough is the product of not just one microorganism, but two. The wild yeast makes the dough rise and bacteria are responsible for flavour development. These bacteria are primarily lactobacilli, so named because they produce lactic acid, which contributes a mild sour flavour. They also produce a more vinegary acetic acid. The ratio of lactic acid to acetic acid production is influenced by a wide range of factors such as temperature, what the starter is fed with, the feeding cycle and so on.
Unlike most bacteria, lactobacilli thrive in an acid environment and produce a variety of mild organic acids, alcohols and countless additional compounds that are vital to flavour development. The organic acids produced by the bacteria play an important role in preventing spoilage. Lactobacilli 'feed' on maltose and it just so happens that unlike commercial yeast, wild yeasts do not 'consume' the maltose, therefore providing the bacteria with a perfect environment to flourish in.
John Downes, Australia's foremost authority on sourdough, makes the observation in his article in Pastrycooks & Bakers News (May 1996) that "these bacteria are also thought to 'pre-digest' the wheat matrix of the flour, thus making the bread more digestible as well as rendering the calcium content of wheat thoroughly assimilative which is not the case with commercial wheat bread".
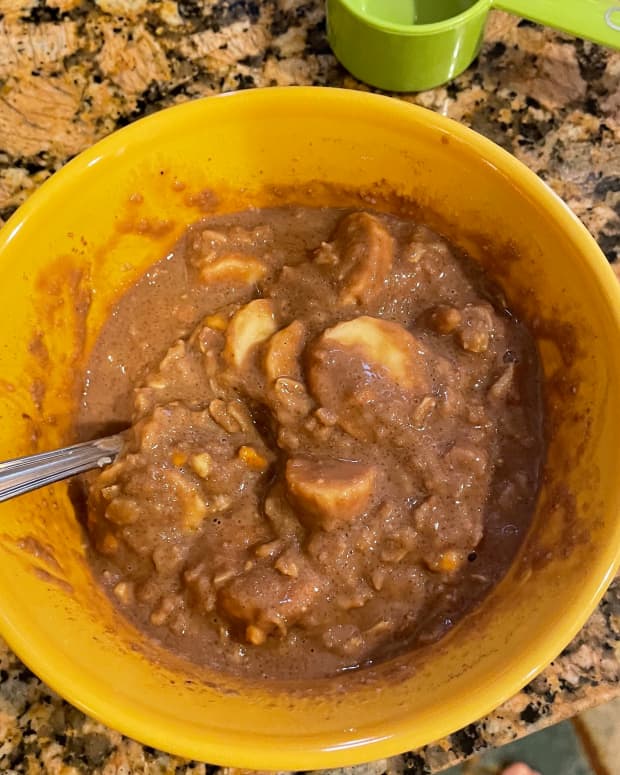
My Dough During Bulk Fermentation
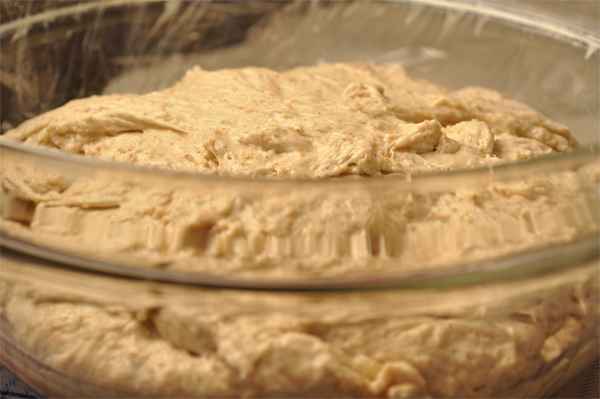
Start of bulk fermentation. The dough is dense and sticky.
Image: © Siu Ling Hui
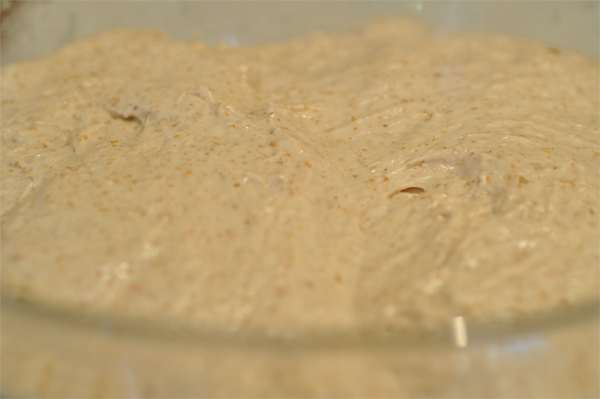
About 3 hours into bulk fermentation at ambient temperature of around 17°C. Dough has been turned several times inside the bowl. Becoming smoother and aerated.
Image: © Siu Ling Hui
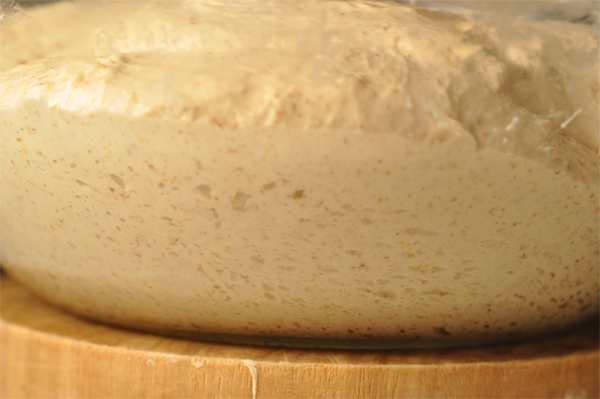
Side view of dough after 3 hours of bulk fermentation. Notice the formation of air bubbles in the dough.
Image: © Siu Ling Hui
Time = Texture + Flavour
Once all the ingredients have been incorporated, the dough is kneaded to develop the gluten (which comprises two different proteins glutenin and gliadin) which, apart from providing the wonderful chewy texture, serves to trap the carbon dioxide released when the yeast metabolises the sugars (fermentation).
After kneading, the dough is rested to allow fermentation. Fermentation is the process whereby starch is converted into sugars which react with the yeast and release carbon dioxide.
If the gluten has been developed sufficiently the carbon dioxide gas is trapped, thus aerating the dough and causing it to rise. The dough is ready to be used when it has doubled in size, at which time it is knocked back (or degassed). It may then be shaped into the requisite loaves or rolls, or left for further fermentation.
In 'engineered' breads, improvers are added to reduce the fermentation time. Essentially these improvers are to provide 'instant food' to activate the yeast, rather than having to wait for the conversion of starch into sugar. Whilst there are natural improvers such as Vitamin C or ascorbic acid, rye flour, fava bean flour and levity (a type of yeast food composed of flour, salt, dry yeast, ascorbic acid and the starch enzyme amylase), industrial bread production tends to employ chemical improvers and such bread can be described as 'chemically fermented'.
Kneading also causes the dough to become very short (loss of elasticity). It becomes difficult, if not impossible, to shape the dough without tearing the protein structure apart. Kneading also affects the dough's extensibility (the quality important for expanding and trapping gases when baking). The artisan baker leaves the dough to sit for a long time to allow the gluten to 'relax', whereupon it regains elasticity and extensibility. In the industrial process fats or oils are used to lubricate the gluten strands so that it can be used immediately.
Flavour development is another factor that occurs during the resting time and the elimination of this important step greatly reduces flavour. To compensate for the loss of flavour industrial bakers add flavouring agents back into the dough.
The resultant increase in cost with the addition of all these extra ingredients also affects the mighty God of profit who rules industrial and mass commercial baking. To compensate, water is added to extend the yield and bring the unit cost down, but this practice only serves to further dilute what little existing flavour there is.
A Look Inside an Artisanal Bakery
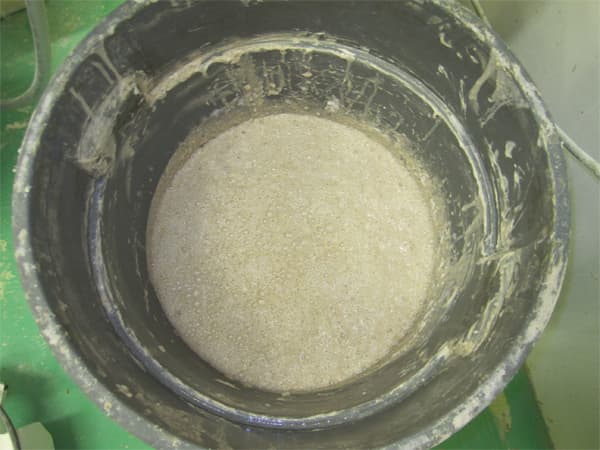
Leaven ready for mixing. Note all the bubbles on the surface.
Image: © Andrew O'Hara

Flour is added to the leaven.
Image: © Andrew O'Hara
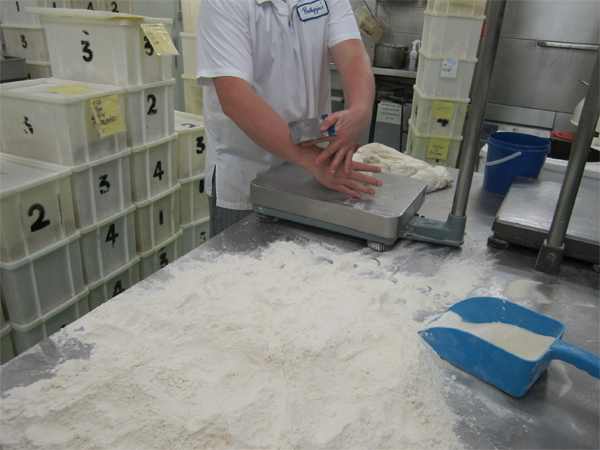
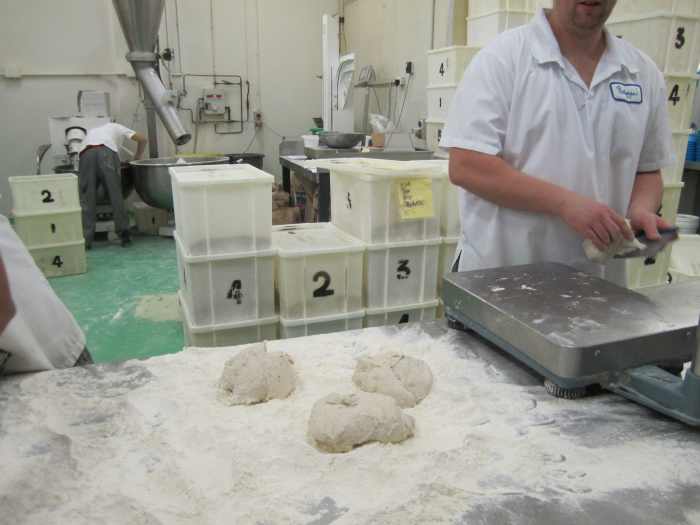
A bench knife is used to cut the dough into portions.
Image: © Andrew O'Hara
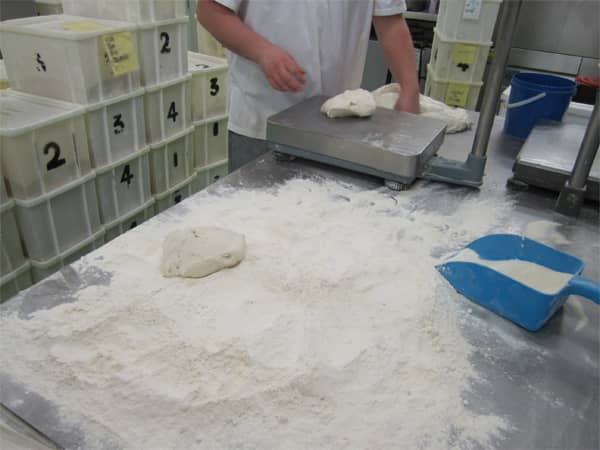
Dough portions are individually weighed for consistency of loaf weight.
Image: © Andrew O'Hara
Dough portions ready for shaping.
Image: © Andrew O'Hara
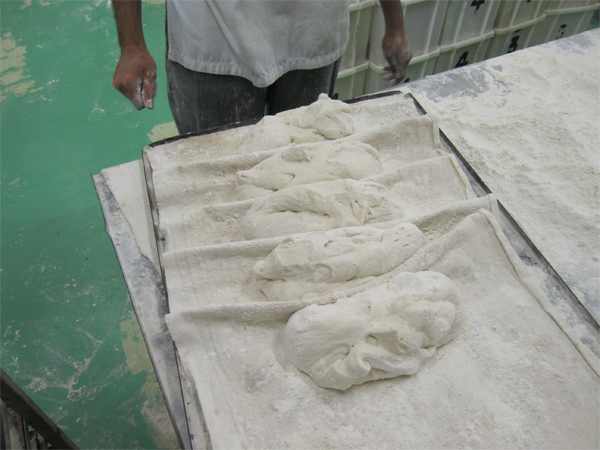
Roughly formed loaves resting before final shaping for final rise.
Image: © Andrew O'Hara
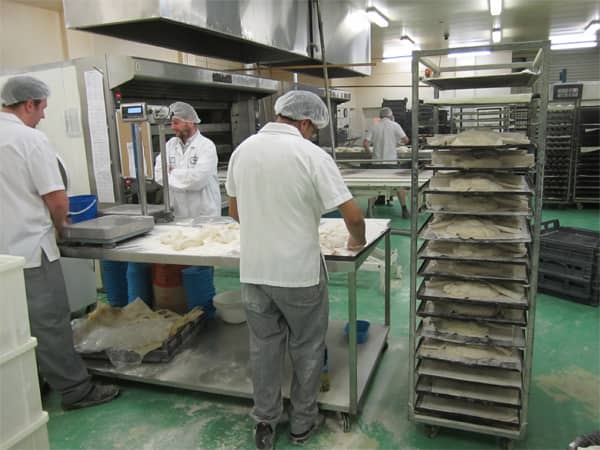
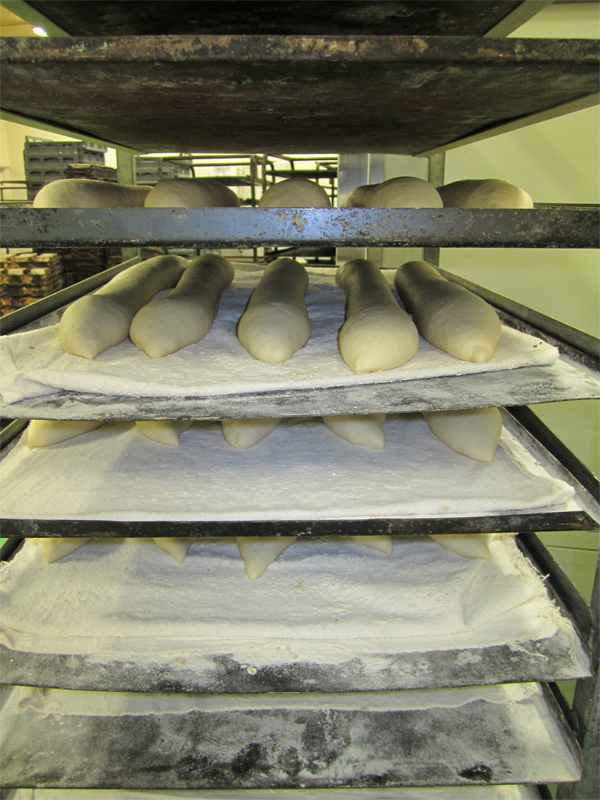
Loaves being shaped to be placed on trays on racks for final rise.
Image: © Andrew O'Hara
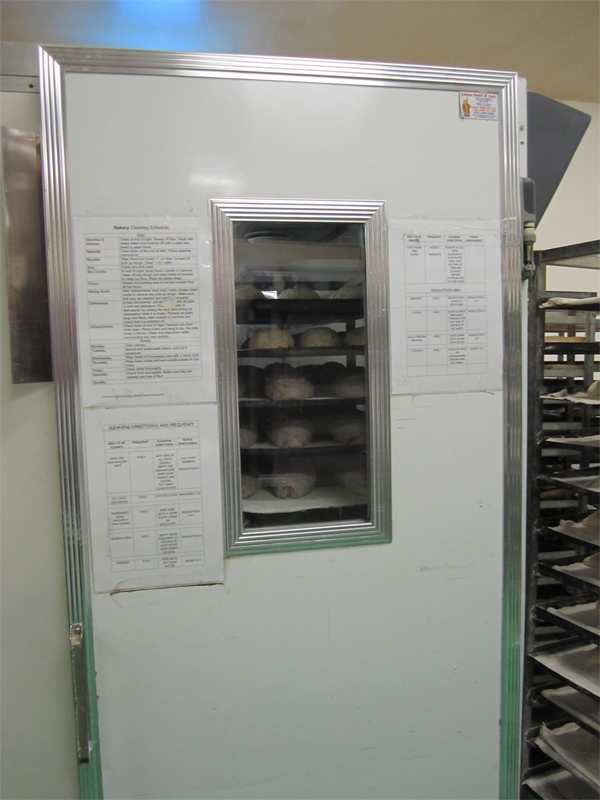
Proofing cabinet where loaves (except sourdough breads) undergo final rise.
Image: © Andrew O'Hara
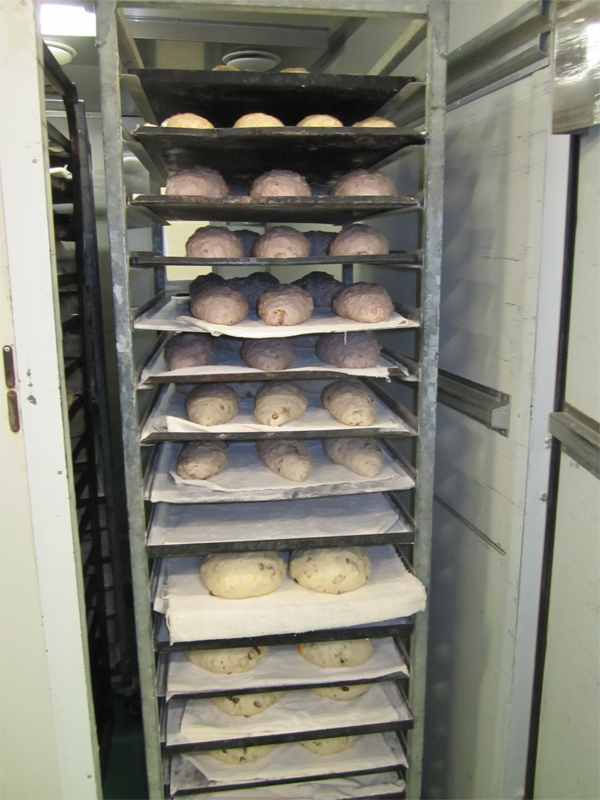
Sourdough loaves are not put into the proofing cabinet. Instead, they undergo final rise in the cool room or outside the proofing cabinet.
Image: © Andrew O'Hara
Baguettes ready for slashing and baking.
Image: © Andrew O'Hara
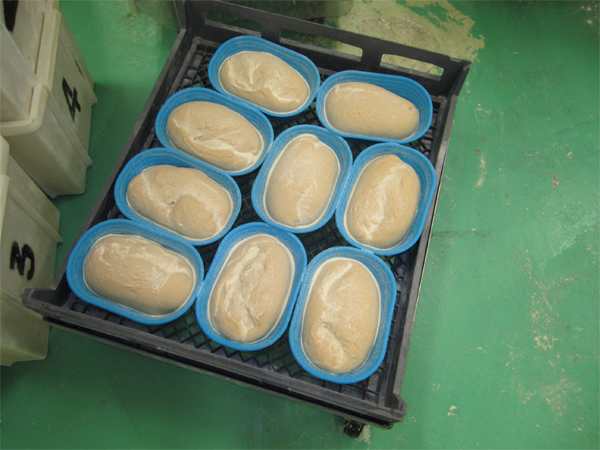
Loaves doing final rise in special "organic bloomers".
Image: © Andrew O'Hara
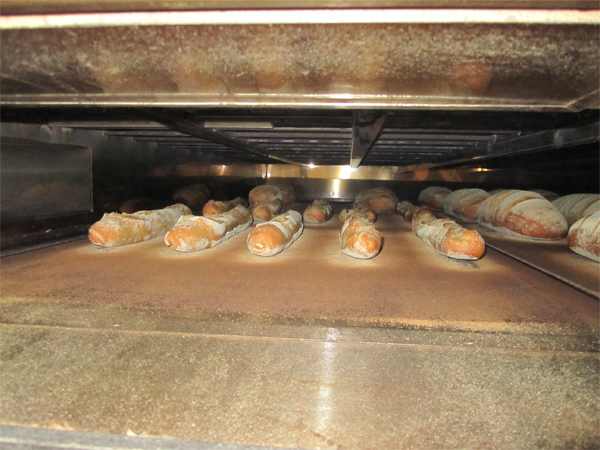
Freshly baked baguettes ready to come out from baker's oven. In these ovens, water is pushed in over hot elements at the rear of the oven. This then drifts inot the oven as steam.
Image: © Andrew O'Hara
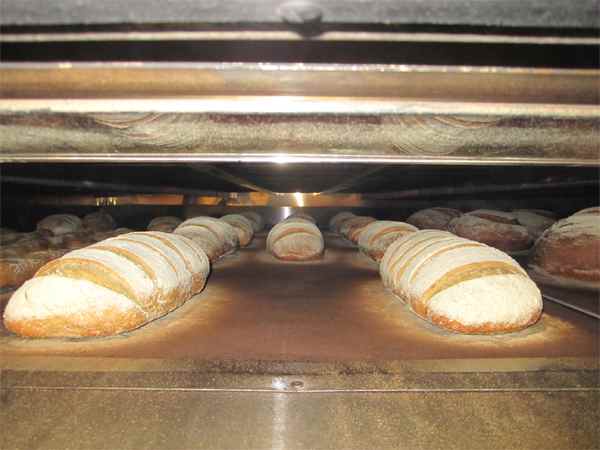
Campagnard loaves in oven. Baker's Ovens come in 'decks' - one on top of the other. Note that the individual "decks" are not very high.
Image: © Andrew O'Hara
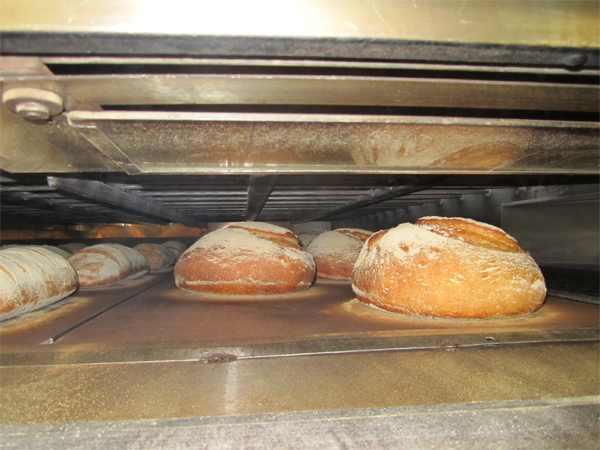
Boule loaves ready to come out of oven.
Image: © Andrew O'Hara
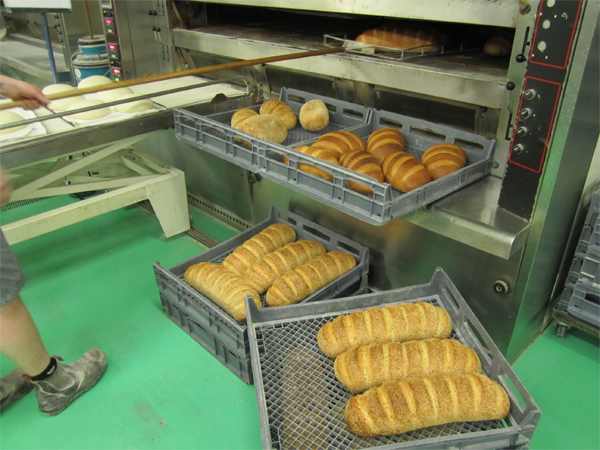
Freshly baked loaves are transferred directly onto delivery trays. Notice the next batch of loaves lined up behind ready to go in.
Image: © Andrew O'Hara
Campagnard loaves on delivery trays.
Image: © Andrew O'Hara
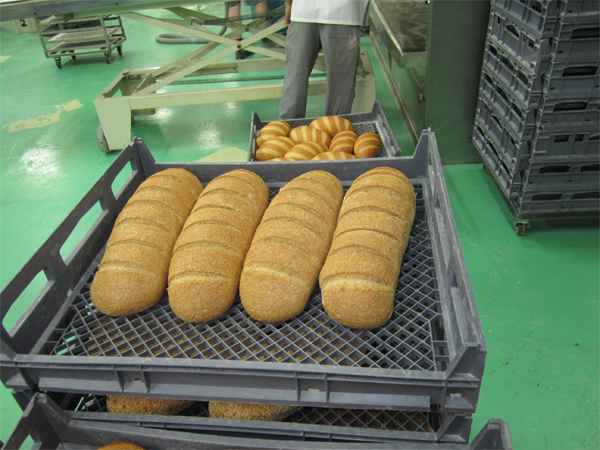
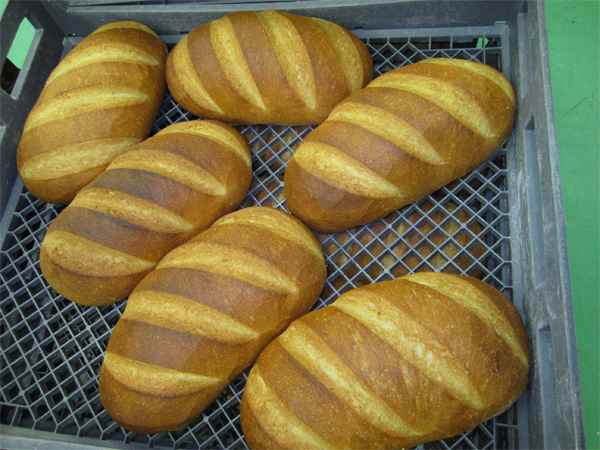
Seeded grain elongs on delivery trays.
Image: © Andrew O'Hara
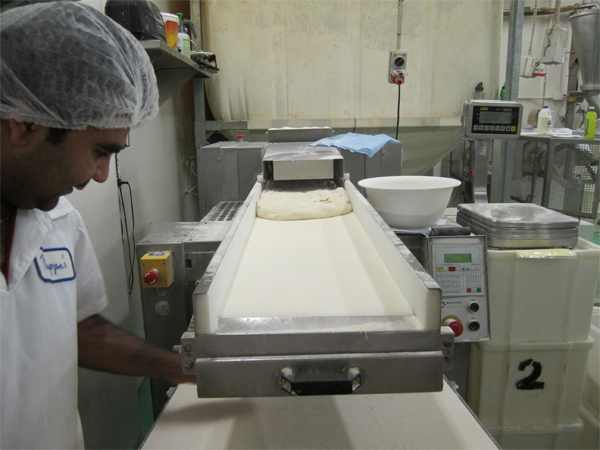
Croissant dough is rolled out on a special machine. The bakers hand-cut them into portions at the end.
Image: © Andrew O'Hara
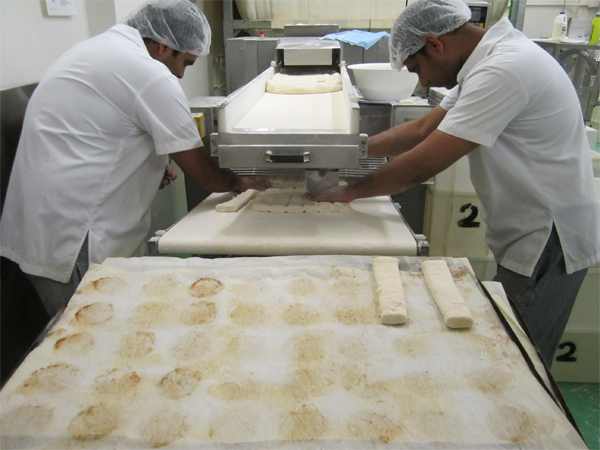
Portions of croissant dough that have been hand-portioned from the dough that has been rolled out by the machine.
Image: © Andrew O'Hara
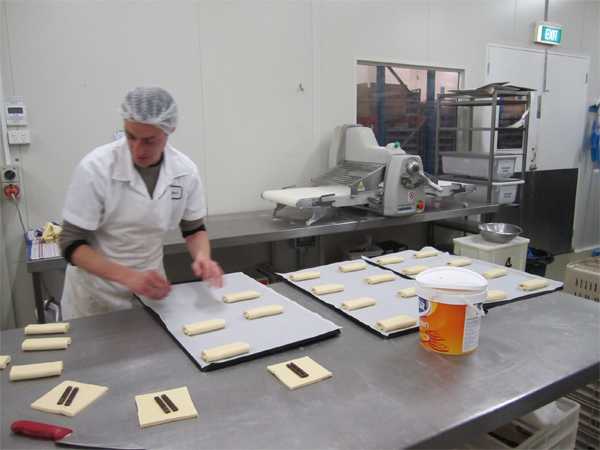
Making chocolate croissants.
Image: © Andrew O'Hara
Inside an Artisanal Bakery
All artisanal bread takes time.
According to Andrew O'Hara, the head baker and co-owner of Phillippa's Bakery in Melbourne, their ciabatta is made from a sponge starter left to sit overnight. The following day, the sponge is mixed with an equal amount (by weight) of flour, water, milk and oil (of varying proportions) and then allowed to sit for an hour and a half before it is finally cut up and baked. Without the benefit of time, this deceptively simple Italian-style bread would not have the correct flavour, texture and chewiness.
So too for real sourdough bread, time is again the indispensable ingredient. It takes time and care for the bacterial fermentation to develop the intense complex flavours so characteristic of sourdough. The starter has to have three to four periodical feedings (to add more flour and water) over 24 hours before it can be used. Then, more time is needed in the actual making of the bread.
The making of Phillippa's pane francese is an example of the lengthy painstaking process involved. O'Hara will start the sourdough at around 9.30pm one evening, give it a feed at 11.30pm, and then another feed at 2.30am with a final feeding at around 4.30am. The starter is then left to sit until the following day when an equal amount (by weight) of flour is added. After mixing and kneading, the dough is left to rest for another 4-5 hours, cut up, shaped and left to rest again for another 1-2 hours before it finally goes into the oven.
But not all the dough ends up in the oven. A proportion of the evening's mix is held back to form the basis of another starter the next evening. It is this holding back of a proportion of the sourdough day after day, week after week, that builds up complexity and depth of flavour no commercial bakery could ever rival.
Another form of starter called a lievato naturale (often referred to as levant ), is a soupier, more liquid sourdough. But instead of incorporating all of the starter into the mix, only a proportion is taken to form the basis of a separate dough. Whatever is removed from the levant is replaced with equal proportions of flour and water.
In essence starters are living entities and unless they are well cared for will cease fermenting and effectively die.
Next Step in My Baking Journey
After bulk fermentation, dough is turned out of bowl and shaped. Then covered with a light dusting of flour and a tea towel and left to undergo "bench rest". For this batch, I let bench rest go for about 1 1/2 hours as the kitchen was quite cool. Ima
After bench rest, dough undergoes "structural folding" (a real art which I have totally mastered!) and shaping. Then put into lined bowls for the final rise. This one did final rise overnight in the fridge. Image: © Siu Ling Hui
Loaves are baked in preheated cast iron casserole (with preheated lid) in very hot oven to create steam effect of baker's oven. Image: © Siu Ling Hui
The Difference Between Levain and Sourdough Breads
It is this long fermentation period that provides that very special flavour, texture and wonderful crust of the true sourdough. But the time, loving care and skill involved all clearly have their cost.
Downes deplores the practices of unscrupulous bakers jumping on the sourdough bandwagon with cheap sourdough surrogates. In his aforementioned article, he notes that "throwing in a piece of yesterday's dough does not a sourdough make". Worse still are those that pass off 1-4 hour yeasted bread with souring agents added as sourdough bread.
It's not mandatory for a bread based on a sourdough to be 100% natural levain (sourdough starter). Depending on the type of starter and style of bread, the addition of commercial yeast is possible.
But as O'Hara states, the yeasted artisan loaf employs the minimum amount of yeast, time doing most of the work. The yeast content of Phillippa's breads would probably be about one-sixth of that used by hot bread shops. As long as the dough is allowed to develop at its own speed and the baker adheres to the time-honoured principles aforementioned, the end product will be flavourful and wholesome. And this principle applies to all breads, be they sourdough or yeasted.
Commercial bakeries add copious quantities of yeast in order to speed the whole breadmaking process up. They can get bread into the oven within as little as one to one and a half hours of mixing the dough. This is less time than even a very simple bread such as the baguette which would take four hours, at the very least.
In France baguettes are made simply with the four basic ingredients and would be eaten within three hours of baking. Being a relatively 'quick' bread, it does not keep well and thus in France, it is common practice for baguettes to be made several times a day. However, in Australia, to extend the keeping life of baguettes so that they still taste fresh at 6pm when they are served up at the restaurant tables after being baked at 3am, O'Hara uses a 'sponge' which sits for three to four hours before being used in the dough.
It is important, therefore, to recognise the difference between a natural levain bread and a sourdough. Much confusion has resulted in consumers believing one and the other to be the same. Both are made using a sourdough starter, but the latter, unless stated as natural levain, more than likely contains a small amount of baker's yeast.
It is also important for consumers to realise that there is no such thing as an unyeasted sourdough. All sourdoughs have yeast in them of one kind or another (otherwise we could use them for bricks).
So now you know the real story. For bread that satisfies the tastebuds and the soul, why would you eat anything else but artisanal bread? Real bread.
Acknowledgements: This article would not have been possible without the help of Andrew O'Hara of Phillippa's and Ian Bamfield of Fruition to explain the craft of bread to me.
Useful Resources
- There's an international sourdough community for bakers of all levels at http://sourdough.com
- The book Tartine Bread by Chad Robertson is an excellent reference, with great instructional photos. This has been my guide in my sourdough bread making journey, and is where I learnt how to use Dutch oven to simulate professional baker's oven at home.
- Another classic is The Italian Baker by Carol Field.
- The Handmade Loaf: Contemporary European Recipes for the Home Baker by Dan Lepard is inspirational.
Making Sourdough Bread at Home
Making sourdough bread is a real art. I've still got a long way to go mastering the art of the artisanal loaf but dealing with the alchemy of flour, water and time is totally fascinating. I'd even say addictive.
The challenge is in learning how to understand what's happening with the dough. And there are many variables that will affect how the dough behaves: the flour(s) used, the leaven, temperature etc. Time is the most important ingredient for sourdough: the dough will do what it wants to do in its own time. But you can make that time work for you.
I had Chad Robertson's Tartine Bread beside me all the time in the kitchen when I started. He sets out detailed instructions (text and photos) as well as in-depth explanations of the processes. That didn't prevent the early disasters but it helped me figure out what was going wrong. And I also had the benefit of advice from friends who are chefs and bakers.
My sourdough bread-making technique is still evolving. It's a really rewarding craft to master. The results, even the disasters, are delicious.
Here are some notes from my experience to date and I'll keep updating it as I try out different flours, techniques and so on.
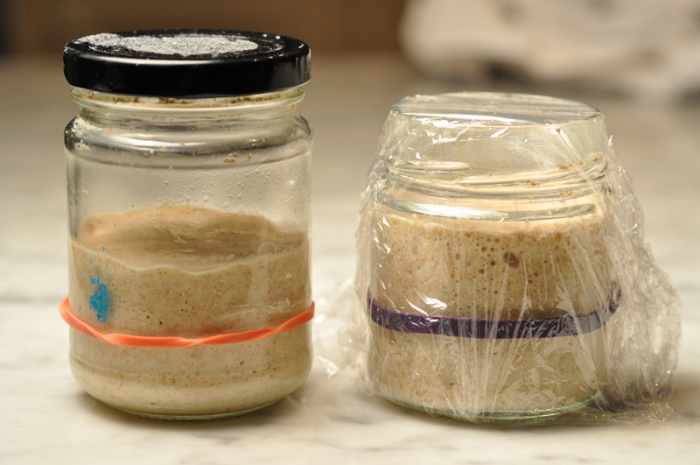
Two of my starters (about 4 hours after feeding). The starter on the LHS is fed with 10g each of bakers flour, semola, and light rye. The starter on the RHS is fed with 15g each of bakers flour and light rye. Image: © Siu Ling Hui
Establishing and Maintaining a Starter
The starter is essentially a culture of wild yeasts and bacteria. When flour and water are combined and allowed to ferment, it provides food for naturally occurring wild yeasts and bacteria.
Having lively bubbly starter is vital. It can take anywhere between 6 - 14 days, depending on the flour(s) used and the room temperature. It took me nearly 14 days to establish my first starter using only bakers' flour.
With the benefit of hindsight, I should have included some rye in the flour mix when I was trying to establish the starter. It would taken less time.
I now maintain several starters—each has a different flour mix and they are fed with their respective flour mixtures. I have observed that the 50/50 baker's flour/rye flour starter almost triples in volume and is much frothier than the others.
How to Establish the Starter
- Mix 50g of flour(s) with 50g (50ml) lukewarm (around 25C) water. You should have a very thick, almost paste-like batter.
- Put into a clean glass jar and leave aside for 2 - 3 days. Check to see if any bubbles have formed on the top or along the sides. If nothing has happened, leave it for a few more days. A dark crust may form on the surface by this stage. That's ok. Just remove it. The mixture underneath should be bubbly by now. It will also have a very sharp sour smell.
- Discard around 80% of this mixture. Mix 50g of flour and 50g lukewarm water to a smooth thick batter and add this to the remaining starter. Stir to combine well. Clean down the edges of your jar.
- Repeat the process each day: discard 80% of the mixture and add a fresh amount of flour/water mix. This process is called "feeding" the starter.
- Repeat this every day until the starter rises and falls consistently. (I was impatient when I first started and didn't wait for this consistent behaviour before I used it for my first loaf. I ended up with bread that could have been used as a spare tire for the Flintstones' car!)
I use a rubber band around the side of the jar to mark the starter level immediately after feeding. As it's been cold, I put my starter(s) into a small wooden box with a small hot water bottle and cover with a thick towel. In this micro-climate in the box, it takes about 4 hours for my starters to rise and they hold the rise for a good few hours. In summer, I may be able to just leave it at room temperature.
When the starter is at its peak, it will have very sweet ripe smell—almost like overripe bananas. This is what Chad Robertson describes as a "young" starter and it's best to use it at this stage. As the starter subsides, it becomes increasingly acidic. Temperature also plays a role: warm temperatures favour sweet lactic-acid producing bacteria whilst cooler temperatures are preferred by sour acetic-acid producing bacteria.
How to Maintain the Starter
I leave the starter in the fridge and give it a weekly feed. My feeding routine is as follows:
- Discard approximately 80% of the starter.
- Mix up 30g flour: 30 ml warm water into a thick paste and add it to the jar.
- Mix it well with the starter that's still in the jar. Then clean down the sides of the jar.
- I put it into the wooden box with the hot water bottle and leave it to rise overnight.
- Next day, I put it back into the fridge.
If I am planning to bake, I feed the starter the day before I need it (or in the case of the white leaven, I start the feeding at least 2 days before).
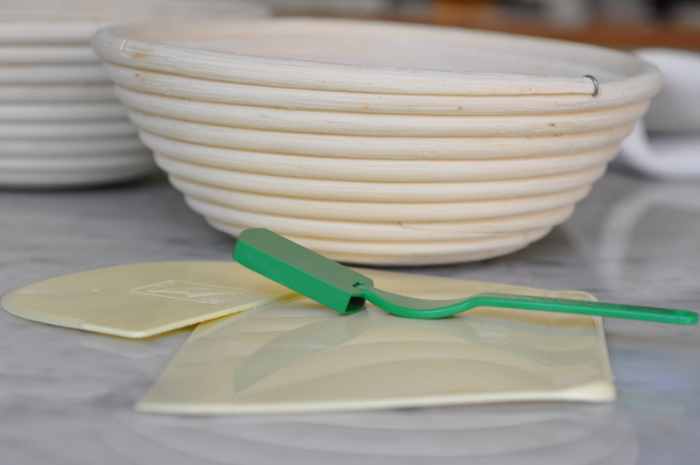
My bread making tools - dough scraper and dough blade; slashing knife known as lame; and proofing basket (known as banneton). Image: © Siu Ling Hui
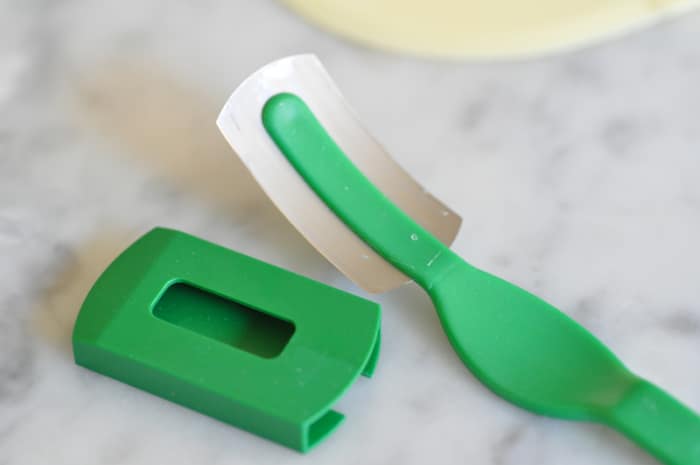
Close up of lame (slashing knife).You can also use a double-sided razor fitted onto a split chopstick. Image: © Siu Ling Hui
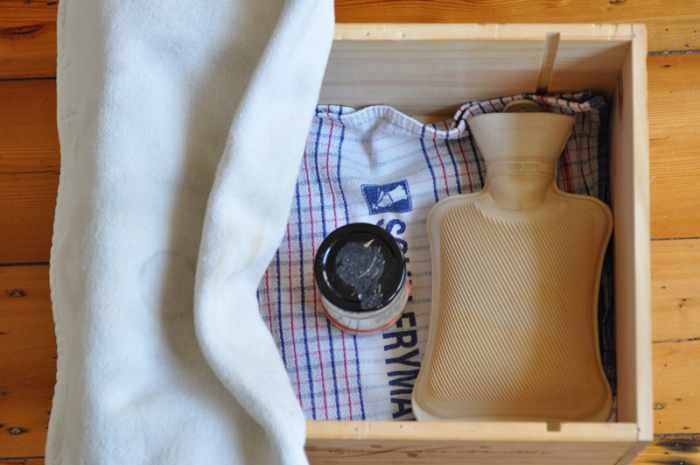
My make-shift proofing box. I put the starter or leaven in with a hot water bottle and cover with a thick oven cloth. Image: © Siu Ling Hui
One of 2 loaves I baked for a friend. Tried out the 8 point structural shaping method in Dan Lepard's book. Don't think I did it particularly well. Image: © Francoise Garnier
2nd loaf that I made in the same batch for my friend. Was trying to do same structural shaping method as 1st loaf but results are quite different! Image: © Francoise Garnier
How to Make the Bread
The process is basically as follows:
- Prepare a leaven from the starter mix and allow it to ripen. To test if the leaven is ready to be used, drop a teaspoon of it into a bowl of lukewarm water. If it floats, it's ready. If it sinks, it's past peak ripeness or it hasn't sufficiently ripened.
- Make up the dough with flour(s), water, ripe leaven and a small amount of salt.
When I started, I followed the "2 step" method in Tartine Bread which involves stirring the leaven into lukewarm water to disperse. Then flour is added and the dough is left to stand for around 20 - 30 minutes for the autolyse reaction to take place. Then salt and a bit more water is worked into the dough and that marks the start of bulk fermentation stage.
I now do the 3-step process: I mix flour with water and leave it to stand for around 20 - 30 minutes before adding the leaven. Leave it to stand for another 20 - 30 minutes. Then add the salt and a bit more water. - Bulk fermentation. This is when the dough is left to develop with intermittent kneading.
Instead of kneading the dough on a bench, I follow the method in Tartine Bread, where the dough is "turned" in the bowl at regular intervals. The "turning" process involves using a wet hand to grab the dough from the bottom of the bowl and pulling it upwards. This approach is perfect for a small kitchen like mine as there's no mess on the bench.
The feel of the dough will change progressively from heavy and sticky to light and silky, with lots of bubbles in the dough and on the surface as well. That's when it's ready to be divided. Learning how to judge whether the dough is ready or not takes practice. - Initial shaping. When the dough is ready to be divided, I tip it out onto the bench. Lightly dust the top of the dough with flour. (It's vital to minimise the addition of flour to the dough at this stage.) Divide it into two with a dough blade.
Then using a dough blade, I flip one portion of the dough over and fold the dough into itself so that the floured side becomes the outside.
Using the dough blade, I shape it into a ball. Using my hands, I cup it around the dough and pull it towards me. Then I give it a couple of twists so that it's quite a tight ball. The "drag" of the dough against the bench gives tension to the dough.
The dough ball is lightly dusted with flour and covered with a tea towel to prevent drying out. Repeat the process with the other half. - Bench rest. The dough is left to rest for about 30 minutes (but lately I've been stretching this out to an hour.) By the end of the resting time, the dough ball will have flattened out into a thick disc.
- Structural shaping. This is the process of stretching and folding the dough in layers to create tension points in the dough to achieve a strong "oven spring" when the bread first goes into the oven.
Structural shaping needs a LOT of practice to get it right! I have tried out various approaches.
The one that seems to work best for me at the moment is the method that Sardinian chef Pietro Porcu of Da Noi restaurant in Melbourne showed me. (The house-baked sourdough at Da Noi is fantastic.) With his method, the dough is stretched length-wise and rolled up like a Swiss roll. Then turned 90 and stretched and rolled again. Then I shape it into a ball. (The loaves are Da Noi are shaped like oval footballs.) - Final proofing. Turn the ball over so that the seam underside is upwards and place into baskets lined with tea towels that have been dusted with rice flour. I put the baskets into large plastic bags and tie them up with wire twist ties.
Sourdough is proofed to 75% risen rather than fully risen before baking. The way to check whether the dough is ready to bake is with the indentation test. Push the dough with one finger. If it bounces straight back, it's not ready. If it comes back up about half the depth of the indentation, it's ready. If it doesn't come back up, it's fully proofed (possibly even over-proofed). Again, it takes practice to learn how to judge when the dough is ready. It can take anywhere between 2 to 4 hours or longer, depending the ambient temperature.
This final proofing can be retarded for up to 18 hours in the fridge. But it's best to allow it proof for at least an hour before putting it into the fridge. - Baking. The dough is slashed with a very sharp blade just before it goes into the oven. The slashes dictate how the dough expands in the oven. The way the slashes are made also dictates the final appearance. To get very pronounced "ears", the slash is made almost horizontal to the dough.
Believe it or not, slashing is an art in itself. I'm still practising.
To get a good crust, the dough needs a lot of steam in the early stages of baking. The method in Tartine Bread where the dough is baked in a cast-iron pot with a tightly fitted lid allows the steaming effect in a domestic situation. It works a treat!
This is a white leaven ie using only baker's flour. It has a very "gloopy" texture; quite different from leavens that include rye or other flours. Image: © Siu Ling Hui
Basic Recipe for Sourdough
All you need is flour, water, leaven and salt . . . and time!
Bakers work in terms of ratios, with flour as the reference point. There is a lot of flexibility in terms of the proportions of water and leaven to flour. I've noticed a pretty wide range of water and leaven proportions. It's up to you to decide the style of bread that you like.
Sourdough Ratio
- Flour 1,000g (100%)
- Water: from 55% (550g or 550ml) up to 80% (800g or 800ml)
- Leaven: from 15% (150g) to 50% (500g)
- Salt: 2% (20g)
I make up the exact amount of leaven required for that specific baking session by mixing flour equal to 50% of that required weight of leaven and mix it with equal weight of water. Then I add an amount of starter equal to 20% of the weight of flour used for the leaven.
So for 200g of leaven, I mix 100g flour with 100g (100ml) water and add 20g starter. I put this leaven mixture into a glass jar and place it in my make-shift proofing box for about 4 to 6 hours by which time it will have at least doubled in volume and developed a very sweet overripe banana fragrance.
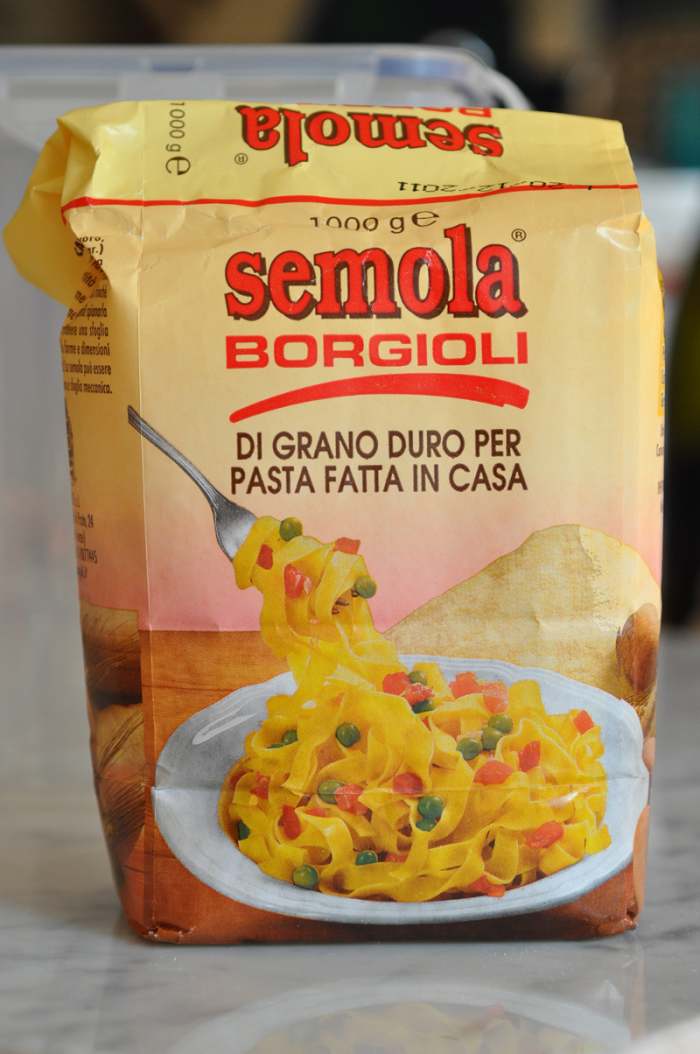
This semola is the same one that is used by artisanal pasta maker Martelli (one of my 2 favourite brands of dried pasta). It is finer than the one by Moretti. Image: © Siu Ling Hui
The "over-proofed" loaf. But it turned out ok. Using Pietro Porcu's method of structural shaping seems to produce a more closely textured bread. Image: © Siu Ling Hui
Recipe for My "Daily Bread"
This is the recipe for the "standard" loaf I keep on hand . . . at the moment, anyway. I like my breads at 75% hydration (ie 750ml water for 1,000g flour). I use semola in my flour mix. Semola is coarse grain flour made from the very hard durum wheat and used in Italian pasta. The addition of honey was inspired by chef Cheong Liew: honey and rye are a match made in heaven. I prefer dark honeys and at the moment, I am using this amazing Buckwheat honey that I bought at the Farmers' Market at Old Ferry Terminal in San Francisco.
Ingredients
- 700g bakers flour
- 150g semola
- 150g light rye
- 200g leaven
- 650g + 50g + 50g lukewarm water
- 1 tablespoon dark honey
- 20g sea salt
Method
I am still playing around with time. but here are diary notes from one of my recent baking sessions to illustrate how you can make the timing work around you.
- 9.50am: Start leaven using 50/50 bakers flour:light rye flour)
- 1.30pm: Check progress of leaven. It has doubled in volume.
- 3.10pm: Mix flours with 650g water.
- 3.25pm: Completion of mixing of flours and water. Set aside to rest. [Temperature in kitchen: 22°C. ] Check leaven: it is now very bubbly and smells very ripe.
- 3.50pm: Mix 50g water with leaven. (Leaven by this stage is still very fruity but slight hints of acidity are coming through.) Work the leaven into the dough.
- 4.10pm: Completion of working of leaven into the dough. Set aside to rest.
- 4.40pm: Add honey, salt and 50g water to the dough. Work these into the dough thoroughly.
- 4.55: Mixing completed. Leave dough to rest.
- 5.30pm: Turn the dough vigorously.
- 5.45pm : Leave the dough to rest. [Temperature in kitchen: 20C ]
- 6.50pm: Bubbles now forming in dough. Do vigorous turns of dough.
- 7.10pm: Leave dough to rest.
- 8.15pm: Dough shows bubbles on surface and visible on sides of bowl. Dough is now lighter, starting to become silky and pulling away easily from side of bowl. Do series of gentle turns.
- 8.20pm: Leave dough to rest.
- 9.30pm: Do another series of gentle turns. Dough is silky with bubbles on surface.
- 9.35pm: Leave dough to rest.
- 10.30pm: Transfer dough to bench. Divide and do initial shaping.
- 10.45pm: Shaping completed. Start bench rest period.
- 11.30pm : Do structural shaping (using Pietro Porcu's method). Place into bannetons. Put bannetons into large plastic bag, tie up and leave to proof. [Temperature in kitchen: 18°C ]
- 3.00am: Put the bags into the fridge. [I was working late that night.]
- 7.00am: Take 1 of loaves out of fridge to bring to room temperature.
- 9.15am: Uh-oh....think I left it too long. Dough looks over-proofed! But bake it anyway. 25 mins with lid on the pot at 220°C. Another 20 minutes with lid off at 220°C.
- 10.05am: Take second loaf out of fridge.
- 10.30am: Second loaf into the oven.
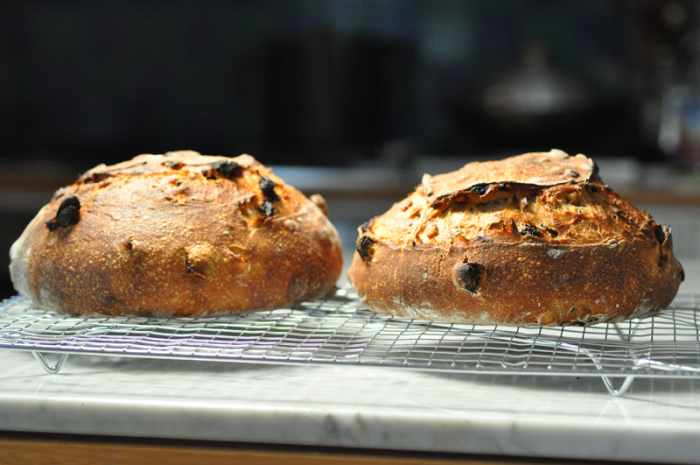
Two loaves of fruit bread (black raisins) Image: © Siu Ling Hui
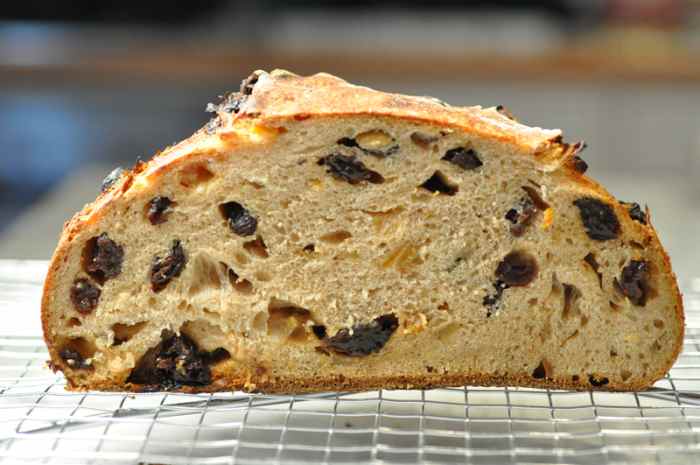
Fruit loaf with black raisins and candied peel Image: © Siu Ling Hui
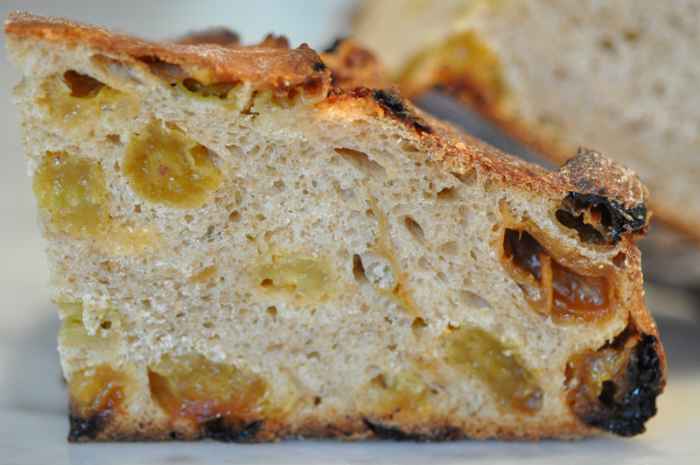
Fruit loaf with green raisins and candied peel Image: © Siu Ling Hui
Fruit Loaf With Raisin and Candied Peel
This is a really lovely raisin loaf (even if I do say so myself). The candied peel, particularly the candied lemon peel and candied citron, added a beautiful distinctive spiciness to the bread. I've made this twice so far—once with black raisins and another time with green raisins. For these loaves, I used the coarser-grained Moretti semola and you can see flecks of it in the bread. I also used the 2-step process for the dough.
Ingredients
For the leaven:
- 100g bakers flour
- 25g semola
- 25g rye
- 30g starter
For the dough:
- 1 kg flour (85% bakers flour, 15% semola)
- 650g + 50g water (ie 70% hydration)
- 280g leaven
- 20g salt
- 1 tbsp rosemary honey
- 450g raisins (soaked in hot water for 30 minutes and drained)
- approx 150g mixed candied peel (orange, lemon and citron), coarsely diced
Method
- Stir leaven into 650g lukewarm water to disperse. Add flour and mix.
- After 30 minutes, add salt, honey and water. Knead into dough.
- Bulk fermentation for around 5 hours, giving the dough "turns" every half hour for the first 2 hours and then hourly.
- Raisins and candied peel were added at the second "turn".
- Divide and shape after 5 hours of bulk fermentation.
- Bench rested for about 1 hour.
- Final proof for 2 hours on the bench and then placed in fridge overnight.
- Each loaf taken out of fridge about 30 minutes before baking.
Fruit Loaf With 45% Semola

My fruit loaf now has 45% semola, 45% baker's flour, 10% rye. I like the flavour better. Image: © Siu Ling Hui
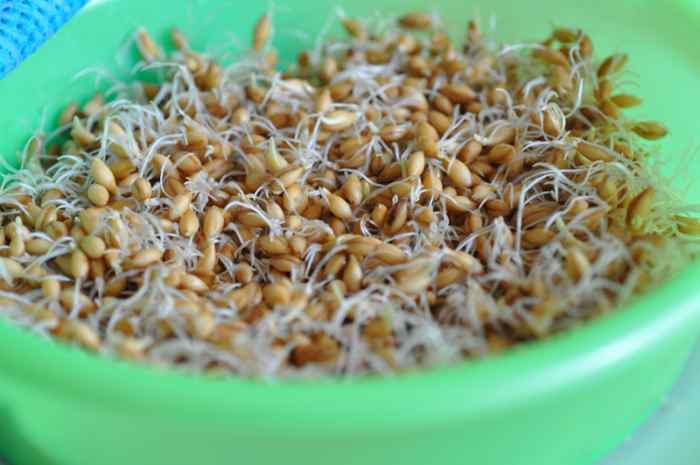
Barley sprouting in sieve. Image: © Siu Ling Hui
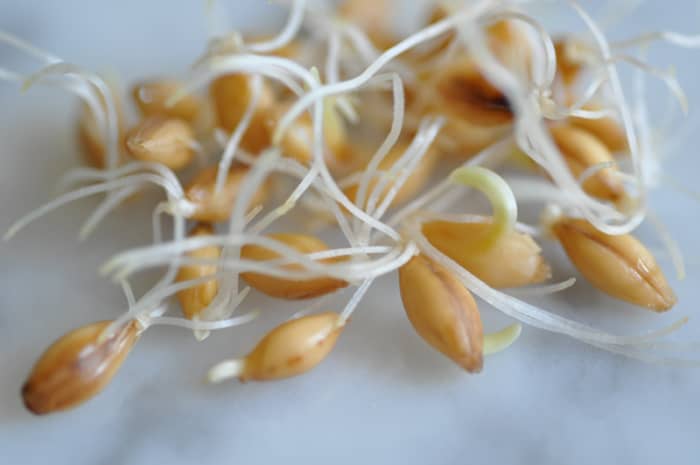
Close up of sprouted barley. Image: © Siu Ling Hui

Roasted sprouted barley. Image: © Siu Ling Hui
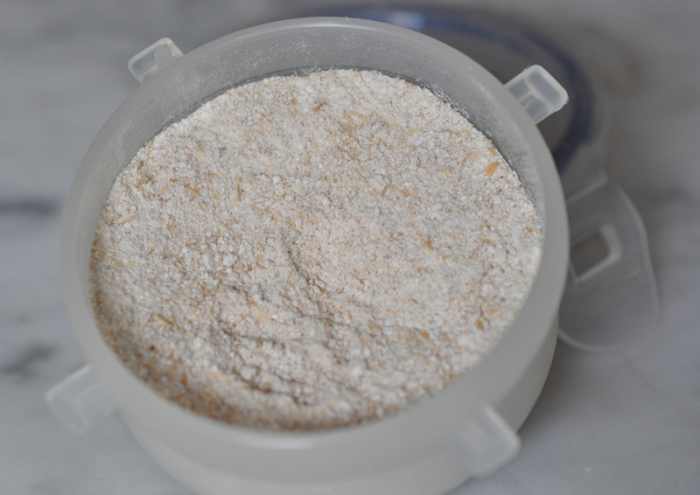
Ground malt from roasted sprouted barley. Image: © Siu Ling Hui
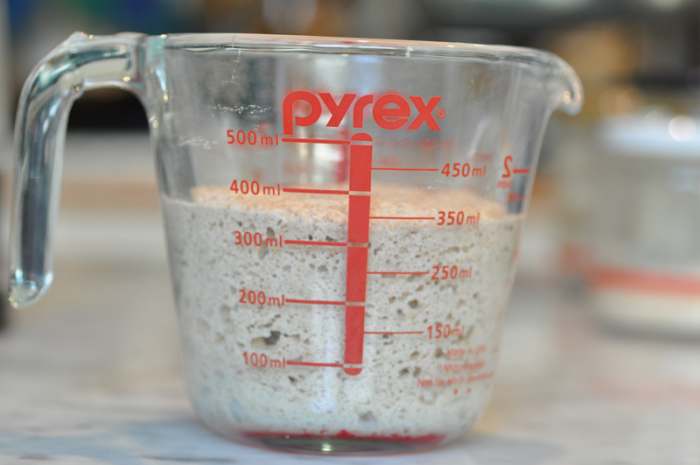
Barley/rye leaven. Interestingly, this leaven looks like curdled cake batter when fully risen. Image: © Siu Ling Hui
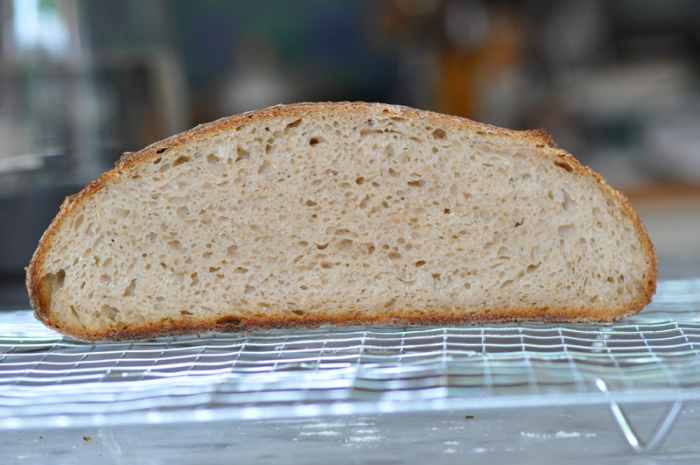
Cut section of barley flour sourdough loaf. Image: © Siu Ling Hui
Close up of cut section of barley flour sourdough loaf. Image: © Siu Ling Hui
Barley Flour Bread
My most recent experiment is a barley-based sourdough. I cultivated a starter based on a 50:50 mix of barley and rye flours, built a leaven using a 75:25 ratio of barley and rye flours; used a flour mix that included 15% barley flour and added a home-made barley malt.
Homemade Barley Malt
I followed the instructions by Dan Lepard in his book The Handmade Loaf. But the first time I did it, I used pearled barley. Bad move! There was only sporadic sprouting and I ended up with mould on the grains. Then I tried it with organic whole barley and it worked beautifully!
Essentially, the process involves soaking the barley in cool water for about 6 hours. The barley is then allowed to drain in a sieve for about 4 hours, stirring occasionally to ensure that it drains and semi-dries out evenly. The grains were then soaked in cool water again for about 8 hours and then drained.
I left the grains in the sieve covered with a damp Chux cloth for about 5 days. The room temperature at that time stayed around the recommended 15°C - 19°. They were thoroughly flushed with cool tap water every 24 hours (sometimes more frequently) to keep them clean and damp but not soaking in water. The grains produce a rather "whiffy" scent as they are sprouting.
When they had fully sprouted, I spread them on a dry cloth laid on a wire rack to dry for around 12 hours. Then the grains were dried in a low oven (50°C) for several hours, leaving the door slightly ajar to allow moisture to escape. I raised the temperature to 70°C to achieve a golden coloured grains. Interestingly, the green bits retained their colour in the drying process.
After cooling the grains, they were ground to a fine powder with an electric grinder. The resultant malt powder smells like very intense Ovaltine.
My Barley Flour Bread
Barley flour doesn't have any gluten, so a loaf made with 100% barley flour would have the dense texture of, say, a dark rye bread such as pumpernickel. What I did was to utilise barley in various forms into the bread.
I cultivated a barley starter based on a 50:50 barley and rye flour mix for about 2 days, using my 50:50 rye and baker's flour starter as the base.
Then I built a leaven using a 75:25 barley to rye flour mix with 20% of the barley starter.
Ingredients
- 650g baker's flour
- 150g barley flour
- 150g semola
- 650g + 50g + 50g lukewarm water (ie 75% hydration)
- 200g leaven (ie 20% leaven; leaven based on 75g barley flour, 25g rye flour, 100g water)
- 20g salt (2%)
- 6g malt (0.6%)
- 2 tbsp buckwheat honey
Method
- Flours mixed with 650g water and set aside to rest for 1 hour. This is the autolyse process.
- Leaven + 50g water worked into the flour. Set aside to rest for 30 minutes.
- Salt, malt and buckwheat honey together with 50g water worked into dough. This marks the start of bulk fermentation.
- Bulk fermentation of dough for 11 hours. Dough is "turned" every hour.
- Dough divided and initial shaping done. Then left for "bench rest" for 1 hour.
- Structural shaping and placed into baskets for final proofing. Proofed at room temperature (21°C) for 1 hour. Then placed in fridge for 16 hours.
- Baked straight from fridge in closed cast iron casserole at initial oven temperature of 280°C for 10 minutes. Oven temperature dropped to 250°C for 15 minutes.
- Lid removed after 25 minutes and baked at 220°C for 20 minutes.
Results
This bread displayed pleasantly strong flavours which became more balanced after 24 hours. The crumb was close but even. I discussed the texture with Phillippa Grogan (co-owner of Phillippa's and an experienced baker along with her husband and co-owner, Andrew O'Hara), saying I would have preferred a more open texture. She felt that the texture was fine but if I wanted to achieve a more open texture, I should increase the leaven from 20% to 30%. So, I will make that adjustment the next time I make this bread.
The discovery journey continues!
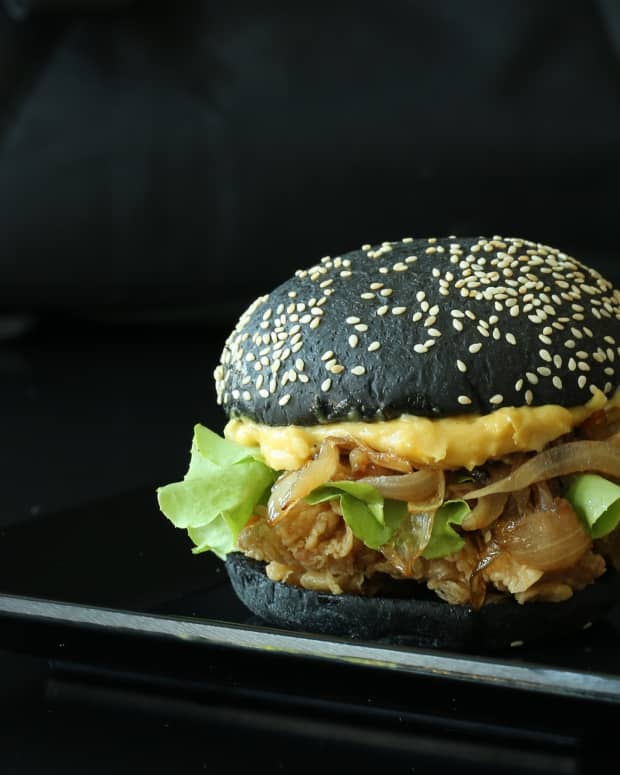
Sesame Bread Loaf 1. Getting better with structural shaping and slashing. Image: © Siu Ling Hui
Sesame Bread Loaf 2. Botched the structural shaping AND the slashing! Image: © Siu Ling Hui
Cross-section of Sesame Bread. Image: © Siu Ling Hui
Sesame Bread
The toasty nuttiness of roasted sesame seeds gives a lovely fragrance and flavour to this white sourdough.
Made with a "white leaven" which is built from a "white starter". This starter is regularly fed with equal parts of baker's flour, semola and organic wholewheat flour.
Ingredients
- 650g baker's flour
- 200g semola
- 100g organic wholewheat flour
- 650g + 50g + 50g lukewarm water (ie 75% hydration)
- 300g white leaven (ie 30% leaven based on 50g each of baker's flour, semola, and wholewheat flour with 150g water and 30g white starter)
- 20g salt
- 125g roasted sesame seeds
Method
- Same method as in Barley Flour bread but in this case, I only ran bulk fermentation for 8 hours. The sesame seeds were added during the 2nd turn of the dough.
- The 2 proofed loaves were brought out of the fridge 40 mins before baking. I tried a different slashing pattern for these loaves. They were baked at 225°C (fan-forced oven) in the closed cast iron casserole for 25 minutes. Lid was then removed and baked for further 20 minutes at temperature of 215°C (fan-forced).
Buckwheat flour bread. Image: © Siu Ling Hui
Buckwheat flour bread: internal texture was good despite flatness of loaf. Image: © Siu Ling Hui
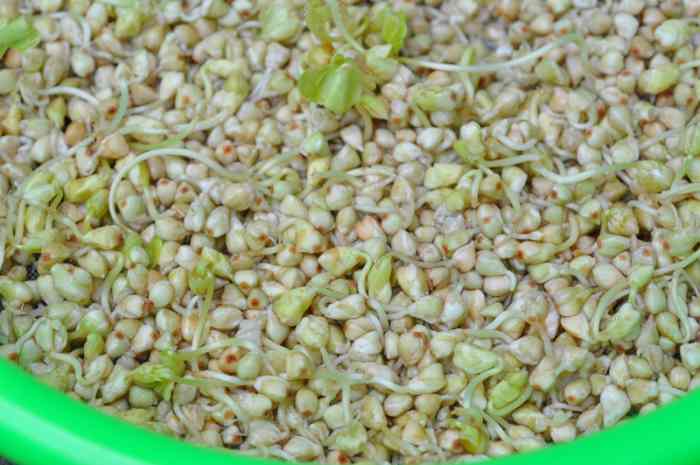
Sprouting Buckwheat to make buckwheat malt. Image: © Siu Ling Hui
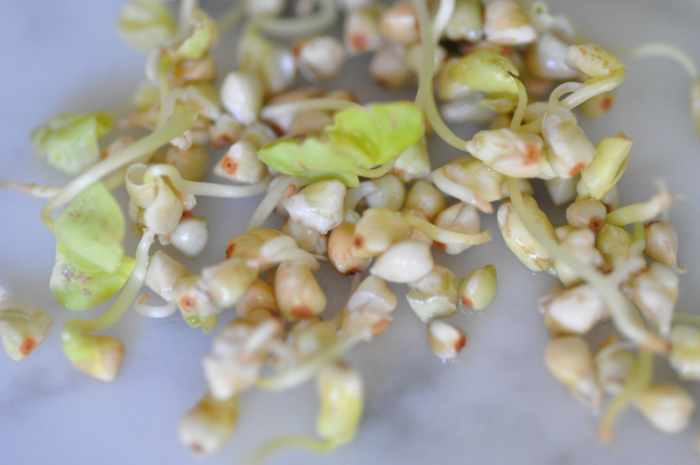
Sprouting Buckwheat has a sweet fragrance, quite unlike sprouting barley which just smells musty. Image: © Siu Ling Hui
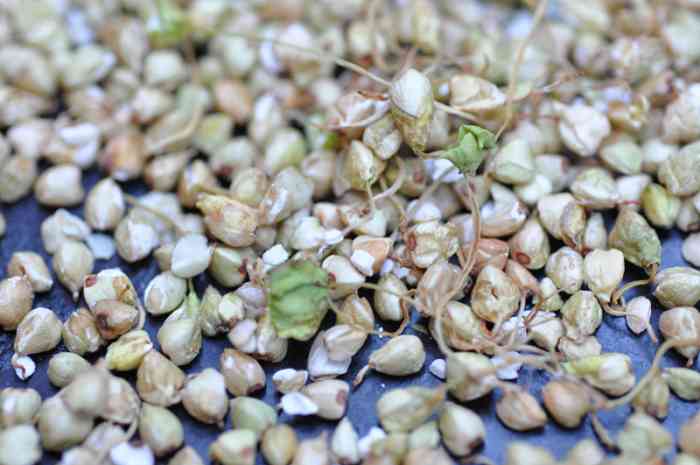
Roasted sprouted buckwheat. Ready for grinding into malt powder. Lovely nutty fragrance. Image: © Siu Ling Hui
Buckwheat Flour Bread
This buckwheat flour—or more accurately, buckwheat flour flavored— bread was an accident. I had meant to make a barley flour bread but didn't look closely enough at the flour packet label. [My various flours, except the 5 kg sack of Baker's Flour, are kept in 1 box in the fridge.]
I had trialled buckwheat flour bread before but the results were not great. The flavor was bitter (although the bitterness disappeared as soon as the bread was buttered . . . how weird is that?). The loaf pretty flat and texture was far too dense.
But this time I roasted the buckwheat flour the night before. And this made all the difference to the flavour. Even the dough had a beautiful nutty fragrance. The final loaf was still very flat—buckwheat isn't really a grain and therefore has no gluten. The high percentage of baker's flour didn't seem to be able to compensate for this lack of gluten. Perhaps if I had used a white leaven, it might have had a better rise? I will try that the next time.
But regardless of the "flatness", the bread had a wonderful soft yet chewy texture with a strong crust, and very full flavored.
Ingredients
- 700g baker's flour
- 100g roasted buckwheat flour
- 600g water (ie 75% hydration)
- 240g leaven made with 90g buckwheat flour, 30g dark rye, 120g water (ie 30% leaven)
- 8 g barley malt (should have been buckwheat malt)
- 16g salt
Method
Bulk fermentation for 6 hours with ambient temperature going from 23°C to 26°C during that time. Think I should have shortened the time.
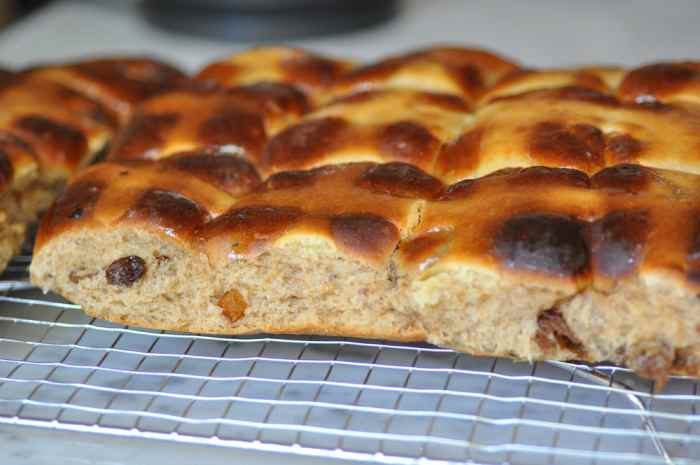
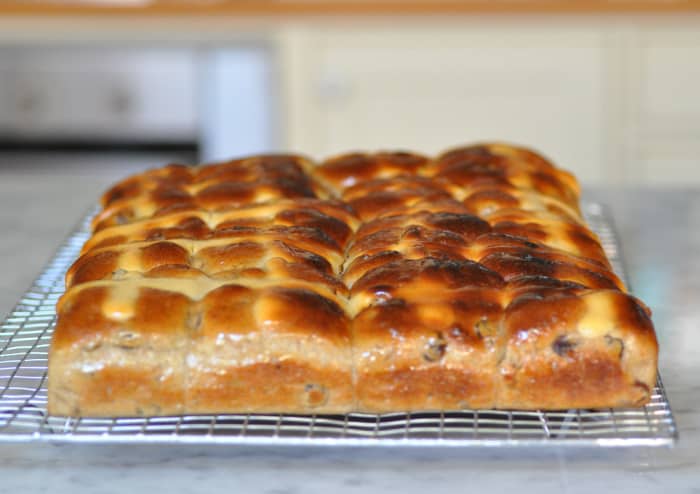
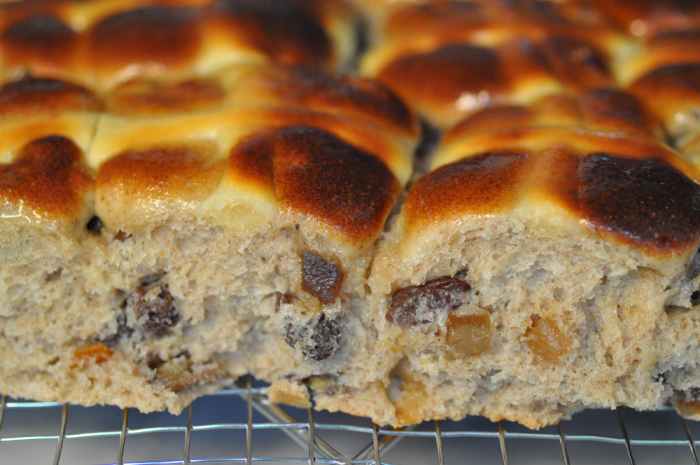
Hot Cross Buns - first attempt. The "cross paste" was somewhat of a disaster. Image: © Siu Ling Hui
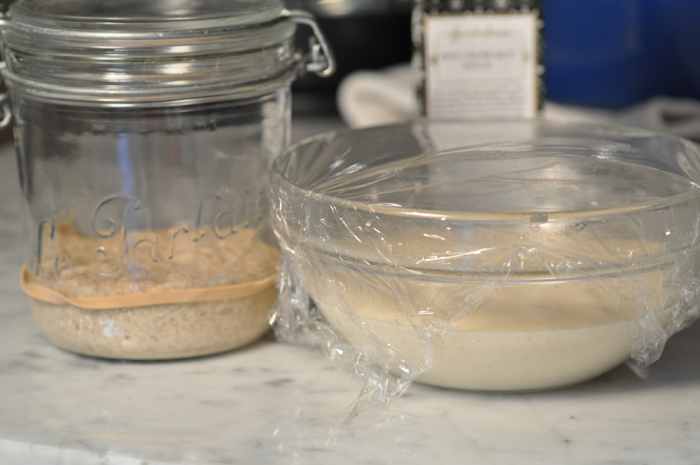
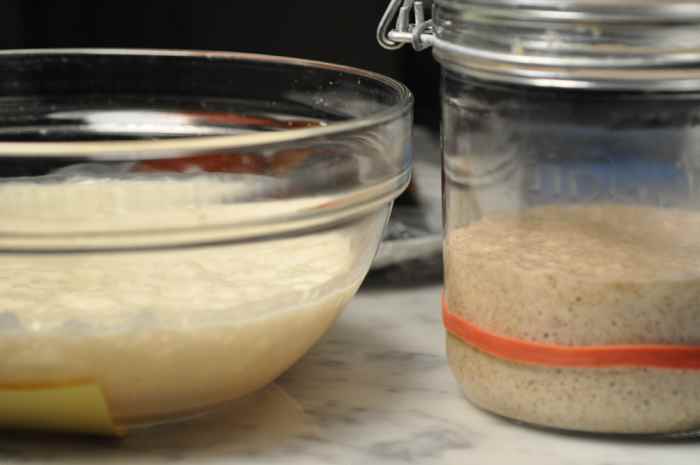
Sourough leaven (on left) and poolish (right) in early stages of development. Both will be more than doubled and bubbly when ready. Image: © Siu Ling Hui
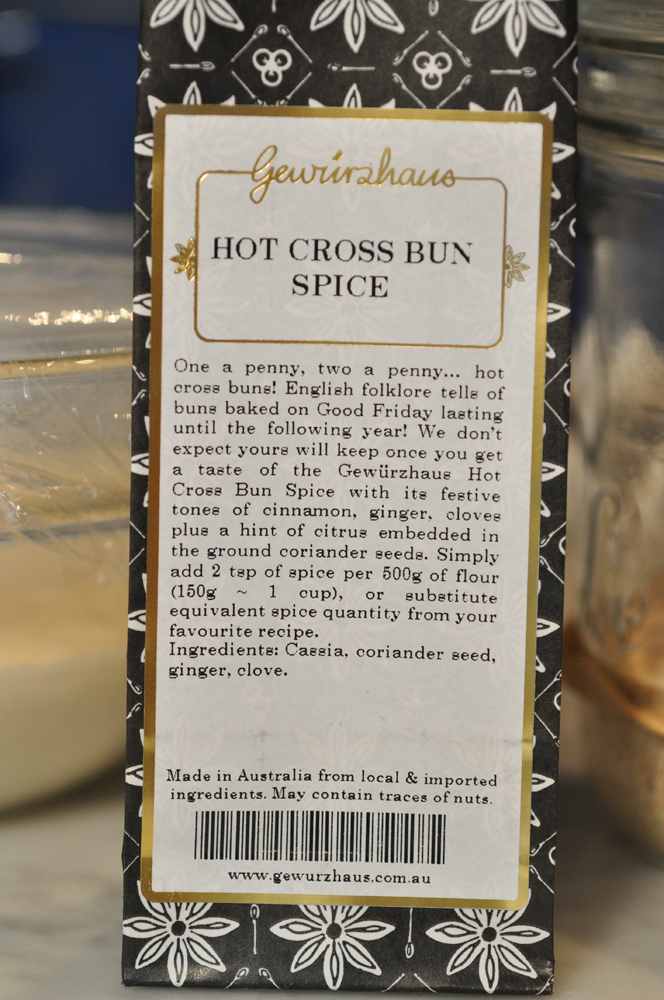
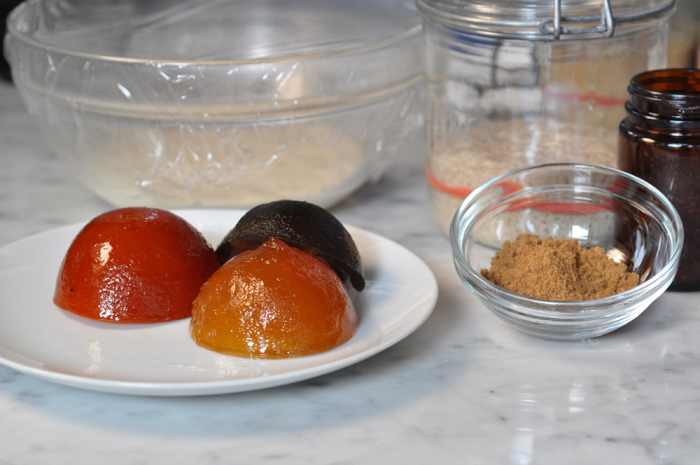
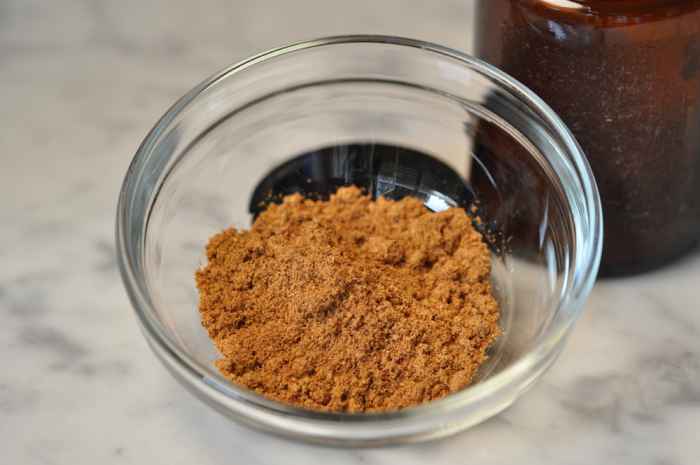
The spice mix I used, from my local spice store. Should have read instructions and doubled the amount of spice used for my buns. Image: © Siu Ling Hui
Hot Cross Buns
This is my first attempt at making Hot Cross Buns, using a sourdough leaven and a poolish. It's a bit of a mish-mash of recipes from Jeffrey Hammelman's Bread: A Baker's Book of Techniques and Recipes, my fruit bread recipe and the brioche recipe in Chad Robertson's Tartine Bread.
It's not a very sweet bun, which is my preference. I used a Hot Cross Bun Spice mix from my local spice shop. With this mix, I think I should double the amount of spice.
It took a few attempts before I started to get consistent in shaping the buns. It's best to place the buns pretty close together in the baking pan so as to force the rise upwards instead of sideways.
The cross paste mixture was too runny and spread too wide across the buns. The ¼ inch diameter nozzle was too big as well. Next time round I will make a thicker cross paste and a 1/8 inch nozzle.
Here's the recipe with the percentages in brackets. (The flour for the dough is 100%.)
Ingredients
- 500 g flour (85% baker's flour, 10% semola, 5% rye)
- 5 g dried yeast (1%)
- 5 g salt (1%)
- 5 g spices (1%)
- 90 g light brown sugar (18%)
- 160 g full cream milk at lukewarm temperature (32%)
- 95 g lukewarm water (19%)
- 80 g beaten egg (16%)
- 200 g poolish (40%)
- 150 g sourdough leaven (30%)
- 75 g unsalted butter, softened (15%)
- 200 g raisins (40%)
- 100 g chopped candied orange, lemon and citron peels (20%)
Method
1. Preparing the leavening agents:
The poolish: Made by mixing 100g flour, 100 g water and scant 2 g dried yeast. Leave to stand at room temperature about 4 hours. [Room temperature was about 22°C on the day I made this.]
Sourdough leaven: I used the my "standard" leaven for fruit loaf. It takes about 7 to 8 hours to develop. So I start this leaven first, and start the poolish about 4 hours later.
2. Mixing the dough
Put the flour, dried yeast, salt, spices and sugar into a mixing bowl of electric mixer with dough hook attached. [I use a Kitchen-Aid so the speeds will reference this on this machine.]
Add the milk, water, egg, poolish and leaven.
Beat at low speed (number 1 setting) for about 5 minutes, stopping the machine half-way to scrape down the sides of the bowl. Cover loosely with bowl (still attached to the mixer) with clingfilm and leave to rest for 20 minutes.
Beat the dough at medium speed (number 4 setting) until the dough leaves the side of the bowl clean. (It took me about 3 to 4 minutes.)
Add a small amount (about a fifth) of the butter to the dough and beat at low speed until the butter is fully incorporated before adding the next lot of butter.
When all the butter has been beaten in, turn the dough out into a large mixing bowl. Add the raisins and the candied peel and "fold" it into the dough with damp hand.
Cover the bowl with clingfilm and leave to rest in a cool place for about 2 hours. [It was about 21°C in the room when I did this.] Give the dough one "turn" after 30 minutes and a second "turn" after another 30 minutes.
Turn the dough out onto an unfloured work surface. Lightly dust with baker's flour and divide the dough into about 24 portions (about 75g per portion). Shaping each dough portion into a bun in the same way as a loaf is shaped. This is the part that had me stumped for the first few portions as it is more difficult to do this with a small amount of dough. But I got the hang of it after messing up the first few. :)
Place the buns closely together onto a parchment-lined baking sheet. This forces them to rise upwards instead of sideways.
Put the baking sheet into a large bag (I used an oven bag - the type that is used for roasting turkeys) and leave to rest in a warm place for about 1 to 1.5 hours.
Pipe cross paste on the buns just before baking. The buns are baked at 225°
Making the Cross Paste:
These are the proportions I used but the paste was too runny. So next time around, I'll probably reduce the amount of milk, maybe even leave out the egg, and increase the amount of flour slightly.
- 55 g butter
- 55 g sugar
- 85 g milk
- a few drops of vanilla extract
- a drop of lemon oil
- 30 g beaten egg
- 110 g baker's flour
Heat the butter and sugar in a saucepan until the sugar melts. (It won't dissolve completely - it'll still be a little grainy.) Take it off the heat and allow to cool for a few minutes. Then whisk in the milk, vanilla and lemon oil; followed by the beaten egg. Then stir in the flour and blend to a smooth paste.
Pipe the paste over the buns just before baking. Bake at 225°C for 8 minutes or until the buns start to color; then reduce heat to 200°C and continue to bake for another 8 - 10 minutes or until the buns are medium brown.
Brush the buns while they are still hot with a syrup made with 30g sugar and 30 g water.
Trial 2 Batch of Hot Cross Buns. Image: © Siu Ling Hui
Section of trial 2 Hot Cross Buns. Image: © Siu Ling Hui
Peels, spice mix and the 2 leavenings for making up the dough. Image: © Siu Ling Hui
Spice mix from recipe in Elizabeth David's book. Image: © Siu Ling Hui
Poolish (left) and sourdough leaven(right) ready to use. Image: © Siu Ling Hui
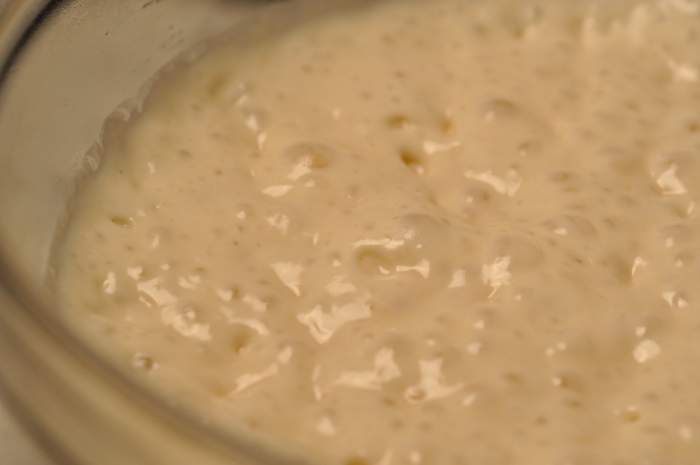
Ripe bubbly poolish used as part of leavening. Image: © Siu Ling Hui
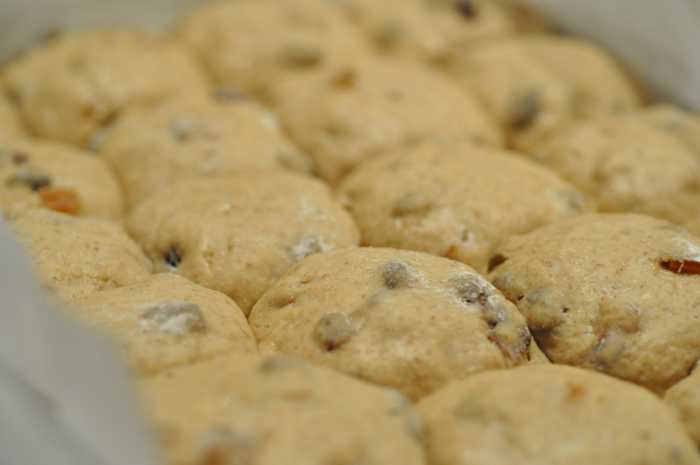
Proofed buns ready to have crosses piped on. Image: © Siu Ling Hui
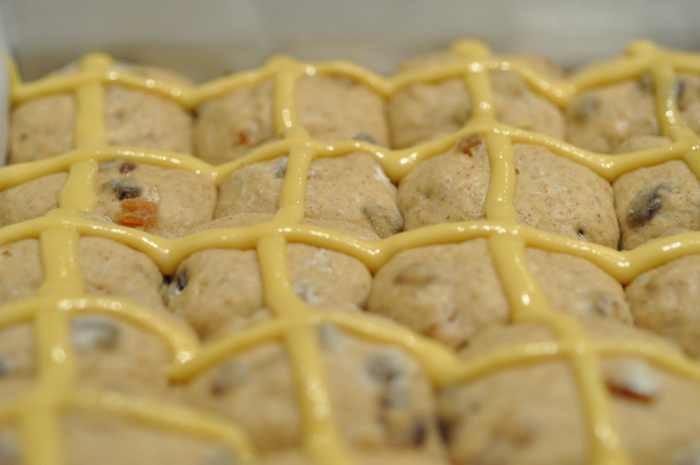
Buns with crosses piped on with a 1/8 inch nozzle. Image: © Siu Ling Hui
Hot Cross Buns Trial No. 2
The second trial of hot cross buns. This time, I made up the ground spice mix from the recipe in Elizabeth David's classic book English Bread and Yeast Cookery. It's a more complex mix than the bought spice mix—wonderfully fragrant when ground fresh.
I also used sultanas instead of raisins and increased the quantity up to 40%.
I think I could increase spicing to 2%. But I'll wait for feedback from my Hot Cross Bun "guinea pigs" to tell me what they think of the two different buns.

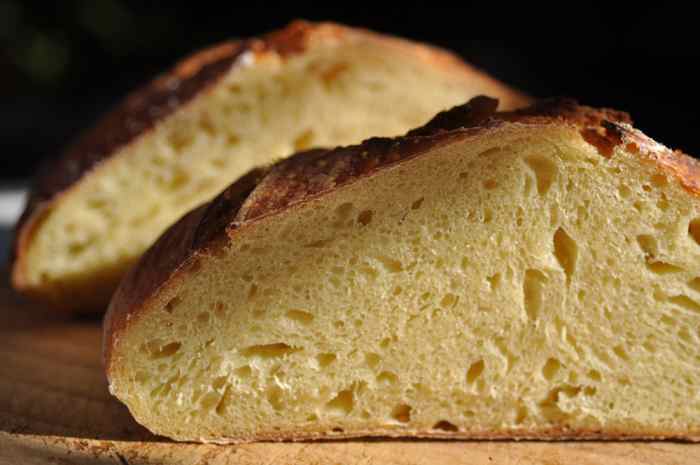
Roasted buckwheat flour sourdough loaf. Long bulk fermentation at around 16C. Image: © Siu Ling Hui
Buckwheat Flour Sourdough Using White Leaven
I've been tweaking my methodology since reading Flour Water Salt Yeast by Ken Forkish. Brilliant book for amateur bakers like me.
I've modified how I make the buckwheat flour sourdough - or more accurately, roasted buckwheat flavoured sourdough as the roasted buckwheat flour is only 20% of the total flour.
This time, I've used a white leaven (i.e. made from baker's flour only). The last time I used a buckwheat flour leaven, I ended up with a very flat bread (as you can see in the pictures earlier in this blog).
I now only do 4 turns of the dough and these are done in the first 2 hours of bulk fermentation. The dough is then left to sit, untouched, until it's time to divide and shape.
Autumn is now well and truly here. With this loaf, the dough was left in bulk fermentation for just over 13 hours at average ambient temperature of around 16°C.
After final shaping, it was left in final proof overnight on the kitchen bench. Ambient temperature in the kitchen would probably have been around 14 - 15°C. I wasn't ready to bake in the morning so I put the loaves into the fridge at around 7am. They were baked just after 1pm.
Looking at the final structure, I think I could have pushed the final proofing out at room temperature (15°C) for another hour or so.
I love this bread for egg and watercress sandwiches.
3 Different Loaves from One Dough Mix
The smallest loaf. Proofed in a banneton. Baked at 200°C. Image: © Siu Ling Hui
The mid-sized loaf. Proofed in a banneton. Baked at 200°C. Image: © Francoise Garnier
The largest loaf. Proofed in a colander. Baked at 215°C. Image: © Francoise Garnier
Variations in Sourdough Bread
I recently made up dough for 3 loaves of my "standard" loaf. That's one based on 15% rye and 85% bakers' flour at 75% hydration.
The results were interesting. My dough division wasn't perfect and I ended up with what I'll call Papa Bear, Mama Bear and Baby Bear loaves. As I only have 2 bannetons, I proofed the largest loaf in a colander. The other 2 were proofed in the bannetons.
Bulk fermentation was for 9 hours. The loaves were left to prove at around 14 - 15°C for 3 1/2 hours; then placed into the fridge. The smallest loaf was baked at 9,40am, the mid-sized loaf at 11am and the largest loaf was baked at 12.10pm. Baking temperature was 200°C (intensive fan-forced oven) for the first 2, and the large loaf at 215°C.
Despite the 3 loaves being made from the one dough, the appearance of the 3 loaves turned out quite different! (I gave 2 of the loaves to my friend, Francoise Garnier, who kindly took the pictures of those loaves.) I find this quite intriguing and am now trying to figure out why!
Sumac Levain Crackers With Black Lava Sea Salt And Rosemary
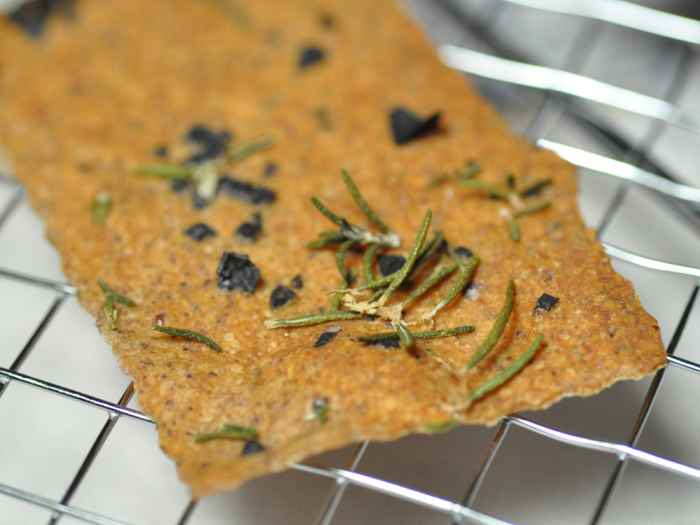
Levain Crackers with Cyprus Black Lava Sea Salt and Rosemary. Image: © Siu Ling Hui
Levain Cracker Dough with Sumac. Image: © Siu Ling Hui
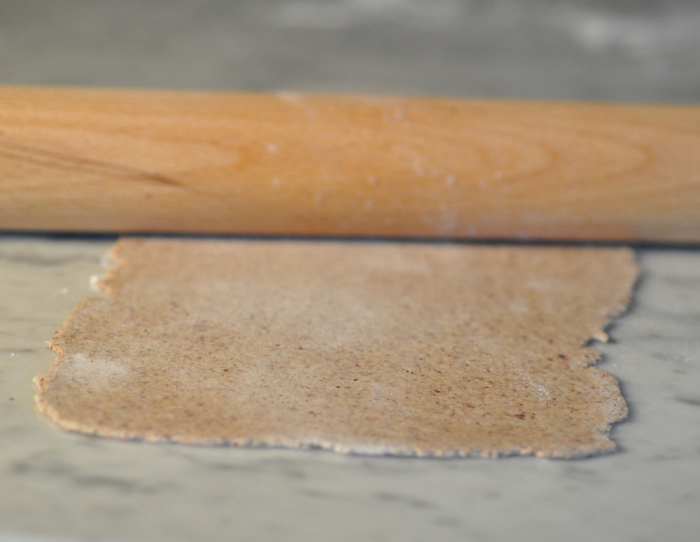
Levain Cracker dough being rolled into a thin sheet. Image: © Siu Ling Hui
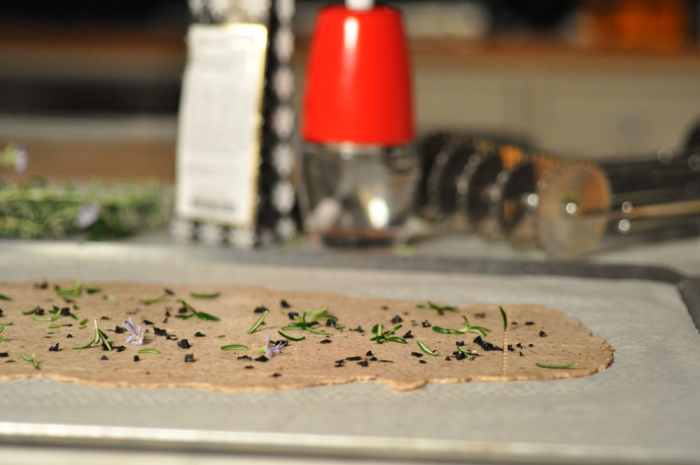
Black Lava Sea Salt and Rosemary scattered over the chilled levain cracker dough just before baking. Image: © Siu Ling Hui
Levain Crackers
I've always cringed at having to throw away sourdough starter at each feeding. Then I found this fabulous way of using leftover starter in Jeffrey Hamelman's book "Bread. A Baker's Book of Techniques And Recipes." Make crackers with it!
So instead of throwing out the 80% of sourdough starter to be discarded at each feeding, I accumulate the discarded amounts in a jar which I keep in the fridge. When I have a reasonable amount (about 400g), I turn them into these gorgeous savory crackers. These crackers are great for snacks with drinks or for dips like hummus, baba ganouj etc.
The proportions for making the dough is follows:
- 230% starter
- 100% flour (use 50/50 plain flour/whole-wheat flour)
- 3.8% salt (you can round up to 4%)
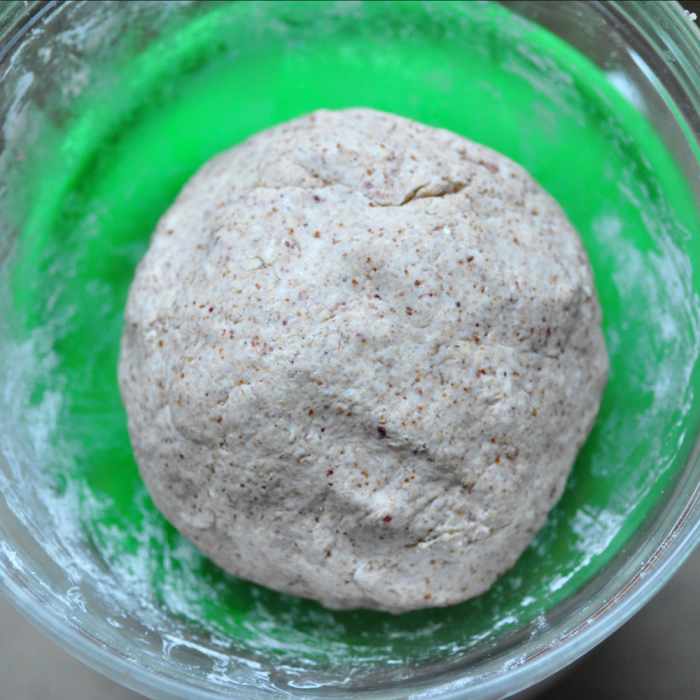
Method
- Simply combine the ingredients until you get a firm dough.
- Cover with the bowl with clingfilm and run bulk fermentation for about 30 minutes to 1 hour.
- Divide the dough into small portions. Roll out each portion of dough into a thin rectangle, about 1 - 1.5mm thick. If the dough is starting to shrink back significantly during the rolling, leave it aside to allow it to relax before rolling again.
- Chill the dough sheets, covered in clingfilm, for at least 30 minutes. [I have left it overnight without any issues.]
- When ready to bake, carefully transfer the dough to baking sheets. Spritz the dough with cold water. Sprinkle coarse salt and seeds (eg sesame seed, poppy seed, fennel etc) or herbs (rosemary or thyme are two possibilities). You can score the dough with a pizza wheel if you wish.
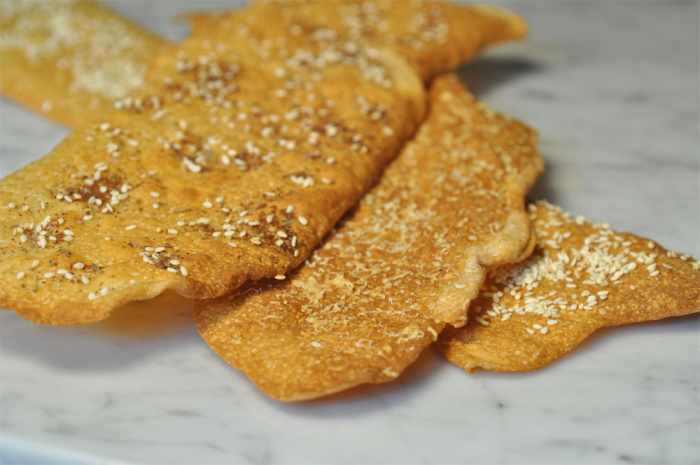
- Bake in a pre-heated 220°C oven until the crackers are medium brown. The baking time will depend on how thinly you've rolled the dough. Baking times in my trials have been between 20 - 25 minutes.
- Leave to cool completely on wire racks before storing in an air-tight container. If they soften, you can reheat them for a few minutes in pre-heated 180°C oven.
(Hamelman's recipe also suggests 1% cumin. So that's the amount of spice that you may want to add. I have been using sumac in my trials. But I've found that even after ramping the amount of sumac up to 15%, it doesn't really come through. There is a mild acidity in the crackers but I'm not sure if that is due to the acidity of the starter or the sumac.)
Levain Crackers Made With Pasta Maker
I came up with a different method of rolling out the levain cracker dough which makes it easier to achieve very thin dough sheets. Use a pasta maker!
Pass small portions of the levain dough through the pasta maker, exactly as you would with making pasta. Start at notch #1. Pass the dough through. Turn the notch up to setting #2. Pass the dough sheet through again. Repeat until you get to notch setting #4 or #5. Beyond #5, the dough becomes far too difficult to work with.
Lay the dough sheets carefully on a baking sheet lined with cling film. Each layer of dough sheets must be separated by a sheet of cling film. Refrigerate for at least an hour. In this case, I left the dough sheets overnight.
To bake, follow the instructions above for levain crackers. These pasta maker extruded dough sheets were much thinner than the hand rolled ones. They only took about 15 minutes to bake.
I made 3 different flavors of crackers in this batch. One was scattered with the Middle Eastern spice mix called Za'atar and this will be lovely with Middle Eastern dips like hummus and baba ganouj.
One had sesame seeds scattered over. I tried rolling the sesame seeds into the dough but it created holes in the dough.
Lastly, I grated Grana Padano over the dough. This smells absolutely gorgeous when it's baking and will be terrific to have as a nibble with drinks.
3 different flavours of Levain Crackers. Toppings are Za'atar (top), finely grated Grana Padano (middle), and Sesame Seeds (bottom).
My first trial of wholemeal and plain flour sourdough bread. Image: © Siu Ling Hui
Section of wholemeal and plain flour loaf. Image: © Siu Ling Hui
Wholemeal and White Flour Loaf
This is my first loaf with wholemeal flour. I had read that wholemeal flour absorbs a great deal more water so I increased hydration to 80%. I also reduced the amount of levain to 15% on the basis that wholemeal flour ferments faster.
Ingredients
- 640 g bio-dynamic wholemeal flour
- 640 g baker's flour
- 160 g dark rye flour
- 1.2 litres water (80%)
- 240 g levain (15%)
- 32 g salt (2%)
Method
Flour and water were mixed and allowed to sit for an hour before adding the levain. The dough was left in bulk fermentation for 23 hours at temperatures between 12 - 13ºC. Final proof went for 8 hours for the first two loaves. By the time the second batch went into the oven, they had been in final proof for an additional 1½ hours and they had showed much better rise than the first.
51 hour wholemeal, baker's flour and dark rye loaf. Image: © Siu Ling Hui
51-Hour Loaf
I read in Michael Pollan's book Cooked: A Natural History of Transformation that Chad Robertson actually used higher levels of hydration than those set out in Tartine Bread. The amount of water in the recipes had been reduced by 10% or so as Robertson was concerned that "home bakers confronting a dough too wet to knead would 'freak out'. "
I had also learnt that wholemeal soaks up a lot more water and that bran "cuts" the gluten which then makes for a denser loaf. However, the bran could be blunted by longer soak and a wetter dough.
So with this batch, I ran autolyse for over 20 hours before adding the levain. Bulk fermentation time went on for nearly 24 hours at average temperature of 12° - 13°C and final proof took around 4 hours.
The result? This has to be the best batch of loaves I have baked since I started bread making just over 12 months ago!
Ingredients
- 160 g organic whole grain dark rye flour
- 320 g baker's flour
- 1080 g bio-dynamic wholemeal flour
- 1440 g water (90% hydration)
- 240 g levain (15%)
- 32 g salt (2%)
95% hydration sourdough made with 20% rye, 80% baker's flour. Image: © Siu Ling Hui
Section of 95% hydration sourdough. Image: © Siu Ling Hui
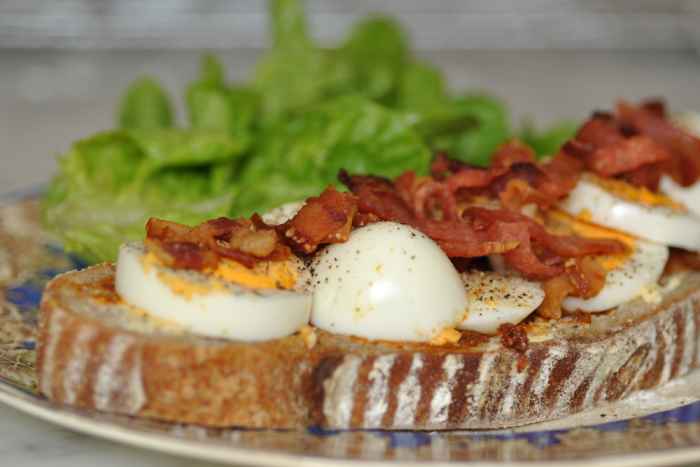
The freshly baked 95% hydration sourdough made a great sandwich with hard-boiled eggs, crisp bits of dry-cured bacon, lettuce from my neighbour's farm, harissa, whipped butter, a sprinkle of Persian blue salt and freshly ground black pepper. Image: ©
95% Hydration Loaf
I pushed the boundaries with hydration with the latest loaves - by accident. I had planned to try a 20% light rye:80% baker's flour dough at 90% hydration. However, my brain wasn't properly engaged when I added the water to the dough. I added the entire 90% water when mixing up the dough instead of holding a small amount back, as I usually do, for mixing the levain and the salt.
I also mixed the water with the flour at the same time that I set up the levain. So the autolyse process went for about 12 hours.
An additional 2.5% water was added when incorporating the levain into the dough. A further 2.5% water was added at the time of mixing in the salt. That's how I ended up at 95% hydration.
Bulk fermentation ran for just over 12 hours with ambient temperature hovering around 15° - 16°C. The dough was very silky and soft. It was very challenging to shape and equally challenging to slash!
Final proof was for 18 hours, with the first hour at room temperature and the rest of the time in the refrigerator.
The final result was good but I don't think I'll repeat this level of hydration unless I am using wholemeal flour!
Semola starter. It has a very open structure. The first rubber band is the starter when first mixed. The second rubber band indicates the risen height. Image: © Siu Ling Hui
100% semola loaf. Image: © Siu Ling Hui
Cross section of the 100% semola loaf. I love the golden colour of the crumb. Image: © Siu Ling Hui
Close up section of the 100% semola loaf. Image: © Siu Ling Hui
100% Semola Bread
Semola is made from durum wheat. It is much more granular than semolina (or as the Italians call it, semolino) and is used for making pasta. Whilst it is very high in protein, its gluten structure is very different from that of bread flour. It has high extensible qualities but doesn't have the strength to support the capture of air bubbles like wheat flour.
I've have difficulties previously in getting a good rise in the bread when I've increased the amount of semola in a dough mix to 50%. But I recently learnt about the Pane di Altamura, a bread that is specific to the town of Altamura in Puglia, Italy. This famous bread even has DOP (Denominazione Origine Protetta) status.
The true Pane di Altamura has to be made from 3 specific varieties of durum wheat from specific areas.
It's a wonderful yellow bread with strong crust and chewy interior.
I've tried to create the equivalent with the Moretti brand semola, this being the only semola I can get hold of. The Moretti semola is from the Lombardy region. I have no idea what durum wheat varieties is used in this semola.
However, I followed the guidelines for Pane di Altamura as closely as possible and was very happy with the results.
Here's what I did for this experimental loaf:
- 9.30am: Mixed 500g semola with 300g water (water temperature was 35º C). The mixture looks like a shaggy porridge. Set aside to rest.
- 10.15am: Added 100g semola levain (using a pure semola starter I had been building for over 4 days). Worked it in by pinching the dough and then doing a number of stretches and folds. After that, I worked in 10g sea salt. Again, pinched the dough and did some stretches and folds. The dough is still sticky and loose at this stage - somewhat akin to thick porridge.
- 10.30am: Set the dough aside, covered with cling film, to rest.
- 11.00am: Did the first "turn" of the dough. By this stage, the dough felt softer and more elastic but still very sticky. Room temperature was 24ºC at 47% humidity.
- 11.30am: Did the second "turn" of the dough. The dough was more cohesive but still very sticky.
- 1.15pm: Did a third "turn" of the dough. By this stage, the dough was holding shape and no longer sticky.
- 1.35pm: Put the dough in the refrigerator as I had to attend a funeral.
- 4.30pm: Took the dough out of the fridge and left it to come to room temperature on the bench. Room temperature was 26ºC at 45% humidity.
- 6.40pm: Turned the dough out of the bowl. The dough came away quite easily. Shaped the dough and put it into a banneton for final proof. The dough was still quite cool.
- 8.20pm: Baked the loaf in Dutch oven at 225ºC (fan-forced) for 20 minutes. The cover on the Dutch was removed and the loaf was baked for a further 25 minutes at 225ºC.
I will definitely try doing this bread in a bigger batch again. It has a lovely flavour. Brushed with olive oil and toasted, it is a fabulous accompaniment to a chunky seafood soup or as bruschetta.

Salt fermented mother dough chopped into small pieces and added to water to prepare the dough. Image: © Siu Ling Hui
Salt fermented sourdough loaf. Image: © Siu Ling Hui
View of crumb of salt fermented soudough loaf. Image: © Siu Ling Hui
Salt Fermented Sourdough
I had heard a lot about the salt fermented sourdough by Teresa Greenway of Northwest Sourdough.
I found the instructions online. It takes about a week to do as you have to build a salt fermented mother dough - the pate fermentée. But there's very little actual hands-on work involved. Just time - the most important ingredient in great bread.
It makes a stunning looking loaf. The flavour is outstanding. I'll definitely be making this again!

Sourdough waffles with crisp dry-cured bacon, maple syrup (and of course, butter). Image: © Siu Ling Hui
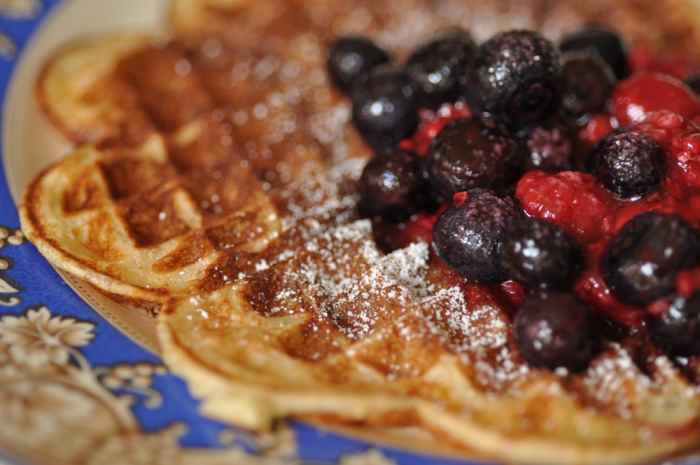
Buttermilk sourdough waffles with blueberry and raspberry compote. Image: © Siu Ling Hui
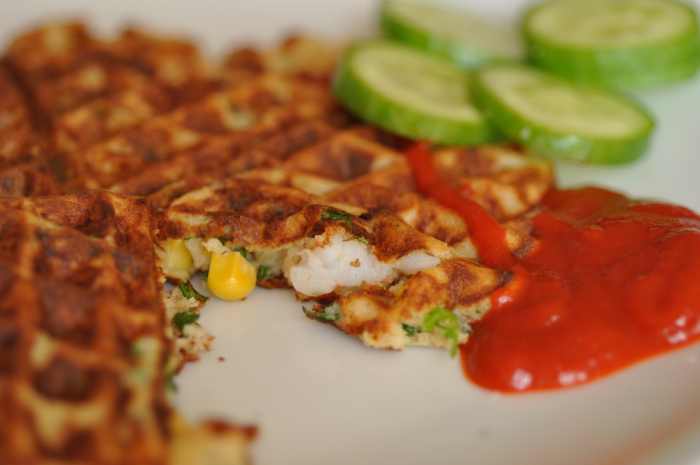
Prawn, sweetcorn, coriander and chilli sourdough waffles. Served with Sriracha chilli sauce. Image: © Siu Ling Hui
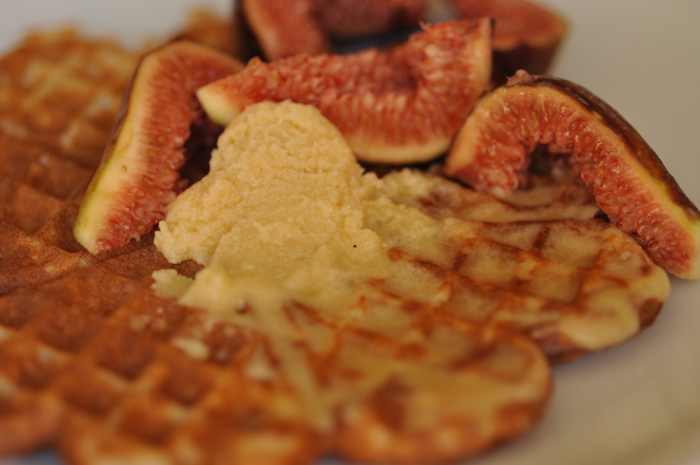
Sourdough starter waffles with honey butter and fresh figs. Image: © Siu Ling Hui
Sourdough Waffles
It is terribly wasteful to have to throw out spent starter at each feed and making levain crackers (as shown earlier in this article) was one way. But there's only so many crackers one can eat—and give away.
Another great way to use spent starter is in waffles. In fact, after making the first batch of waffles following a recipe I found online at the Breadtopia site, I analysed what was happening with that recipe.
The starter can essentially be thought of as a simple "batter" of flour and water with a population of wild yeasts. It's too heavy to use on its own, especially if you feed your starter with strong flours. However, this spent starter works brilliantly for making batter products like waffles if lightened with some all-purpose flour or cake flour, and even some rice flour.
Any of your favourite waffle recipes can be converted to incorporate the spent starter by adjusting the flour and liquid components in the batter. It's up to you as to how much of the starter you want to use in the final mixture. Here's how to work it out based on substituting 50% of the flour in the waffle recipe.
- Halve the amount of flour called for in the waffle recipe. The rest of the flour will come from the starter. So let's say you are using a recipe that requires 250g all-purpose flour. You would use only 125g all-purpose flour to make up the batter. The other 125g is in the starter.
- If you maintain a starter at 100% hydration, that means your starter is equal parts flour and water. So in our 250g flour example, you would need 250g of starter to get the balance of 125g flour required in the recipe.
If you maintain a starter at 80% hydration, then you would need 225g starter. At 80% hydration, that amount of starter would comprise of 125g flour and 100g water. - Next, adjust the amount of liquid in the recipe for the water content in the starter. If your waffle recipe calls for 375ml milk, then you would reduce the amount of milk by the amount of water in your starter.
So if you are using 250g 100% hydration starter, you would reduce the amount by milk by 125ml to 250ml. If you are using 225g 80% hydration starter, you would reduce the amount of milk by 100ml to 175ml for your final batter. - The rest of the waffle recipe remains unchanged.
To create a lighter batter, you can substitute some of the all-purpose flour with rice flour. You can also separate your eggs, adding only the yolks to the initial batter. Then whisk your egg whites to soft peaks and incorporate into the batter just before you are ready to cook.
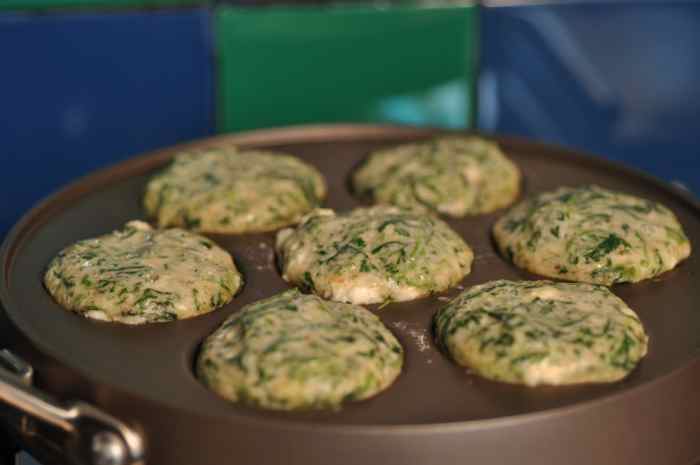
Spinach and feta ebelskivers cooking in pan. Image: © Siu Ling Hui
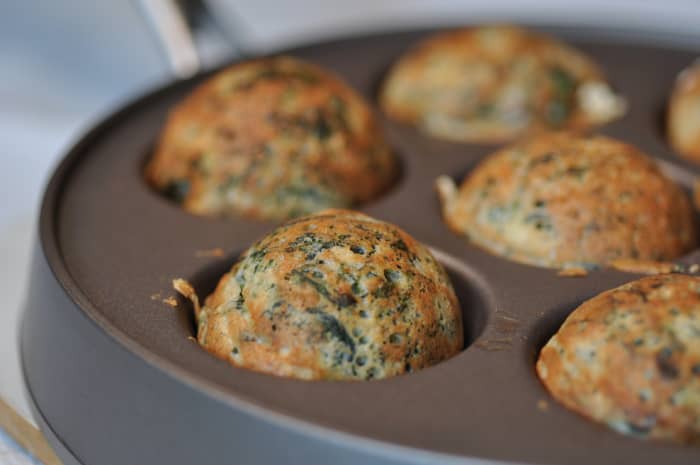
Spinach and feta ebelskivers - flipped over to complete cooking. Image: © Siu Ling Hui

Cross-section of spinach and feta ebelskivers. Image: © Siu Ling Hui
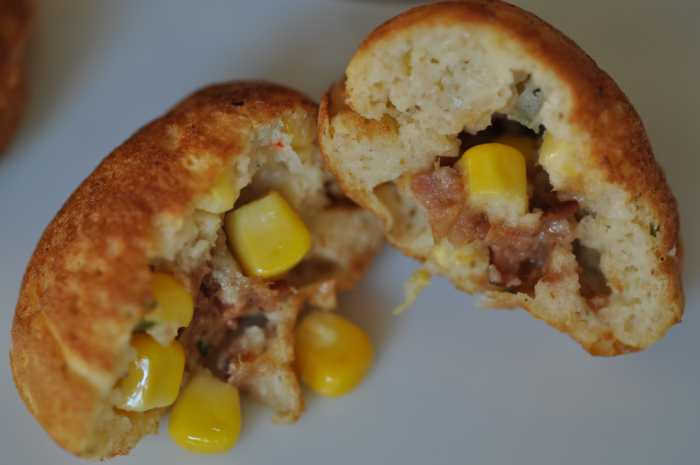
Corn, coriander and chilli ebelskivers filled with bacon jam (a wonderful new product from my butcher). Image: © Siu Ling Hui
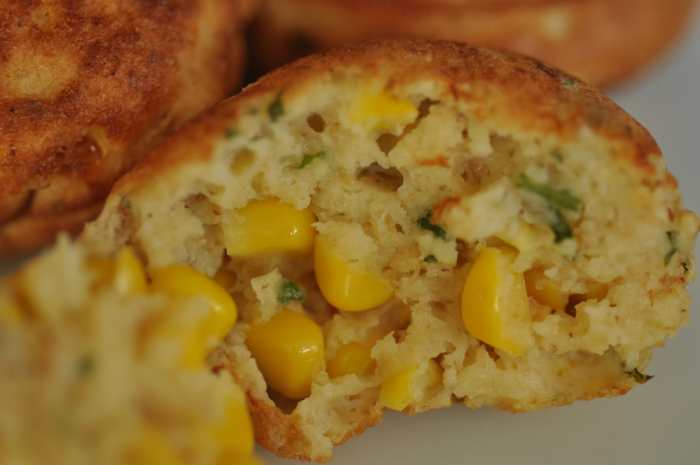
Corn, coriander and chilli ebelskivers. Image: © Siu Ling Hui
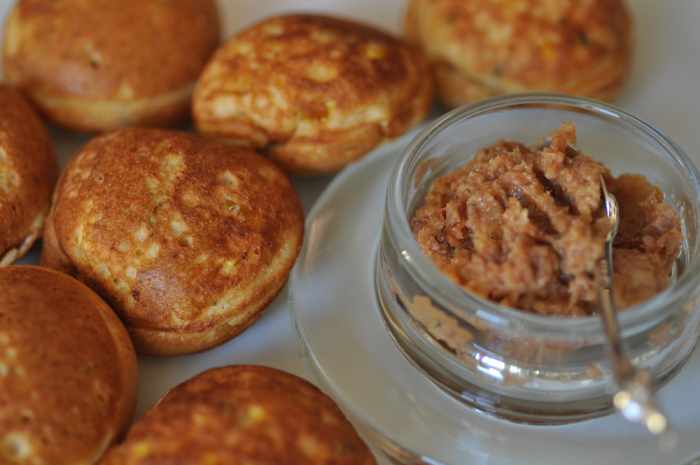
Corn, coriander and chilli ebelskivers served with bacon jam. Image: © Siu Ling Hui
Sourdough Ebelskivers
Ebelskivers are Danish spherical puffy pancakes. I bought an ebelskiver pan several years ago. It seemed like a good idea at the time. But it ended up sitting unused at the back of the cupboard.
After experimenting with the waffles, I thought ebelskivers would be another great way to use spent starter. As with the waffles, I simply converted the flour:liquid ratios in the original ebelskiver recipe to allow for the flour and water content in the starter.
I am part of an artisan bread bakers' group in Facebook and when I posted my sourdough ebelskiver results in the group, I discovered that there were many others who also had an unused ebelskiver pans lurking at the back of their cupboards! So if you're one of those, it's time to bring that pan out!
Turning the ebelskivers neatly does need practice! But it's been fun making these and that pan of mine will now be in constant use.
Savoury ebelskivers like the spinach and feta, and the corn, coriander and chilli ones, are excellent for a light lunch or as nibbles with drinks. And they are really quick to make once you get the hang of it.
Einkorn loaf Image: © Siu Ling Hui
Crumb of Einkorn loaf. Image: © Siu Ling Hui

The Einkorn flour, a UK flour bought in Malaysia and brought back to Australia! Image: © Siu Ling Hui
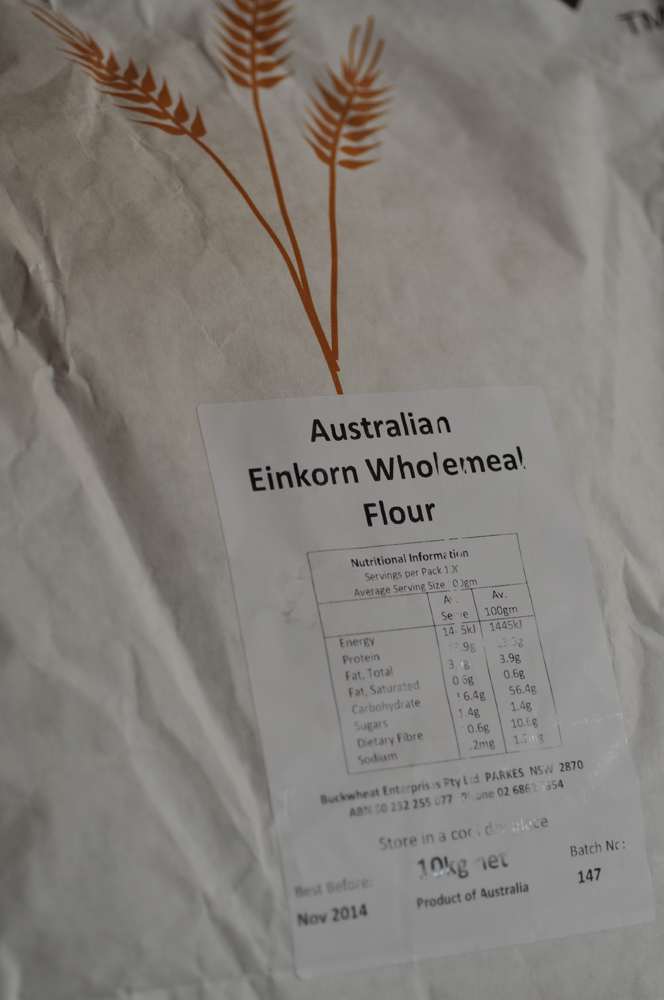
Australian Einkorn flour. Only 1 grower of this grain in Australia. Image: © Siu Ling Hui
Einkorn Bread
Einkorn (Triricum monococcum) is one of the ancient grains that have been enjoying a revival in recent times. This ancestor of the modern common wheat adds a really lovely nutty texture to the bread.
For this batch of loaves, I used Einkorn flour from English Doves Farm which I found in, of all places, a supermarket in Kuala Lumpur, Malaysia on a recent trip there. Fortunately, I have since found a producer of Einkorn flour in Australia.
The gluten structure of einkorn is more fragile than that of modern wheat and the dough needs to be handled quite lightly. This batch was made following the recipe in Tartine Book No. 3. The flour mix consists of 40% baker's flour, 30% Einkorn flour and 30% high extraction flour. The last flour isn't available for home bakers like myself but you can simulate it by sifting whole wheat flour. (The bran that is left over can be used for other purposes.) With my sieve, I got about 400g high extraction flour from sifting 500g whole wheat flour.
The dough is 85% hydration and is quite weird as it stays wobbly (like pannacotta) even at the end of bulk fermentation. I found it quite tricky to handle but practice will make perfect. This Einkorn loaf will be part of my regular bakes from now on as I love the flavour and texture.
Salt Fermented Sourdough: Baker's Flour Vs Semola
Salt fermented sourdough made with 100% baker's flour. Image: © Siu Ling Hui
Salt fermented sourdough made with 100% semola. Results are quite different from the 100% baker's flour loaf. Image: © Siu Ling Hui
Crust of salt fermented sourdough with 100% baker's flour. Blistering is intense. Image: © Siu Ling Hui
Crust of salt fermented sourdough with 100% semola. This dough doesn't blister in the way that the one with baker's flour does. Image: © Siu Ling Hui
Einkorn Bread Using Australian Einkorn Flour
Loaf with 30% Australian Einkorn flour, 30% high extraction flour, and 40% bread flour. Crusted with bran left making high extraction flour. Image: © Siu Ling Hui
Crumb of Einkorn loaf. Image: © Siu Ling Hui
Salt Fermented 100% Semola - 70% Hydration
70% hydration is the sweet spot for 100% semola bread made using the salt ferment approach. 75% made the dough very tricky to handle. Image: © Siu Ling Hui

Close up of crust of salt fermented 100% semola at 70% hydration. Image: © Siu Ling Hui
A more open crumb at 70% hydration (than 65%). Love the golden colour of semola. Image: © Siu Ling Hui
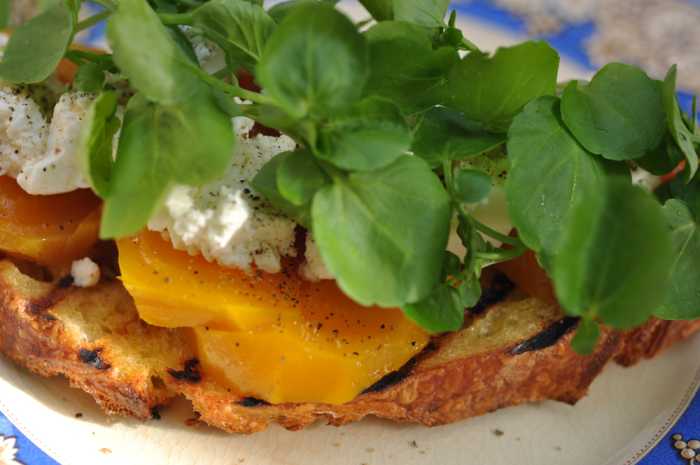
Grilled semola bread with slow roasted orange beetroot, fresh goat's cheese and watercress. Image: © Siu Ling Hui
Crumpets Using Starter Discard
Crumpets are another way to use starter that is discarded as part of the feeding cycle. I adapted the recipe from Phillippa's Home Baking by Phillippa Grogan and Richard Cornish.
Ingredients
- 176 g spent starter (100% hydration)
- 175 g milk
- 87 g boiling water
- ½ teaspoon instant yeast
- 137 g plain flour
- ¾ teaspoon sea salt
- ½ teaspoon baking powder
- butter, for cooking
Method
- Place the spent starter in a large bowl.
- Mix the milk and boiling water. Add the instant yeast and whisk well.
- Add the milk mixture to the starter in the bowl and whisk to combine well.
- Sift the flour over the mixture and whisk in to make a smooth batter. It should be the consistency of thick cream.
- Cover the bowl and leave to stand in a warm place until the batter is very bubbly on the surface.
- Whisk in the salt and baking powder.
- Grease egg rings with butter. Grease a large heavy-based frying pan.
- Place the pan over medium-low heat and place egg rings in the pan to heat up as well.
- Spoon enough batter to fill about half the depth of the egg rings.
- Little holes should form in about a minute. Cook for about 5 minutes or until the surface of the crumpet is almost set.
- Flip the crumpet in the egg ring to cook for another 2 - 3 minutes on the other side.
- Serve hot.
- The crumpets can be stored for about a week in an airtight container in the refrigerator. They also freeze well. Toast them to reheat before serving.
Crumpets
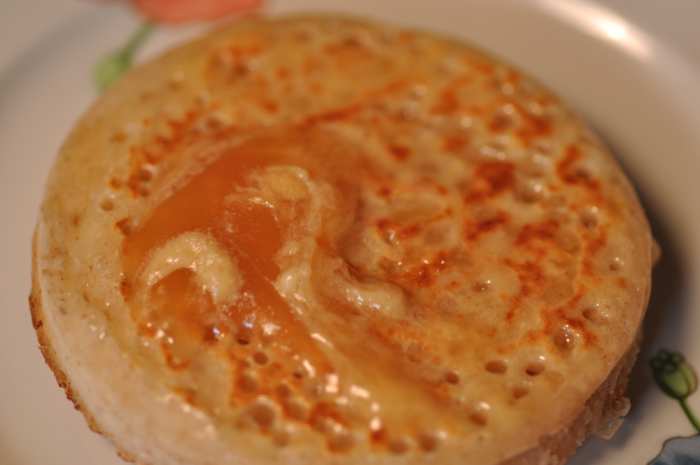
Sourdough starter crumpets with honey butter and extra honey. Image: © Siu Ling Hui
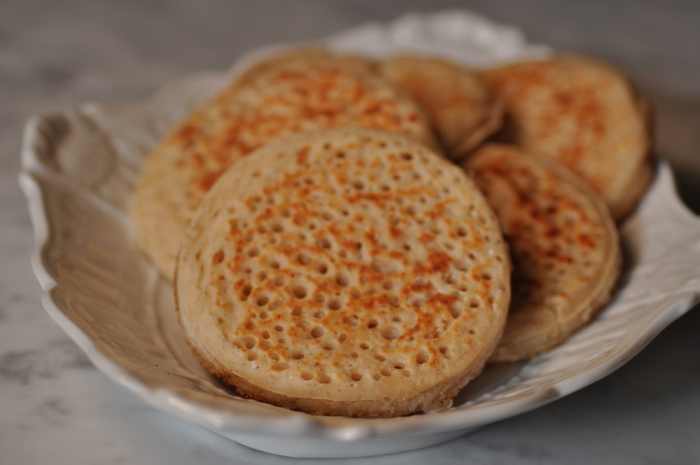
Crumpets made with spent sourdough starter. Image: © Siu Ling Hui
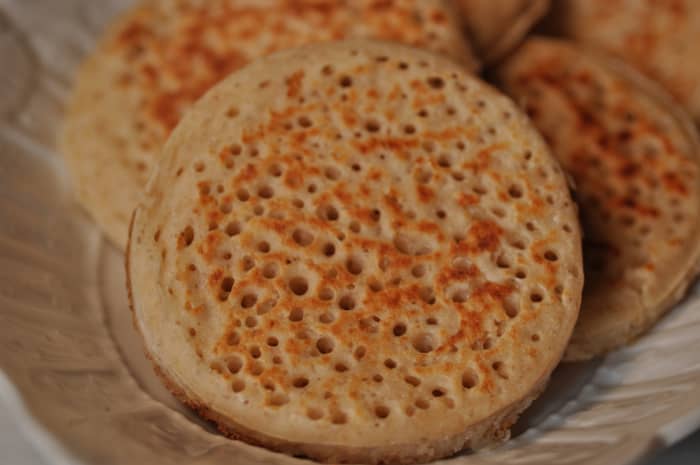
Lovely soft but chewy crumpet made with spent sourdough starter. Image: © Siu Ling Hui
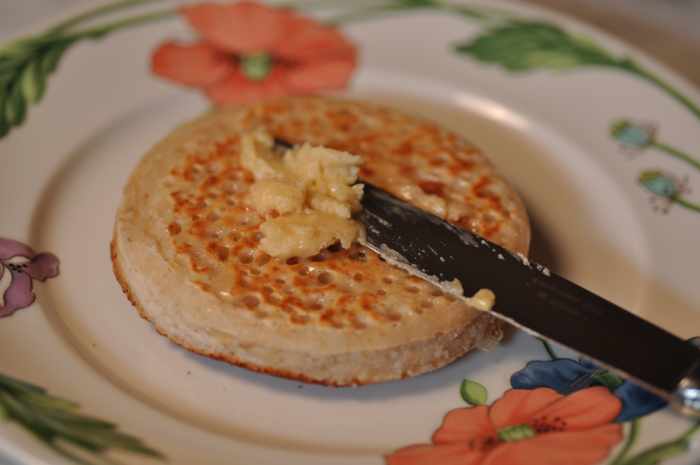
Lashings of honey butter on a hot sourdough starter crumpet. Image: © Siu Ling Hui
Oat Porridge Bread
Oat has no gluten in it, so it is difficult to achieve an open structured crumb with oat flour. So, the best way to incorporate oats into bread and still have an open textured loaf is to use it as a flavouring ingredient.
It can be included as oat flakes or as oat porridge. In this bread, I've toasted unstabilised oat flakes and then turned it into a porridge.
Honey and butter go so well with oats. This bread has 3% melted butter and 3% honey as well. The dough is made with 50/50 mix of an Italian "Manitoba" flour (high protein, strong gluten) and my usual brand of bread flour.
I also had some buttermilk on hand as a by-product of making butter earlier in the week. So that was added to the dough mix as well.
Oat Porridge Bread Image: © Siu Ling Hui
Close up view of crust of Oat Porridge Bread Image: © Siu Ling Hui
Crumb of Oat Porridge Bread Image: © Siu Ling Hui
Close up view of crumb of Oat Porridge Bread Image: © Siu Ling Hui
Ciabatta
The ciabatta is one of the most challenging breads I've made. It has taken 7 or 8 attempts to finally get a loaf that actually showed some of the characteristics of this fabulous style of bread: thin, crisp, shiny, well-blistered crust; together with an open airy crumb with well gelatinised starches.
This batch uses 100% 16-hour poolish (made with Caputo Manitoba flour); 15% lievito madre (also with Caputo Manitoba flour), and 0.2% yeast. The dough is 25% Caputo Manitoba flour and 75% Laucke "Wallaby" baker's flour. Overall hydration is 92%.
The dough is very delicate. It literally wobbles like pannacotta and has to be handled very carefully.
One of the ciabatta loaves. Image: © Siu Ling Hui
Another of the ciabatta loaves. Image: © Siu Ling Hui
Crumb of a ciabatta loaf. Image: © Siu Ling Hui
Close view of the crumb of a ciabatta loaf. Image: © Siu Ling Hui

Close up of the crust of the ciabatta loaf. Image: © Siu Ling Hui
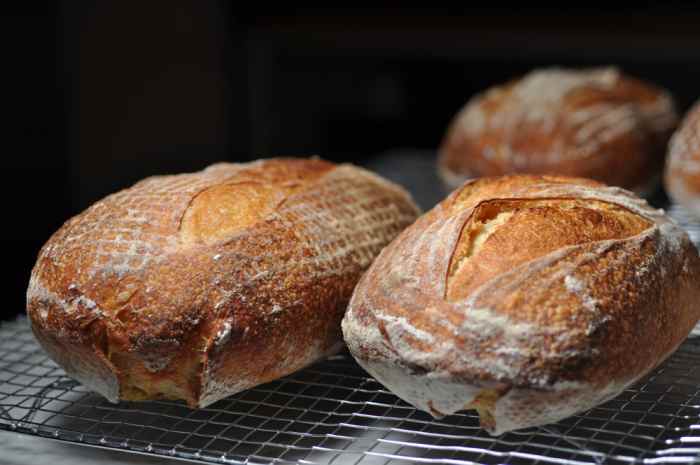
Pain Cordon De Bourgogne
In one of the bread baking groups that I belong to on Facebook, we have a Bread of the Month. The Pain Cordon De Bourgogne was the nominated bread for September 2014, following a recipe on Freerk's blog on The Fresh Loaf.
This distinctive appearance of this bread has an interesting history that dates back to the Crusades. Monks of a religious order of the Minor Brothers of St Francis Of Assisi wore a simple cord around their robes as a symbol of poverty. As such they were known as Cordeliers.
The story goes that they used the cord to mark the breads they made - and tied the cord around the bread during proofing. The cord left the distinctive mark which eventually was replaced by a dough "cord" around the dough.
Apart from the attractive appearance, it's a lovely bread flavour-wise as well. The liquid content includes buttermilk and the bread has a rich sweet fragrance.
Pain Cordon de Bourgogne. The dough "cord" naturally "scores" the bread. Image: © Siu Ling Hui
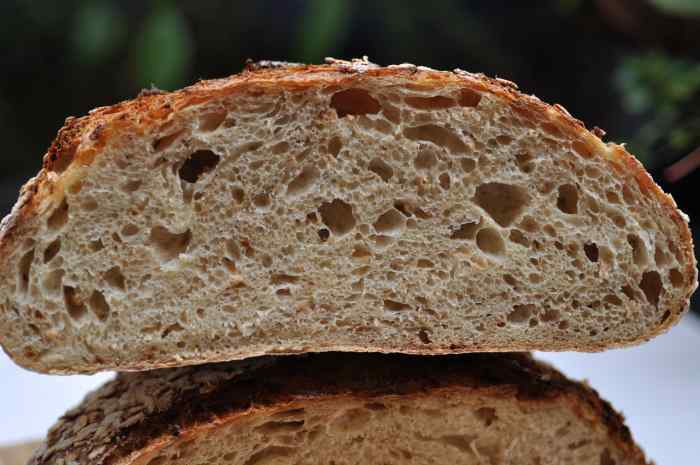
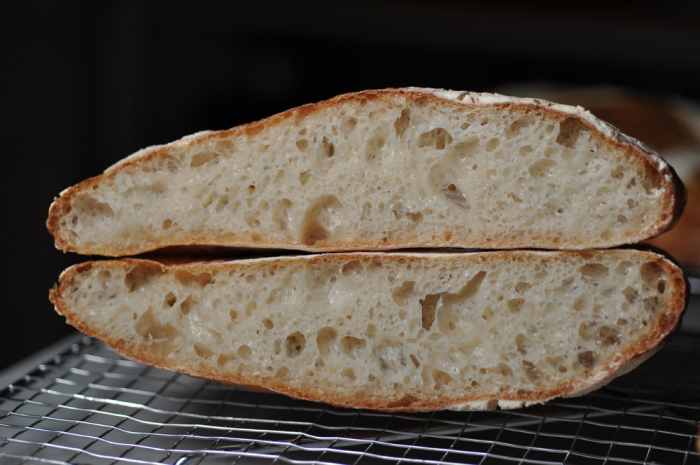
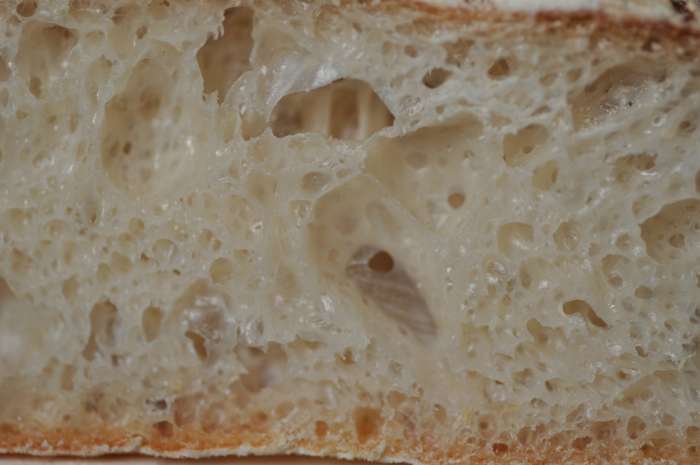
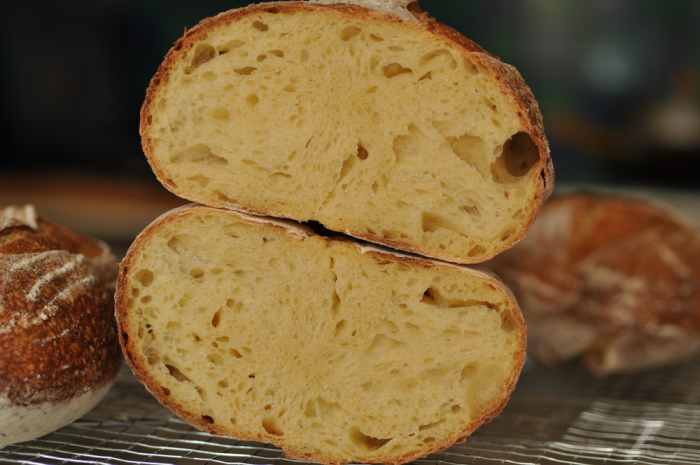
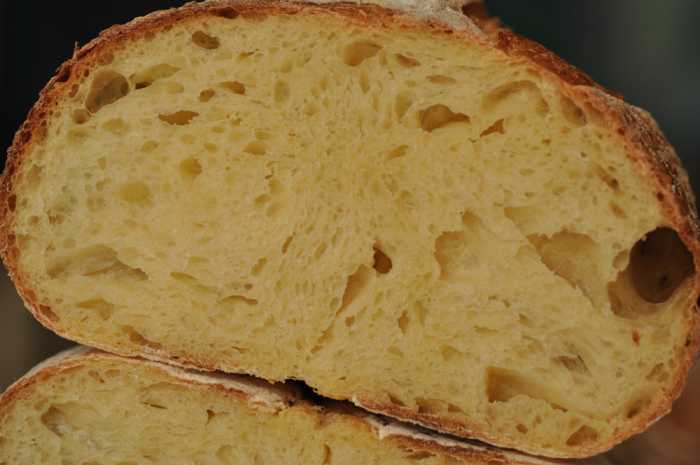
Crumb of the Pain Cordon de Bourgogne. Image: © Siu Ling Hui
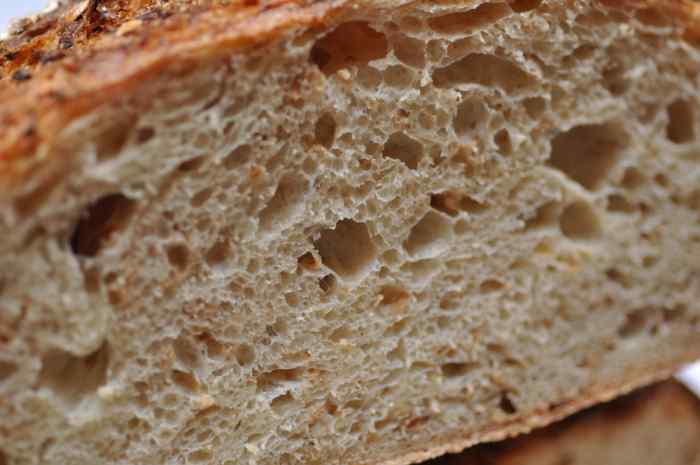
A close up view of the crumb of the Pain Cordon de Bourgogne. Image: © Siu Ling Hui
A closer view of the "cord" and crust of the Pain Cordon de Bourgogne. Image: © Siu Ling Hui
Pain de Romarin (Rosemary Bread)
I am a member of online bread group which has provided great learning and sharing of experiences. The group has a Bread of the Month recipe where members all bake the same bread. For November 2014, the bread was a sourdough bread infused with chopped fresh rosemary. It's an amazing bread and the whole house is filled with the scent of rosemary and freshly baked bread.
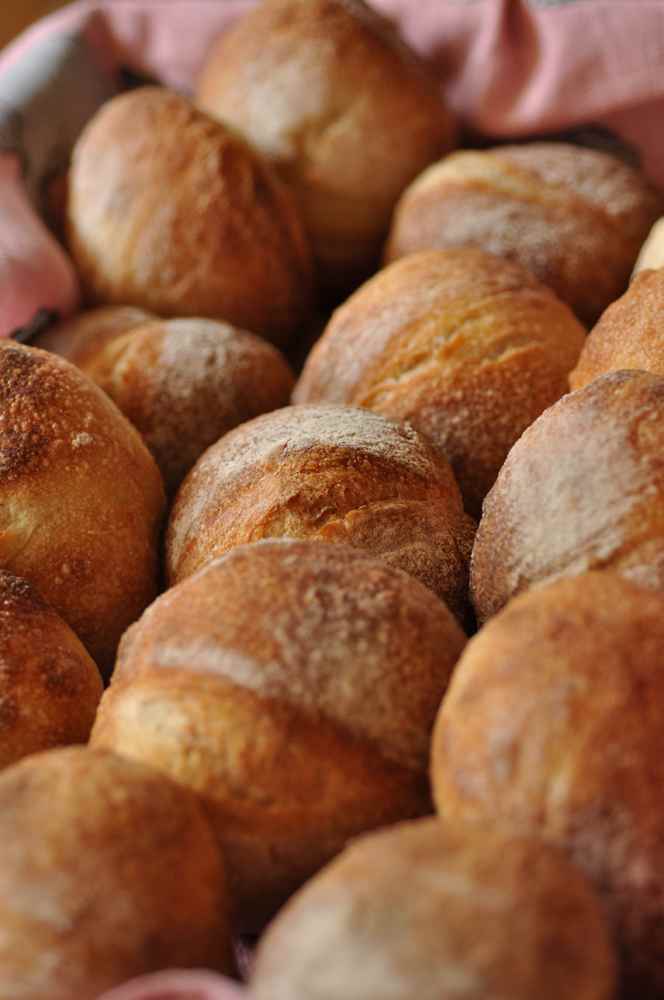
I made up some rosemary buns as well for use with sumac lamb burgers.
Rosemary Bread and Buns
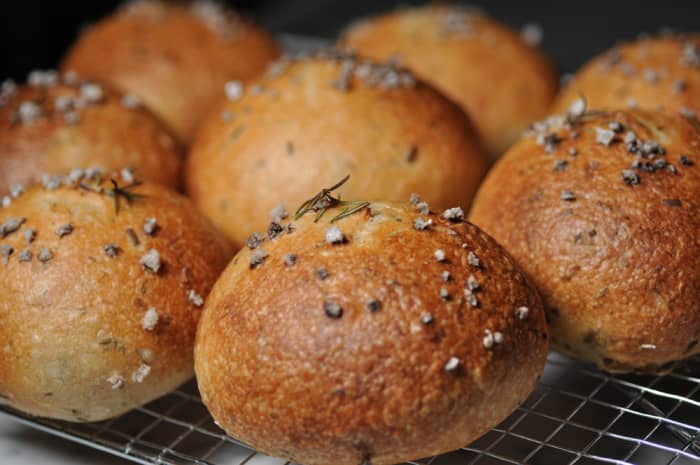
Rosemary Buns. Image: © Siu Ling Hui
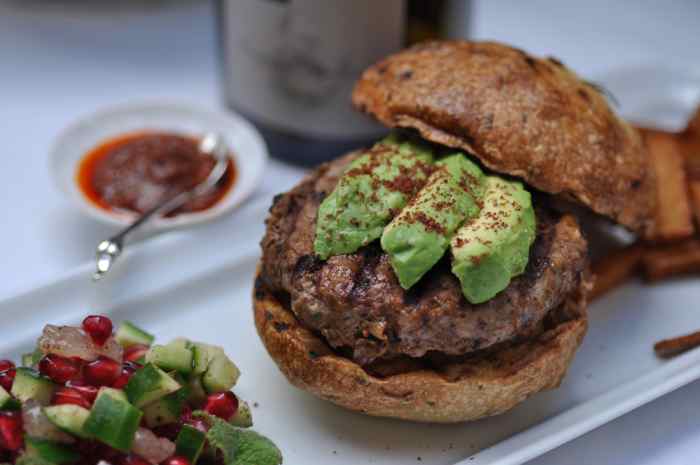
Sumac Lamb Burger on Rosemary Buns. Accompanied with pomegranate, cucumber, lemon and mint salad; home made chips; and harissa. Image: © Siu Ling Hui
Rosemary Bread Image: © Siu Ling Hui

Crumb of Rosemary Bread Image: © Siu Ling Hui
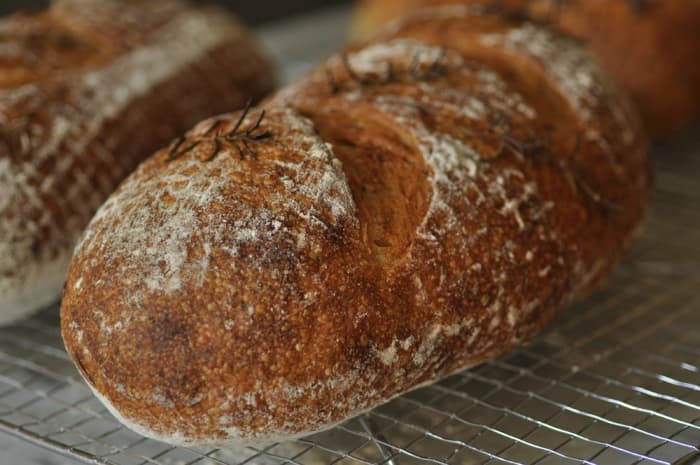
Pane Sardegna
Semola features in many of the regional breads in the south of Italy. On the face of it, the differences appear to be in the percentage of semola used. With the IGP (geographically protected labelling) Pane Altamura of Puglia, there are specific varieties of durum wheat required for its production, the water quality etc.
Melbourne-based Sardinian chef Pietro Porcu had told me about the semola bread in Sardegna. I came across a recipe for Pane Sardegna which comprised 80% semola. So this is my rendition of Pane Sardegna using a lievito madre (essentially a very stiff wild yeast starter made with the strong Manitoba flour).
The dough itself is made with 100% semola. The remaining 20% white flour is represented in the Manitoba flour in the lievito madre.
Pane Sardegna 80% semola rimacinata, 70% hydration. Image: © Siu Ling Hui
Pane Sardegna. Image: © Siu Ling Hui
Crumb of my Pane Sardegna. Image: © Siu Ling Hui
A closer look at the crumb of my Pane Sardegna. Image: © Siu Ling Hui
Pistolets
Pistolets are Belgian buns. I used a recipe from a baker friend. It involves cold (in refrigerator) overnight fermentation. Once the buns are shaped, they are pressed down the centre with a dowel and flipped over for a short final proof. Just before baking, they are flipped over again and baked with a lot of steam in the oven.
Pistolets. Image: © Siu Ling Hui
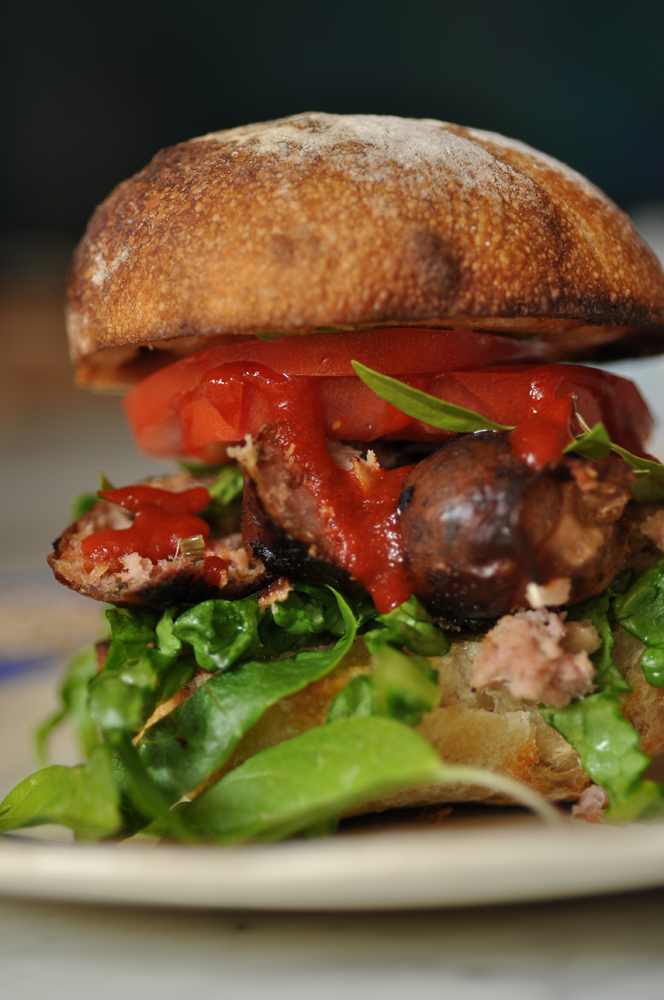
Pistolet filled with Laotian sausage, cos lettuce, tomatoes, Thai basil with a drizzle of Sriracha sauce. Image: © Siu Ling Hui
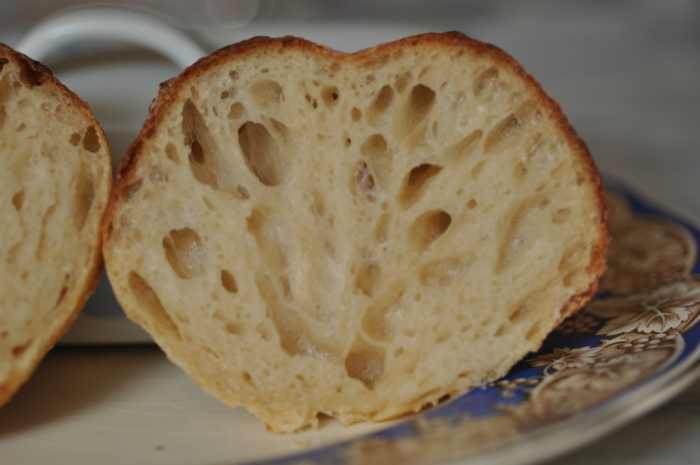
Crumb of pistolet Image: © Siu Ling Hui
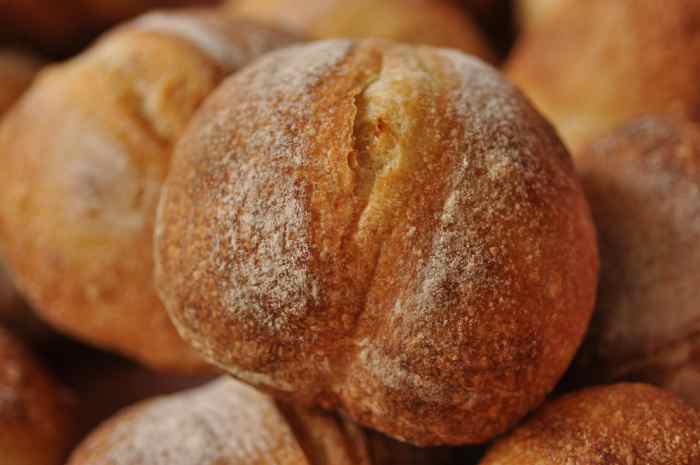
Pistolet with the characteristic "split" across the centre. Image: © Siu Ling Hui
Spinach, Ricotta, Feta Bread "Wreath"
I made this for our annual neighbourhood party. A simple white bread dough at 68% hydration is rolled and stretched out into rectangle. The filling of spinach, ricotta, feta, caramelised onions and garlic, freshly grated nutmeg, salt and black pepper and a whole beaten egg is placed in a column at the long edge of the rectangle. This is rolled over to just cover the filling—about half the rectangle is left. This section of the rectangle is cut into strips. These strips are plaited and rolled over the dough to create a decorative effect.
This savoury bread wreath has been a consistent hit with friends.
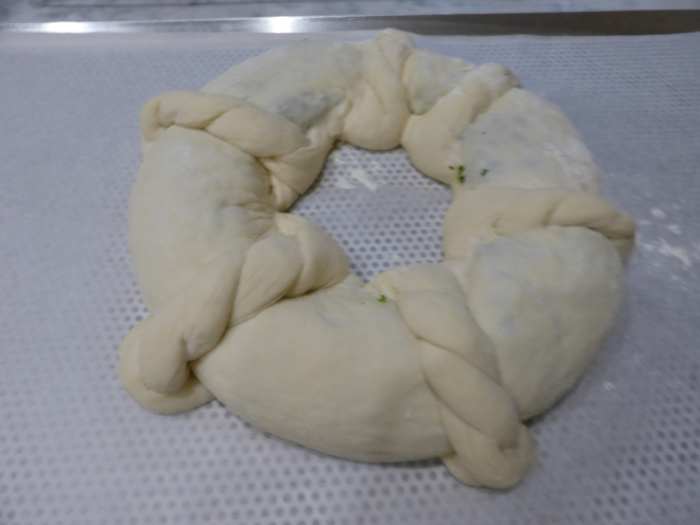
Spinach, ricotta, fetta bread wreath before baking. Image: © Siu Ling Hui
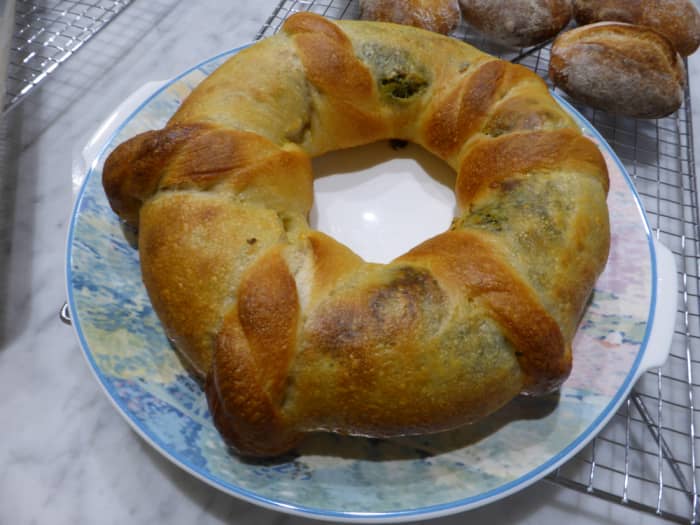
Spinach, ricotta, fetta bread wreath ready to serve. Image: © Siu Ling Hui
Lard, Garlic, and Rosemary Bread
I love lard. It adds a fragrance and flavour that is quite unmatchable.
Years ago, I had a lard bread complete with lardy bits through it at my favourite Sardinian restaurant. Owner/Chef Pietro Porcu said it was called "Ciccioli" bread. The word "ciccioli" means the lard 'cracklings' in Sardinian dialect (or maybe it is the same term throughout Italy?).
I happened to get hold of some beautiful back fat from Berkshire pork. I used the lard extracted from this back fat and added some of the crackling bits as well into this bread. I also added slow roasted garlic and rosemary. It's beautiful bread for sandwiches.
Ingredients in Baker's Percentages
- 30% semola
- 70% unbleached bread flour
- 20% lievito madre (stiff starter at 42% hydration)
- 75% water
- 7.5% lard
- 2% salt
- 2 bulbs of slow roasted garlic
- generous amount of chopped fresh rosemary
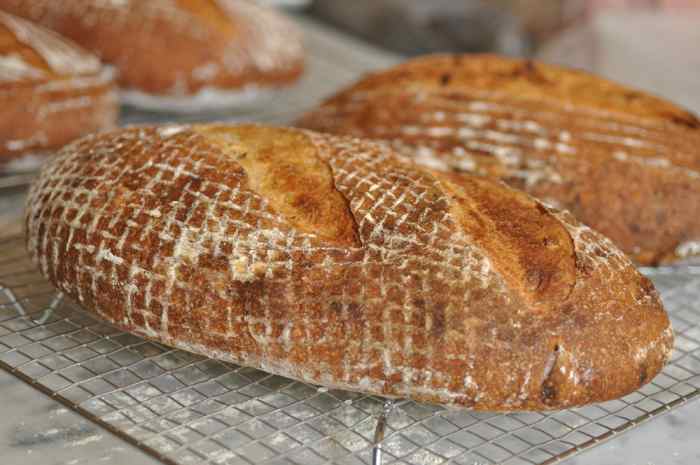
One of the loaves of lard, garlic and rosemary bread. Image: © Siu Ling Hui
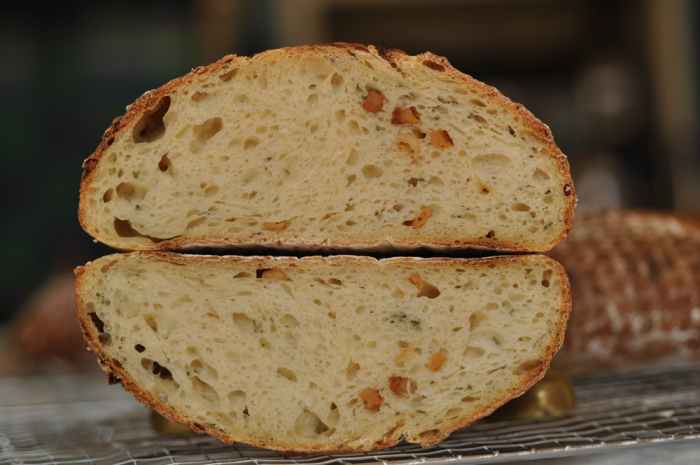
Cross section of one of the lard, garlic and rosemary loaves. Image: © Siu Ling Hui
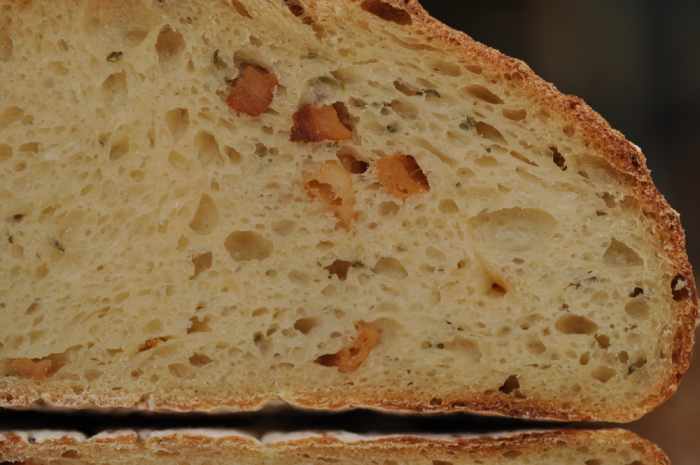
A close up of the crumb of the lard, garlic and rosemary bread. Image: © Siu Ling Hui
Comments
Foodstuff (author) from Australia on April 04, 2018:
Hi Bethany, Sorry but the structure of the webpage doesn't allow for a table of contents.
Bethany Halbert from West Virginia, USA on March 29, 2018:
This looks AMAZING! The photos are beautiful. But it has so much content it's almost overwhelming... do you have a table of content anywhere so I could find specific tips or recipes without looking at the entire hub? I liked your tip for measuring the sourdough starter with a rubber band. I'm always losing track of how much mine has risen.
Liza from USA on November 10, 2017:
This is incredible! I always wanted to make my own bread.
MarloByDesign from United States on May 20, 2017:
I love your bakery pictures and now I am craving some homemade bread! Awesome Hub.
Lena Durante from San Francisco Bay Area on May 02, 2017:
What a thorough article! I killed my last sourdough starter with neglect when I went on vacation a year ago. I guess it's about time to start a new one!
Foodstuff (author) from Australia on January 05, 2016:
Thanks, raguett
Meagan Elaine on January 05, 2016:
love making bread thanks for great hub......
Foodstuff (author) from Australia on December 31, 2015:
peachpurple, I am not clear as to what you are referring to. But you don't leave dough to rise for a week - it would be over-fermented. Also, sourdough is "wild yeast" which is different from commercial yeast. With the sourdough starter, you would want to "refresh" it (ie feed it with flour and water) a few hours before using it.
peachy from Home Sweet Home on December 31, 2015:
does it means that the yeast had to be left to rise for a week?
Foodstuff (author) from Australia on August 16, 2015:
Thanks, mattdigiulio
mattdigiulio from Los Angeles on August 16, 2015:
Those rosemary buns with lamb burgers -- oh momma.
This is an incredible hub! Full of great information. I'm bookmarking it to use in the future when I start collecting my ingredients!! Voting up, interesting, awesome, beautiful.
Foodstuff (author) from Australia on April 13, 2013:
Even structural shaping is not as easy as it looks. In Bouchon Bakery book they recommend making up a piece of dough just to practice shaping. I can't be bothered to do that....just use each baking session as practice. :)
Leah Wells-Marshburn from West Virginia on April 13, 2013:
I was afraid you were going to say that!
Foodstuff (author) from Australia on April 13, 2013:
Glad you are finding it useful. The lame will help but slashing is definitely an art! Practice, practice, practice! I still haven't got it right. Wouldn't have thought that cutting a few lines would be so hard. :)
Leah Wells-Marshburn from West Virginia on April 13, 2013:
Wow, what a hub! There is a ton of information in here! The pictures of the bakery are just absolutely beautiful. I can empathize with you on the bread slashing thing; I am terrible at it. I am ordering a lame from King Arthur Flour. It looks like the one pictured. I hope it helps with my slashing art. My knives are sharp, but I think they're too thick to do what I need them to do. When I go to slice my risen dough, the knives kind of tug rather than slice. Have you experienced anything like that? Do you think it is the thickness of the knives?
Thank you for such a thorough article. Tons of useful information!