How to Make Danish Pastry Dough From Scratch
Baking is one of my favorite pastimes. I enjoy baking cookies, cakes, breads, pies, muffins, cupcakes, and much more.
Making Danish pastry dough is a bit time-consuming, but you will be very pleased with the results.
What Is Danish Pastry?
Danish pastry is a multilayered, laminated sweet pastry in the viennoiserie tradition. It consists of yeast-leavened dough and fat, such as butter. Delicate and buttery, it reminds me French pastries like croissants and brioche.
The Process of Making the Dough
The process is a bit time-consuming, as it requires rolling, chilling, shaping, and raising before the Danish ready to be baked in the oven. As a self-taught baker, I learned that patience is a virtue. The best advice I can give you is to make sure to follow the directions exactly.
How to Make and Shape the Danish?
One of the special features of Danish pastry is the variety of shapes you can give the dough. Another is the wide variety of luscious fillings you can use. If you're planning to bake after the final chilling, take the dough out, roll, and shape to any style you prefer. The dough can also be chilled overnight to bake it the next day. I decided to leave the dough in the fridge and let it chill overnight.
Ingredients
For the sponge:
- 1 1/2 cups warm water
- 1 tablespoon instant yeast
- 1 cup all-purpose flour
For the dough:
- 1 1/2 cups all-purpose flour
- 1 1/4 cups pastry flour
- 1/4 cup sugar
- 1 1/4 cups cold salted butter, cut into pieces
Directions
- Make the sponge: In a mixing bowl, combine the warm water, flour and yeast. Combine the mixture evenly by using a spatula. Let it sit for 5 minutes.
- Transfer the mixture to the stand mixer with a hook attachment. Combine the all-purpose flour, pastry flour, half of the butter, and sugar. Mix using a low speed.
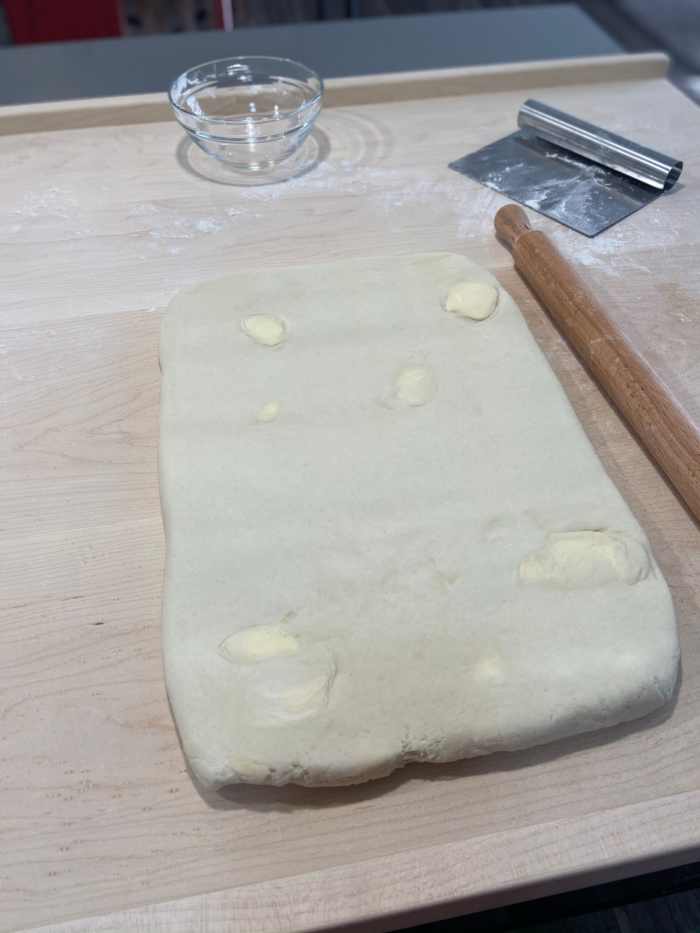
- Continue adding the remaining butter to the bowl and increase the speed to medium for 2 minutes or until the mixture forms a dough. (You'll notice there are chunks of butter in the dough. This is good! The butter chunks help make the pastry flaky).
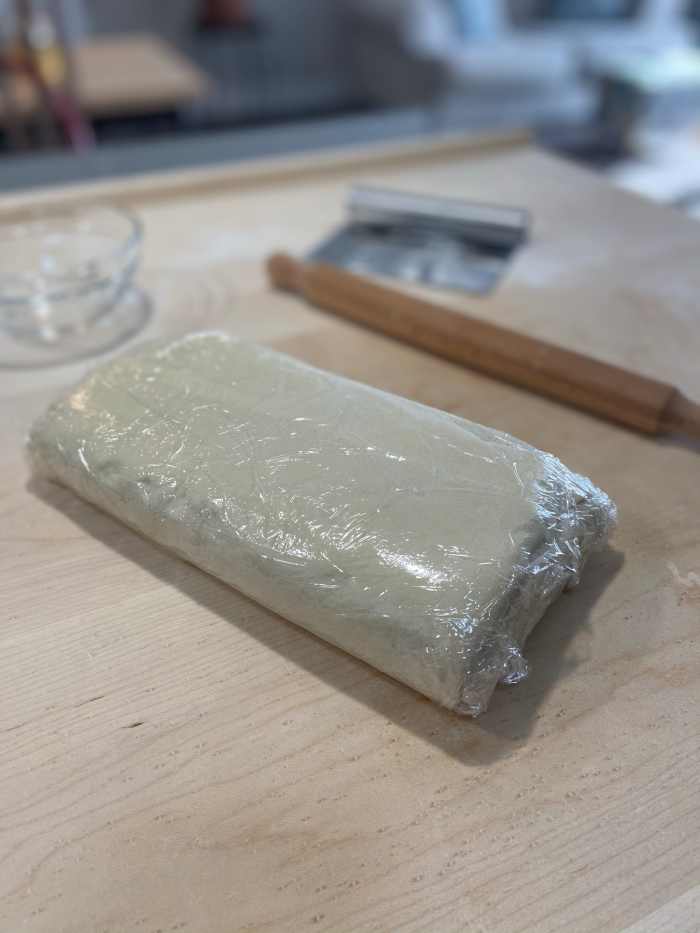
- Transfer the dough from the mixer to a bowl. Cover the bowl with cling wrap and let it rest for 30 minutes before putting it in the fridge for 2 hours.
- After the dough has chilled for 2 hours, prepare a lightly floured board. Turn the dough out and dust with a little flour. Roll the dough to a rectangle. Bring two short ends of the dough to meet in the center. Then, fold the dough in half at the point where they meet (see photo below). Wrap dough with cling wrap and chill again in the fridge for 2 hours.
- Take the dough out and roll it again into a rectangle, turn the dough over and fold it into thirds (see photo below). Wrap dough with cling wrap and chill for 2 hours. Repeat the same step one more time; wrap and chill another 2 hours (or overnight).
- After 2 hours (or the next day), take out the dough and make the Danish. It can be a twist, swirl, or any shape that you want with your favorite fillings.
Note: Using the dough scraper helped me throughout the process. You might want to have a scraper while rolling and folding the dough process.
Photo Tutorial
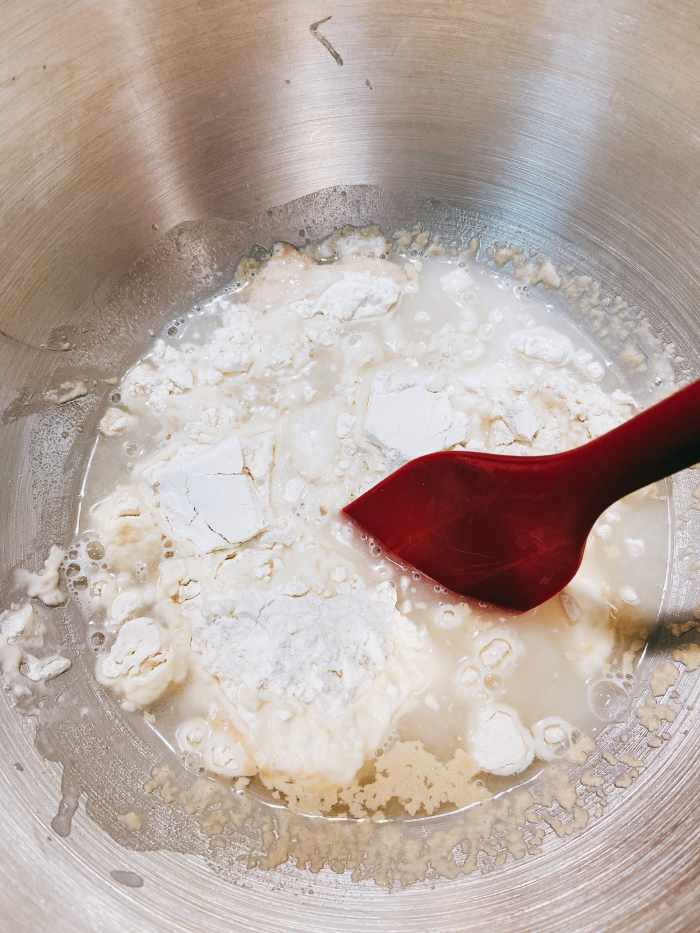
Make the sponge: In a mixing bowl, combine the warm water, flour, and yeast. Combine the mixture evenly by using a spatula. Let it sit for 5 minutes.
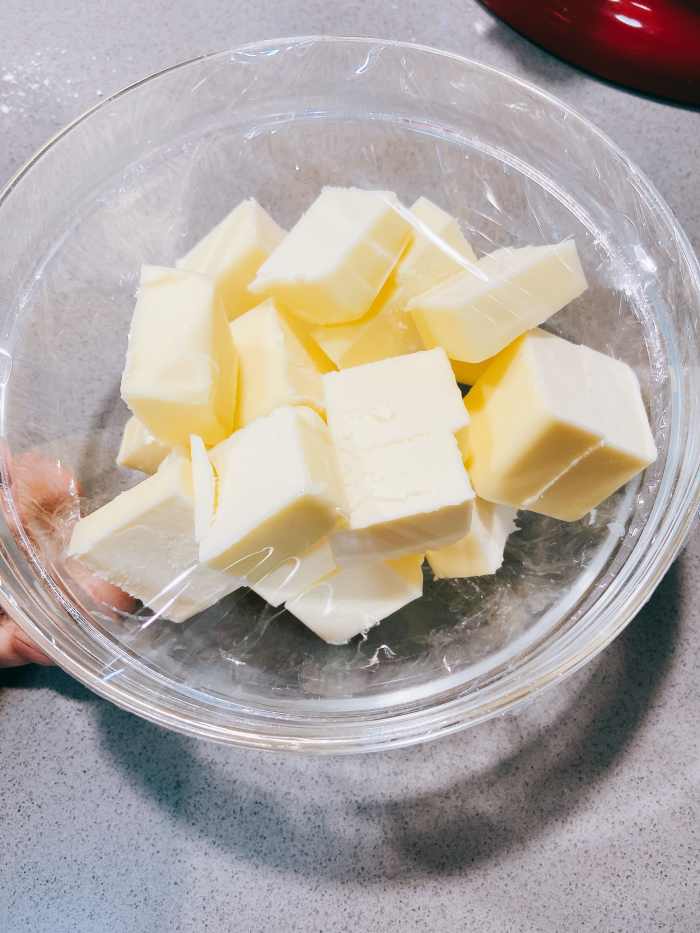
The cold butter. I would recommend cutting the butter into pieces and letting it sit in the fridge until it's ready to add to the mixture.
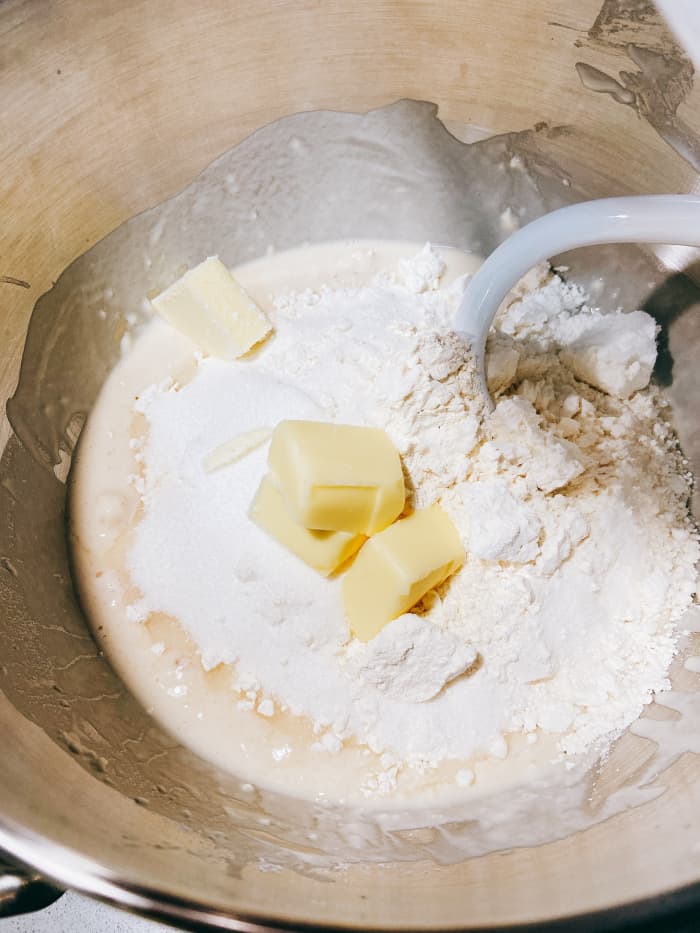
Combine the all-purpose flour, pastry flour, half of the butter, and sugar. At a lower speed, mix.
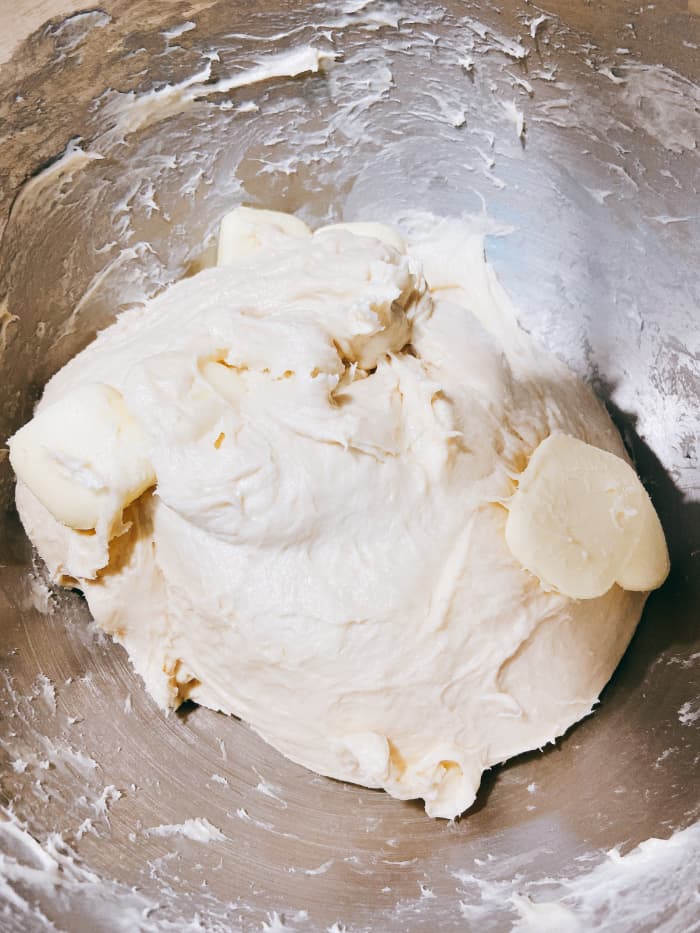
Continue adding the remaining butter to the bowl and increase the speed to medium for 2 minutes or until the mixture forms a dough.
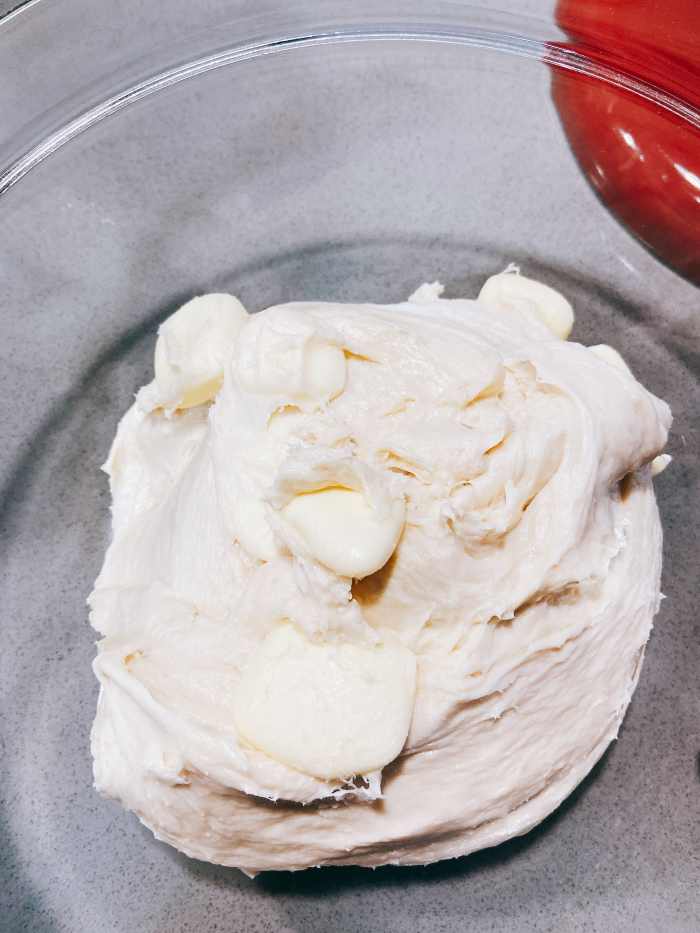
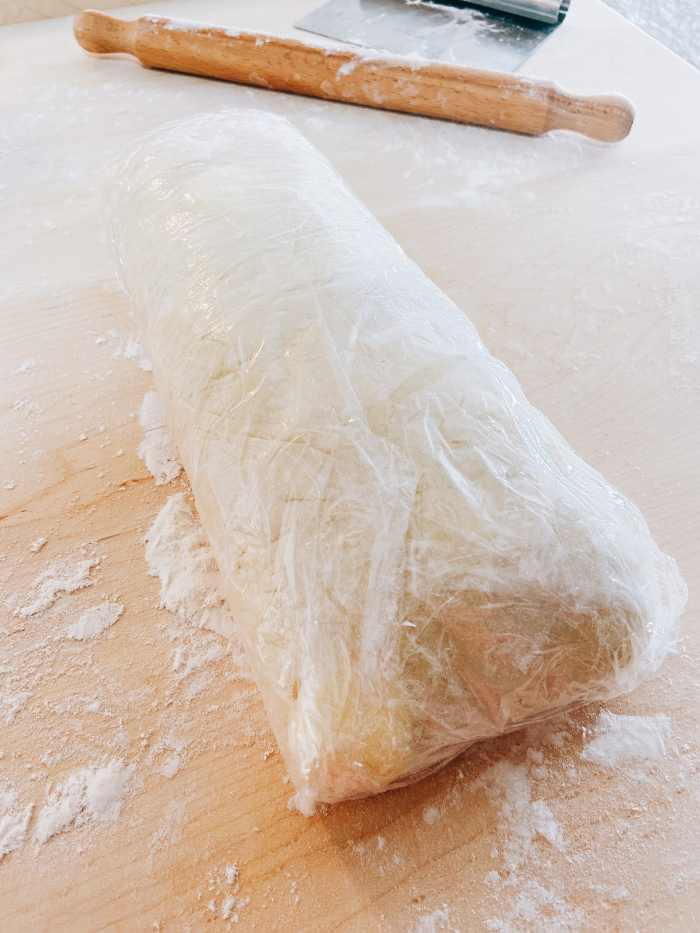
Take the dough out from the mixer and transfer to a bowl. Cover with cling wrap and let it stand for 30 minutes before putting it in the fridge.
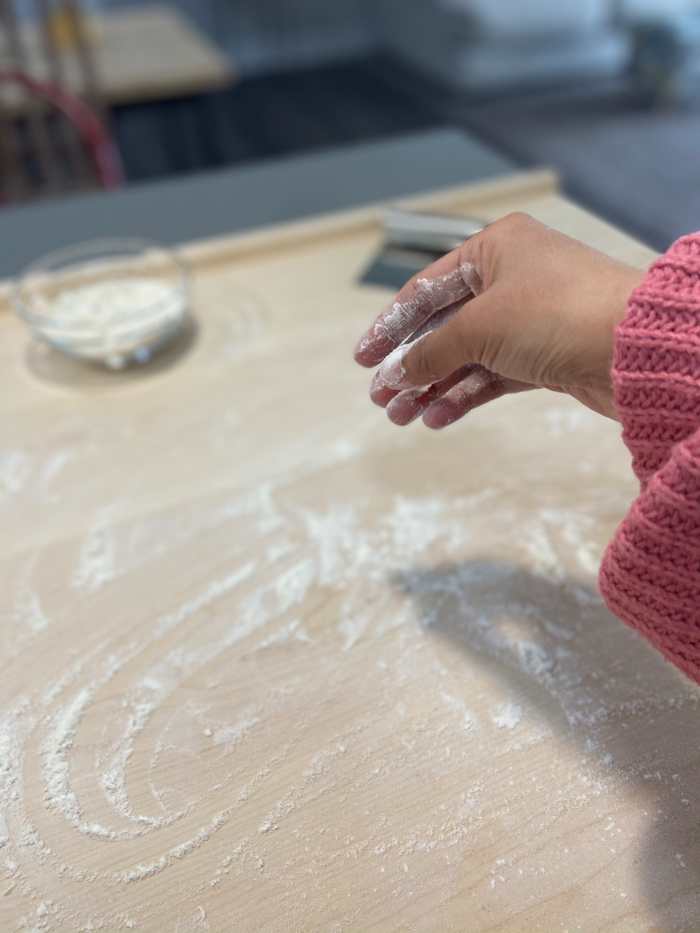
Lightly floured the board before rolling.
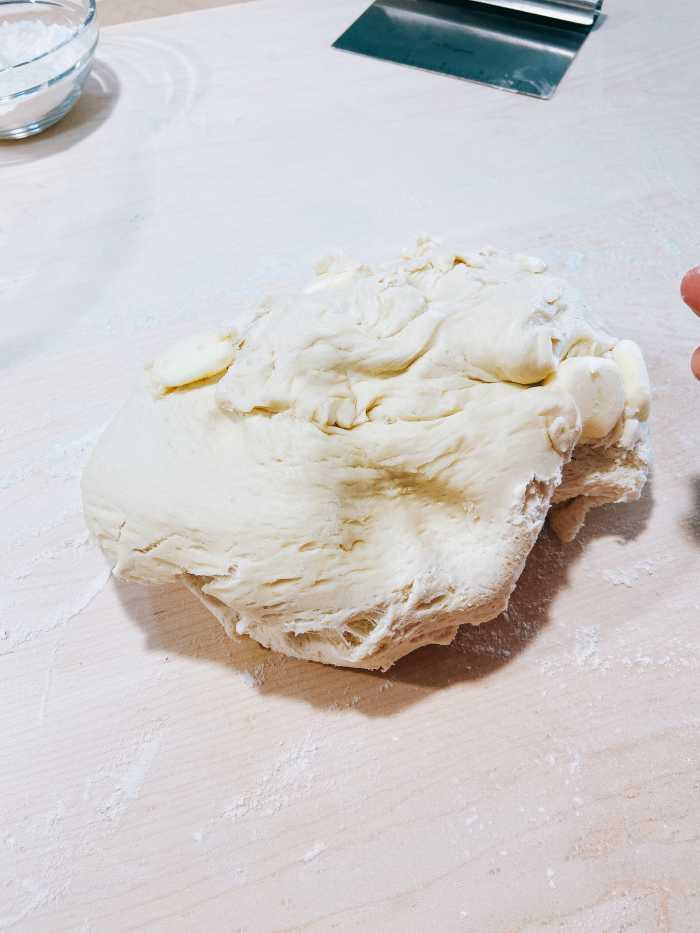
This is how the dough looks for the first chill.
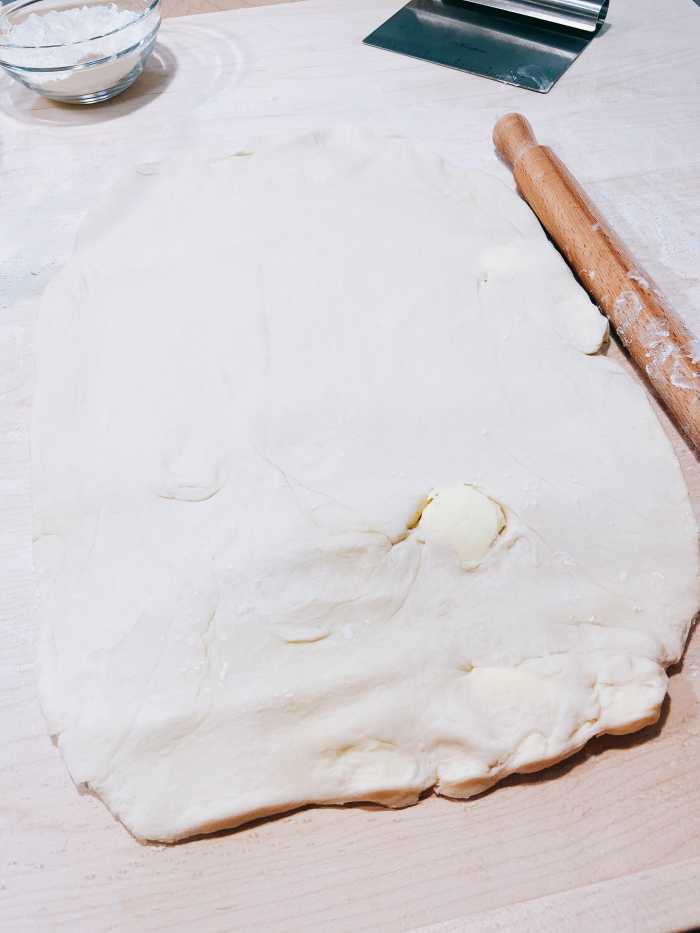
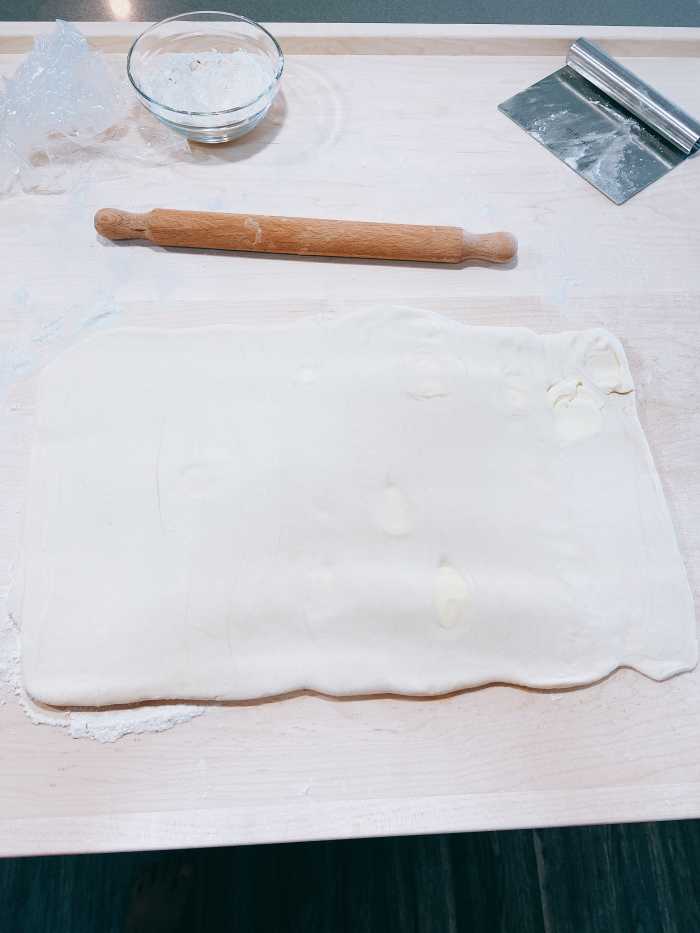
The first stage. Roll the dough into a rectangle.
Bring the two short ends of the dough to meet in the center.
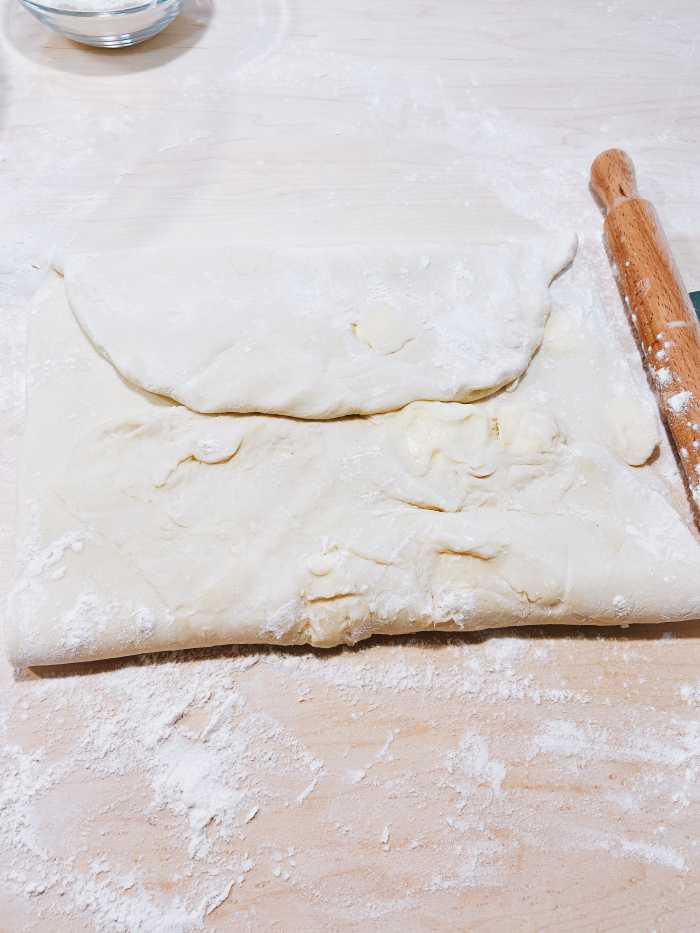
Fold the dough in half at the point where they meet.
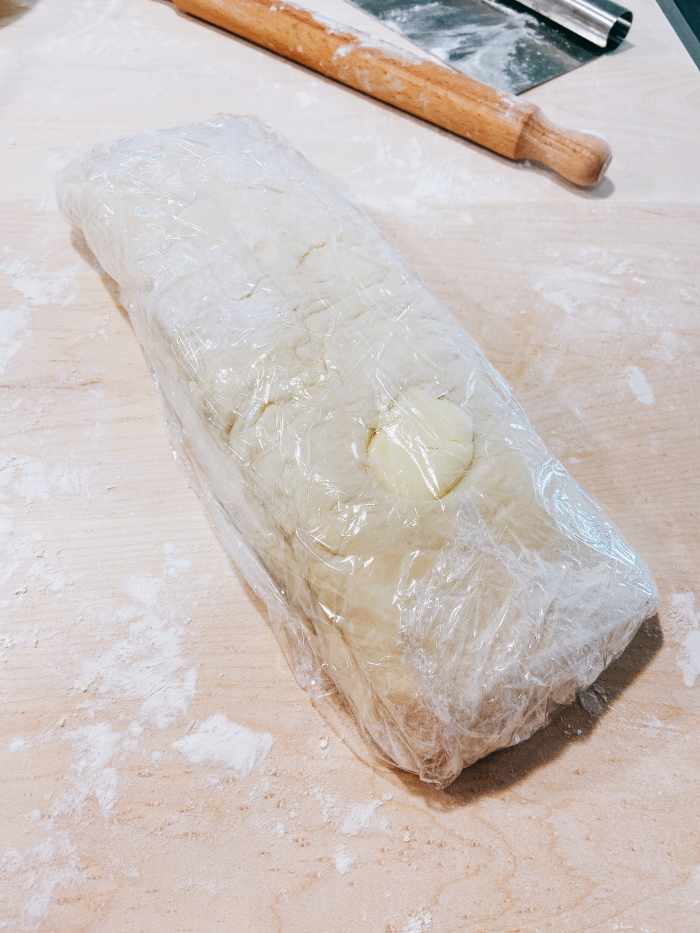
Wrap the dough with cling wrap and chill in the fridge for 2 hours.
After 2 hours, take out the dough out.
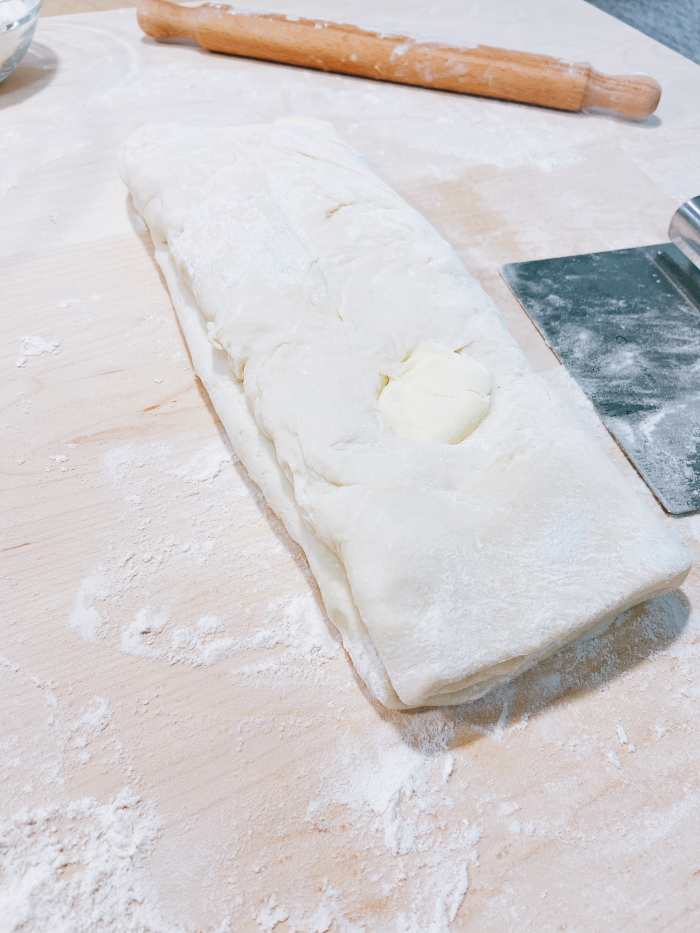
The second stage. Roll it out again into a rectangle.
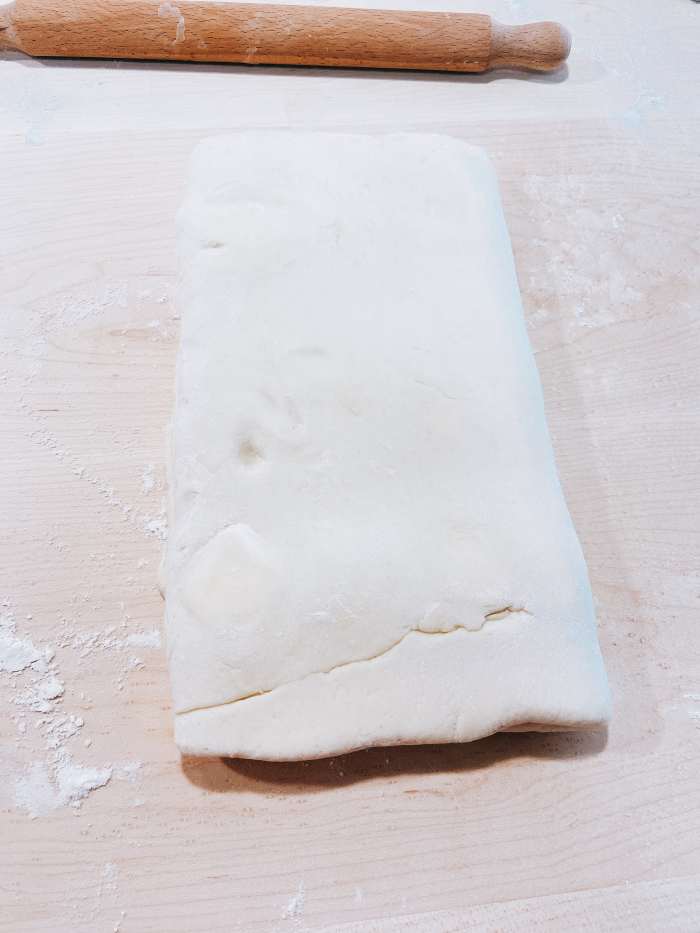
Turn the dough over and fold it into thirds.
Wrap the dough with cling wrap and chill in the fridge for 2 hours.
The third stage. After 2 hours, roll out the dough into a rectangle shape.

Turn the dough over and fold it into thirds.
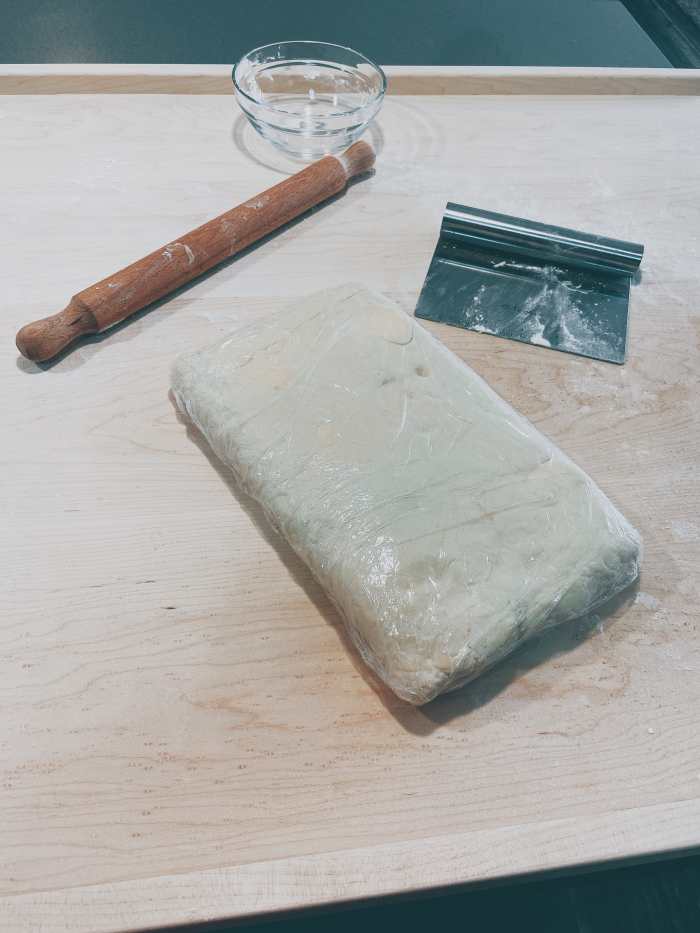
Wrap the dough with cling wrap and chill in the fridge for 2 hours.

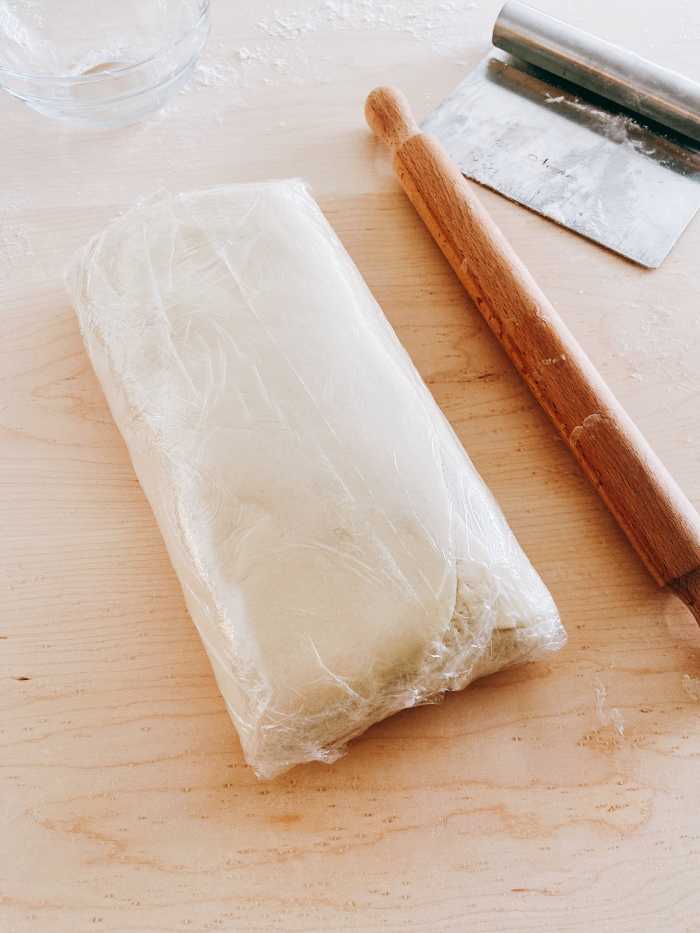
After two hours, the dough pastry should look smooth. I decided to let it sit overnight before making Danish the next day.
© 2020 Liza
Comments
Liza (author) from USA on November 19, 2020:
Thank you for your lovely comment, Liz. I really appreciated it.
Liz Westwood from UK on November 19, 2020:
I am in awe of your baking skills. The results always look so professional. This is a great step by step guide.
Liza (author) from USA on November 16, 2020:
Hi Chrish, it's normal to feel worried about doing something that you're not used to. I was like that for sure :) However, I believe if you keep practicing, you will see the result. I hope you will give it a chance. Happy Baking!
Liza (author) from USA on November 16, 2020:
You're welcome, Peggy, and thanks for your lovely comment. My experience of making a different type of pastries has improved my skills. I enjoy the learning and the practice of making the Danish dough pastry though it took a while before I can achieve the result I want.
Chrish Canosa from Manila Philippines on November 16, 2020:
Goodness it looks so freaking good!!! Making dough always scared me, wether it's dry it's too wet :'( swear i followed the instructions. I'll give this a try ;-) to count another mistake? Will see
Peggy Woods from Houston, Texas on November 15, 2020:
Baking can be so much fun. Obviously, with recipes such as this, you must be patient and allow a lot of time to produce the final product. Thanks for the tutorial on how to make this Danish pastry dough.
Liza (author) from USA on November 15, 2020:
I'm sure everyone can make this. It's doable, Flourish. I was so happy with how the dough pastry turns out after spending some time in the kitchen. As usual, homemade baked goods are always my favorite things to do.
FlourishAnyway from USA on November 15, 2020:
This does make the whole process seem like something I could pull off. I love making homemade baked items but have never made this!
Liza (author) from USA on November 15, 2020:
Homemade pastry is always the best. I had a great time making one at home. Surprisingly, I enjoyed the time I have in the kitchen though I spent almost half a day to achieve the perfect dough pastry. Next, I'm thinking of using this pastry dough to make delicious Danish for breakfast.
Liza (author) from USA on November 15, 2020:
That's great, let me know how it turns out for you :) Happy Baking!
Sp Greaney from Ireland on November 15, 2020:
This looks very doable and the instructions are good. I'm guilty of taking the shortcut and just buying the pastry.
What Art on November 15, 2020:
I am going to try today. Thanks very much. :)