How to Make and Use 'Choi Poh' (Chinese Sweet-Salty Preserved Radish)
Foodstuff is a freelance food writer who has been exploring the art of fermentation. Traditional Chinese preserves is her latest project.

Choi Poh Omelette: a much loved home-style omelette with sweet salty preserved radish.
Copyright 2017 Siu Ling Hui
Chinese Sweet-Salty Preserved Radish Recipe
If you’ve ever wandered through the aisles of Asian food stores, you would have seen a huge range of packets and tins of dried and preserved vegetables. They are not exactly visually attractive with many being dull brown in colour. So what’s the appeal?
Preserved vegetables have been pantry essentials in Chinese households. The tradition of preserving all sorts of vegetables is centuries old. There are literally hundreds of types of traditional Chinese preserved vegetables. Different regions have their specialties. For example, the Sichuan region is renowned for its chilli-coated preserved stem mustard, made by drying, pressing and salting a knobbly stemmed variety of mustard greens. They may be simply dried and rehydrated when required. For example, dried lotus roots are a good substitute for the fresh variety when making lotus root and pork bone soup.
More often, the vegetables are fermented in a number of ways. This results in the complete transformation of the flavour and texture of the underlying vegetable. By combining any one of these preserved vegetables with meat, eggs, noodles or other basic ingredients, you get a uniquely flavoured dish. These types of dishes are the ultimate Chinese home-style comfort food.
Chinese preserved vegetables are cheap as chips. However, due to increasing concerns about use of chemicals and preservatives in commercially produced preserved vegetables, I have decided to experiment with making my favourite preserved vegetables.

A small range of Chinese preserved vegetables at my local Asian food store. Larger stores would have a much greater selection.
Copyright 2017 Siu Ling Hui
What Is Choi Poh? How Is It Used?
I am starting this series on home-made preserved Chinese vegetables with a universal favourite: 'choi poh', the Cantonese name for a sweet-salty preserved radish (daikon). A choi poh omelette is the ultimate comfort food in Chinese home cooking. Commonly eaten with congee, it’s great with steamed rice.
Choi poh is also an essential ingredient in many street food dishes. It’s used in Pad Thai, the universally popular Thai fried rice noodle dish. Interestingly, Choi poh seems to work best with rice noodles. It doesn't marry as well with wheat noodles.
If you have choi poh on hand, you can quickly whip up a delicious stir-fried rice vermicelli dish. Just toss in some green leafy vegetables, crack in a couple of eggs and you've got dinner! Choi poh adds crunch and flavour to Char Koay Kak, a Penang hawker favourite of fried radish rice cakes.
A generous mound of choi poh gives a sweet-salty kick to steamed rice cakes known as 'woon chai koh' (literally 'small bowl cake') which is also called 'chwee kueh' in Hokkien. The latter was a great favourite of my late father.
Comparison: Commercial vs. Home-Made Choi Poh
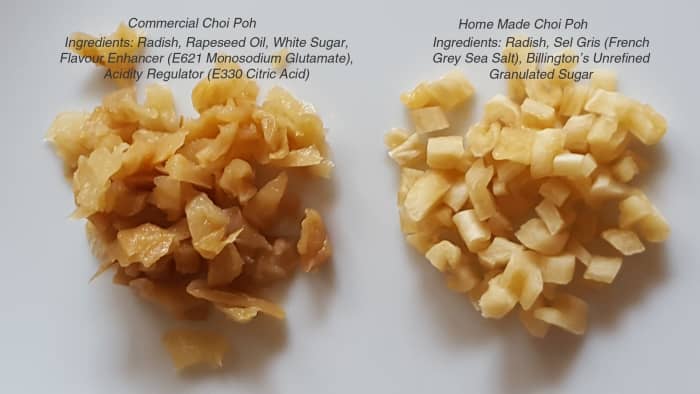
Home Made preserves have no additives or preservatives.
Copyright 2017 Siu Ling Hui
How to Make Choi Poh at Home
In essence, there are 4 stages in the process:
- Stage 1: Getting rid of the water content in the radishes by salting.
- Stage 2: Fermentation.
- Stage 3: Soaking in sugar syrup.
- Stage 4: Final drying.
The amount of radish is significantly reduced during the process. In a recent batch, I started with about 2.5 kilgorams of radishes. After trimming the tops and peeling the radishes, I ended up with just over 2 kilograms of radishes. This was reduced to just under 1.5 kilograms at the end of Stage 1. By the end of Stage 4, I only had 612 grams of preserved radish.
So I would recommend that you make a large batch. Once preserved, the choi poh will keep almost indefinitely. Although you only need small amounts of the preserved radish in a dish, the various choi poh dishes are so delicious that you’ll go through a large quantity in no time at all.
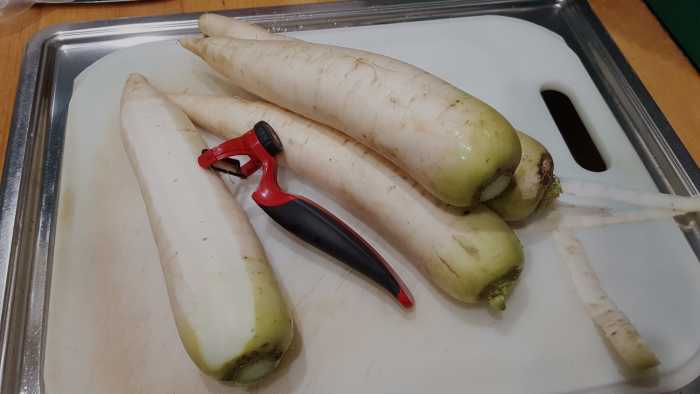
Peel radishes.
Stage 1: Removing Water From Radishes
- Remove the tops of the radishes. (Tip: Try to choose radishes with minimal green tops as the greenish bits are visually off-putting after fermentation. This is more a visual than a flavour issue.)
- Peel the radishes and cut into batons. Place the radish batons into a large glass container. Rub a generous amount of coarse sea salt into the radishes, making sure that all the batons are well-coated with salt.
- Cover the bowl with cling film and leave to stand overnight.
By the next day, the radishes will have exuded much of their water content. They’ll be sitting a large amount of liquid.
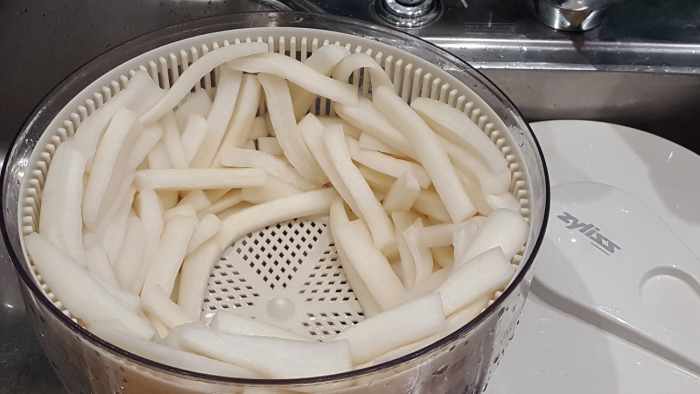
The easiest way to dry rinsed radishes is to use a salad spinner.
Copyright 2017 Siu Ling Hui
Stage 2: Fermentation
Rinse off all the salt. Dry the radish batons. The easiest way to do this is to spin dry the radish baton in a salad spinner.
Copyright 2017 Siu Ling Hui
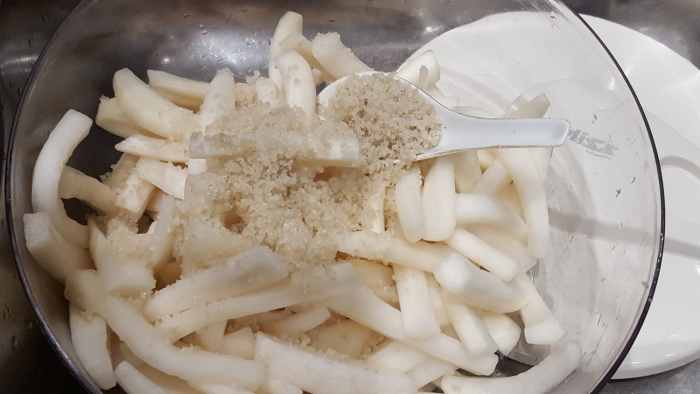
Weigh the Radishes and Add Sea Salt
Weigh the rinsed and dried radishes. Place in a bowl and add coarse sea salt equal to 20% of the weight of the rinsed and dried radishes. Rub the salt into the radishes.
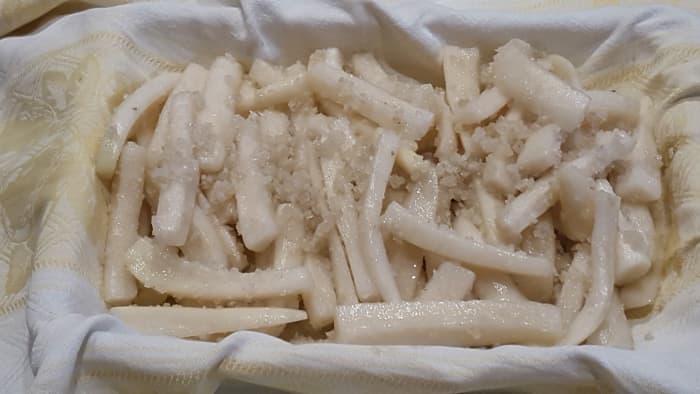


Wrap the Radishes and Add Weight
Place the salted radish batons onto a clean cloth like a tea towel. Wrap the radishes up. Place the radish parcel on a rack and weight it down with a heavy object.
Allow Them to Ferment
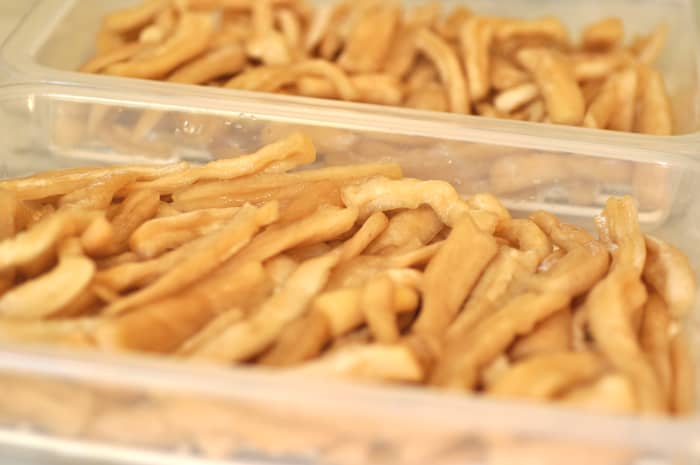
Leave them in a warm place to undergo fermentation. The length of time for fermentation depends on the ambient temperature: the warmer the temperature, the faster the fermentation process. The radishes should be left until it develops a strong 'whiffy fragrance' (not a bad smell; rather the unmistakable smell of fermentation) and the radishes turn a pale brown colour. This ensures maximum flavour development.
When I did my batches, the ambient temperature was about 17°C to 19°C for most of that time. While it did start developing that distinctive 'whiffy' scent after a week, it took 16 days at this temperature to achieve the really pronounced scent and the colour change I wanted.
Additional Tips
My observation over a couple of trials of this process is that it is best to keep it away from direct sunlight. I left one batch next to a window to try to increase the heat exposure. I found that it dried out radishes at the edges of the package too much and probably hindered the fermentation process of those radish batons.
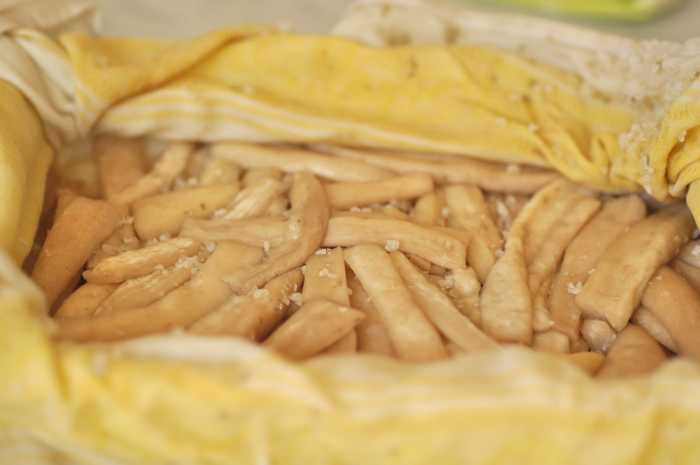
The radish batons will have turned a pale beige brown at the end of fermentation. They will also have quite a strong scent - a pleasant 'whiffiness' as distinct from rotting.
Copyright 2017 Siu Ling Hui
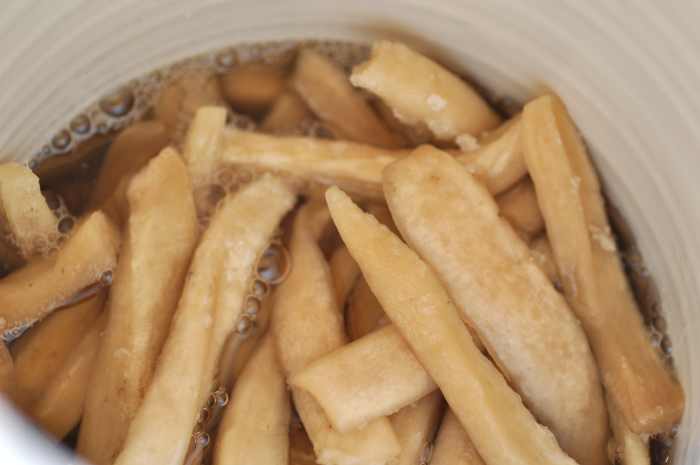
Stage 3: Soaking in Sugar Syrup
Once the radishes have reached the desired level of fermentation, prepare a sugar syrup based on a ratio of 200 grams sugar to 250 grams water.
- Combine sugar and water in a saucepan and bring to the boil, stirring constantly to dissolve all the sugar. Once the syrup comes to the boil, remove from the heat. Set aside to cool completely.
- You need enough syrup to completely submerge the radish batons. With the batch of 1.4 kilograms radishes at the end of Stage 1, I used a sugar syrup made with 600 grams sugar and 750 grams water.
- Place the fermented radish batons (along with the salt coating the batons) into a large non-reactive container e.g. glass or ceramic container. Make sure the radishes are all fully submerged in the syrup. You can weight them down with a plate or use clingfilm pressed against the surface of the syrup.I use an olive brining jar that comes with a weight to keep the radishes submerged in the syrup.
- Leave in a warm place for at least 24 hours. I leave it for up to 2 days.
I use a olive brining jar for soaking the radishes in syrup.
Copyright 2017 Siu Ling Hui

The weighting lid that comes with the olive brining jar keeps the radish batons submerged in the syrup.
Copyright 2017 Siu Ling Hui
Stage 4: Final Drying
- Remove the radishes from the syrup. Discard the syrup. Leave the radishes on racks overnight to drain off excess syrup.
- Dry the radishes in a dehydrator at 35°C for about 8 hours or until completely dry. You want them to be dry but not to a crisp.
- Pack into an air-tight container or bags. I vacuum pack them in small batches (about 50 grams per pack). They will keep indefinitely at room temperature. However, as no preservatives are used, it’s best to refrigerate them once you’ve opened a packet.


Recipe: Choi Poh Omelette
I don’t know anyone who doesn’t love this home-style dish. So simple yet so satisfying. The eggs in a Chinese home-style omelette are cooked firm (rather than creamy as in a French omelette) to a golden brown.
Ingredients
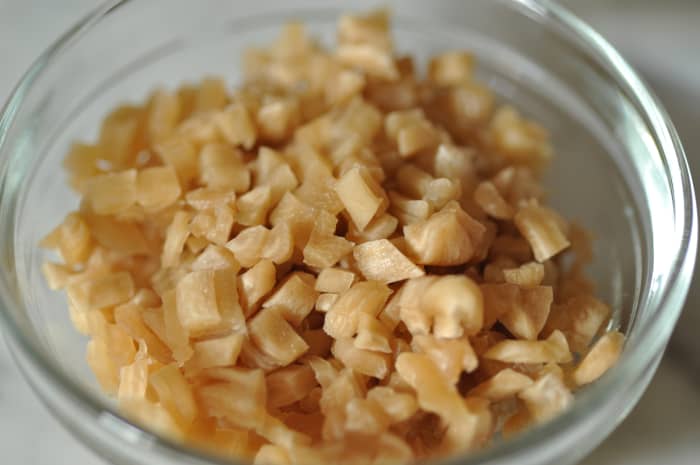
- Use about 10–15 grams minced choi poh for 1 large (65 grams) egg. Do not add any salt as the choi poh is salty.
- For a 2-egg choi poh omelette, coarsely mince about 20–30 grams choi poh.
Instructions
- Whisk 2 eggs thoroughly. Add 1–2 tablespoons water to the eggs to lighten the mixture.
- Season with ground white pepper.
- Heat a wok (or frying pan) to moderately hot. Add enough oil to coat the wok.
- Add the minced choi poh and fry for a few seconds.
- Add the beaten egg. Swirl the egg mixture around the wok to get an even layer and to distribute the choi poh.
- Once the egg mixture is set and the underside is golden brown, flip the omelette over and cook until golden brown.
- Serve immediately with congee or steamed rice.


Variations
- You can also add diced snake beans to the omelette. Just increase the number of eggs.
- Fry the diced snake beans until the beans about 75% cooked through. Then add the choi poh and follow the process in the above recipe.
- You can also add finely sliced chillies if you wish to spice it up a little.


Questions & Answers
Question: Can the choi poh be used in soup? How long should I cook it in soup?
Answer: Yes, choi poh can be used in soup although that is not how it is traditionally used. The preserved vegetable that is normally used in soup (and steamed dishes) is "toong choi". "Toong choi" is preserved Chinese cabbage and I will have an article on how to make it very soon. Anyway, if you were to use choi poh in soup, it doesn't really need to cook for very long. It can be added towards the end of cooking time. However, you can add it at the beginning to maximize the flavour in the soup. Please note that it should be used as a condiment, not as the main ingredient.
Question: What is another option instead of using a dehydrater?
Answer: You could try drying it at a very low temperature (about 35C) in the oven with the door slightly ajar. Alternatively, you could leave it out on wire racks to air dry either indoors or outdoors (subject to weather conditions). The time required will obviously depend on the ambient humidity and temperatures.
Question: I love Choi Poh. But I want to do a spicy version. Do you know how I could make a spicy Choi Poh?
Answer: Traditionally, Choi Poh doesn't come in a spicy version. I think what you may be after is what is known as the Preserved Sichuan Vegetable. That is made from a special variety of mustard greens. Unfortunately, this variety is not readily available in stores. It's on my list to develop a process for making that spicy preserved vegetable. However, my current challenge is to successfully grow that specific variety of mustard greens.
Question: This is happening during the fermentation period. It has been about 10 days over at this keeping this room temperature of 26-28°C. It turned slightly brownish already and the part that worried me is that there is some white stuff developing on the fermented radish. Is it okay?
Answer: There shouldn't be white stuff developing on it. The room temperature is fine. To be on the safe side, I'd get rid of the bits with the white stuff.
Question: Must I soak in the sugar syrup? I am supposed to reduce sugar intake so I am wondering if I can get away without the sugar.
Answer: You probably could side step it but it does change the flavour of the choi poh. Frankly, the sugar syrup soak is not going to end up adding that much sugar to the preserves. Also note that you do not use huge quantities of choi poh in a dish. So my recommendation is to just follow the recipe as it's not going to make that much difference to your sugar intake. You would probably achieve much greater impact on your sugar intake by cutting out the obvious villains like soft drinks, sweets, added sugar into your coffee or tea, etc. Also, read food labels very carefully: you'll be astonished at how much sugar there is in apparently "healthy" foods like low-fat yoghurt!
Question: Is monosodium glutamate pork gluten?
Answer: No. Monosodium glutamate has nothing to do with pork.
Question: Can you confirm that it is indeed 20% salt weight of the radishes after Stage 1 of 1.5kg is 300g of salt?
Answer: If the rinsed and dried weight of your radishes is 1.5kg, you would use 300g salt (i.e. 20% of 1.5kg).
Question: Can I use turnip instead of radish?
Answer: The flavour would be slightly different. Preserved turnip (called "tai thow choi" in Cantonese) is also a very popular Chinese preserved vegetable. It is made in a similar way but the last step of steeping in syrup is omitted.
Question: Where did you buy your olive brining jar?
Answer: From a food and equipment supplies store. With the huge popularity in fermentation these days, you should be able to find it pretty easily in stores specialising in fermentation equipment.
Question: Do you have any idea how this compares to "sunning" instead of fermenting it in a dark place?
Answer: I don't ferment the radishes in a dark place. In fact, they are wrapped and left in a relatively sunny spot. It's only Preserved Tientsin Cabbage that is fermented in a dark place.
Question: How would I store Chinese Sweet-Salty Preserved Radish, either homemade or store-bought versions? Should I refrigerate it?
Answer: I pack mine into vacuum sealed bags. Once opened, it would be fine stored in a cool dry pantry. However, unless your pantry remains cool and dry around the year, it is best to store it in an air-tight container in the fridge.
Comments
Foodstuff (author) from Australia on June 03, 2020:
MiMi, My olive brining jar doesn't have a brand name on it. I found it in a kitchen supplies store. Good places to look around for a similar jar would be Italian supplies stores and stores that specialise in fermentation equipment.
Liza from USA on June 02, 2020:
This is something I definitely would make at home. Pair with steamed white rice. Thank you for the recipe.
MiMi on February 08, 2020:
Do you know the brand name of your olive brining jar?I want the specific one you have.
Foodstuff (author) from Australia on May 11, 2018:
Hi John, Happy to be of help. Enjoy!
John on May 11, 2018:
Thank you very much for this recipe, I am very much looking forward to making it. I was searching for this and had a hard time finding it, so am very grateful to you!
Foodstuff (author) from Australia on April 04, 2018:
Hi Tanya, Yes use weights. 250g water and 200g sugar.
Tanya on April 04, 2018:
200g sugar to 250g water for the syrup is this weighed (both) ? Thanks looks great, my fav ethnic food store closed (well only one near me) so this will help greatly with one ingredient!