Ice Cream and Fruit Cake Recipe
L.M.Reid creates delicious recipes and gives step-by-step instructions with her own photos so you can learn how to make each recipe at home.
Learn how to make this ice cream sponge cake from scratch.
L.M.Reid
Ice Cream Dessert Recipe
This is one of the best dessert recipes I have created. It is easy and fun to make, and it tastes great, too. You can add other ingredients to create your own version. For example, if you have different fruit preferences, you can substitute your favorite fruit. I have included step-by-step instructions with videos and photos so that you can follow the recipe easily.
Ingredients
- 1 (200-gram) packet trifle sponge
- 2 large oranges or 3 satsumas
- 1 (410-gram) tin pineapples
- 100g raspberry jam or jelly
- 2 large bananas
- 1 (1-litre) tub creamy ice cream
- 1 (100-gram) bar chocolate
- 2 (32-gram) bars flake chocolate
- 250 milliliters double or whipping cream
Stage 1: Preparing the Bowl
Add cling film (saran wrap) around the edges of a bowl. Make sure to leave enough room at the top so that once the ingredients have been added you can finish off by wrapping it completely over the top of the cake, too.
Add cling film (saran wrap) around the edges of a bowl. Make sure to leave enough that you can wrap the cake completely at the end.
L.M.Reid
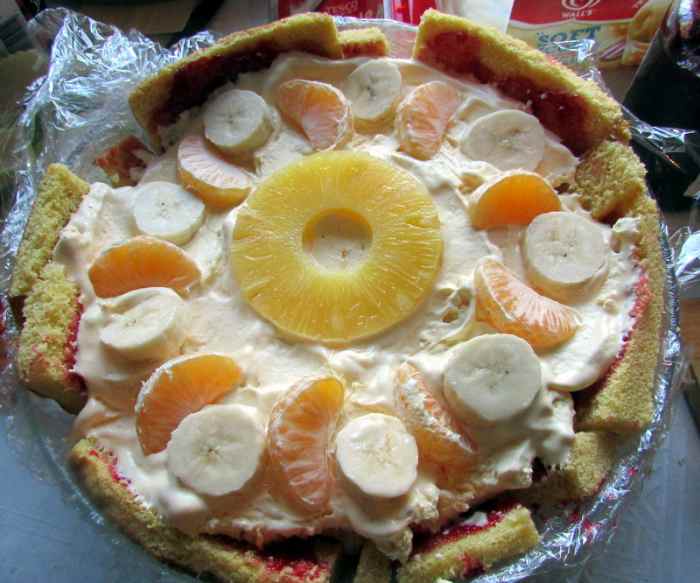
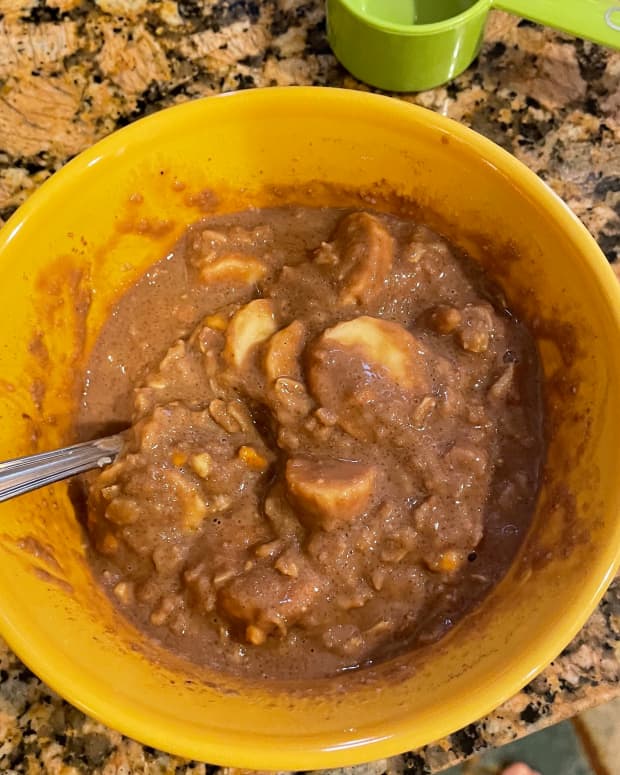
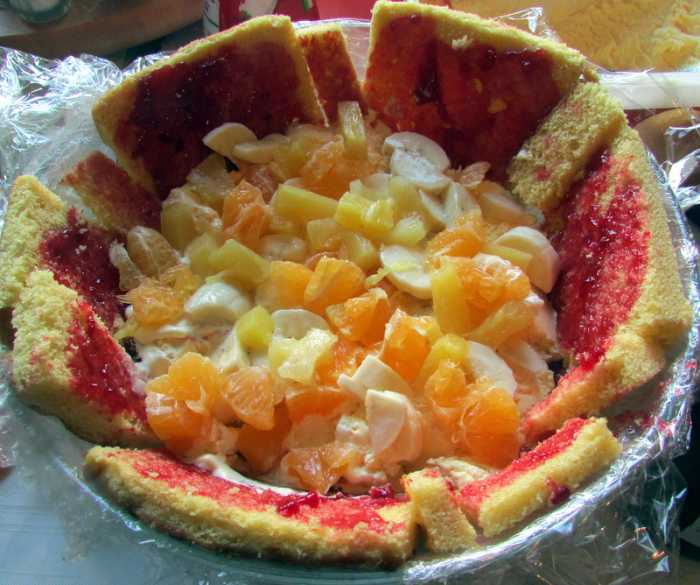
Add another layer of pineapples with some orange segments and banana slices.
L.M.Reid
Stage 2: Building the Cake
- Cut the sponge in half and again in half sideways. This will give you the correct size to fit around the outside of the bowl. Make sure to keep some for the top of the cake too.
- Spread the jam onto the sponge pieces.
- Using the jam side up place the pieces at the bottom of the bowl and then around the sides.
- Put in one whole pineapple slice at the bottom centre and then add smaller pieces of pineapple around that.
- Add ice cream.
- Add another layer of pineapples with some orange segments and banana slices.
- Add some more ice cream.
- Continue to do this until you reach the top.
- Finish off by putting the remainder of the sponge on top of the cake.
- Press down hard to make it all compact.
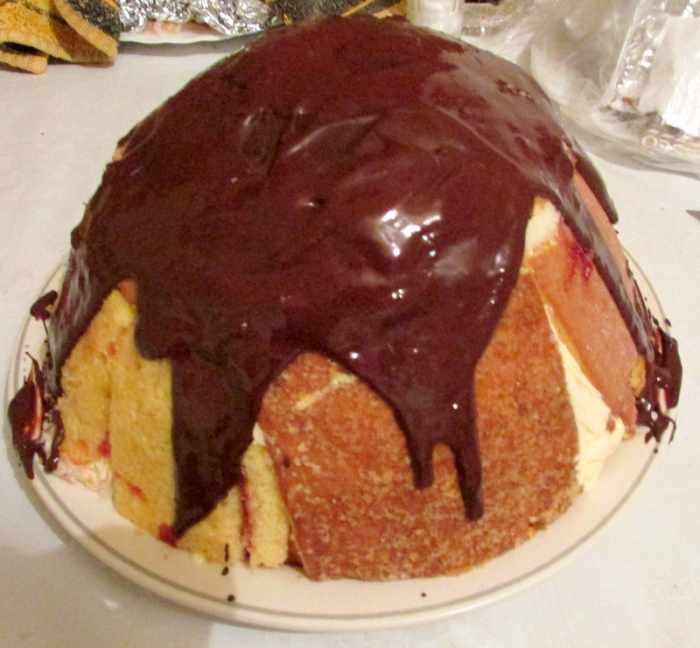
- Pull over the cling film to completely cover the top.
- Put the bowl in the freezer for at least three hours.
This cake can be made weeks in advance because it can stay in the freezer for quite a while until you are ready to eat it.
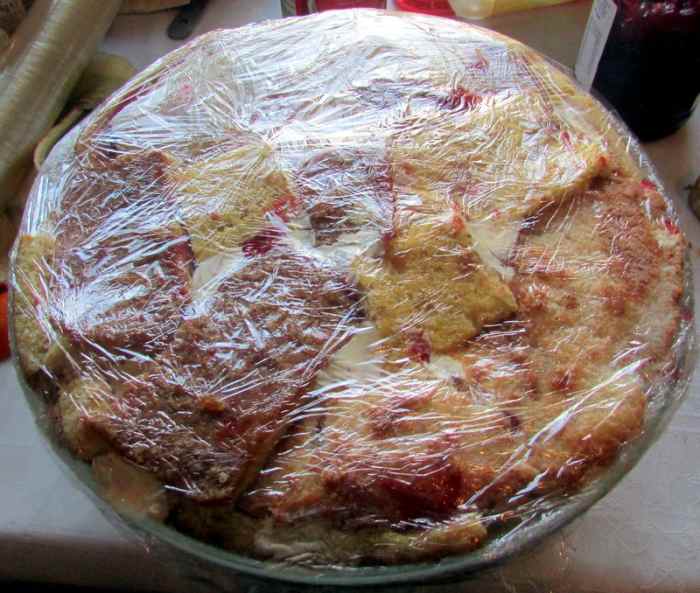
Pull over the cling film to completely cover the top. Put the bowl in the freezer for at least three hours.
L.M.Reid
Stage 3: From Freezer to the Table
- Take out of the freezer at least two hours before you plan to eat it.
- Remove the cake from the bowl and put on a large plate.
- This is made easy because of the cling film.
- Leave in the fridge for an hour and outside on the counter for the last hour.
Stage 4: Prepare to Serve
- Whip up the cream and leave in the fridge.
- Break up the chocolate bar into a bowl and place over a pan with boiling water. Add half a cup full of hot water to the chocolate and stir as it melts.
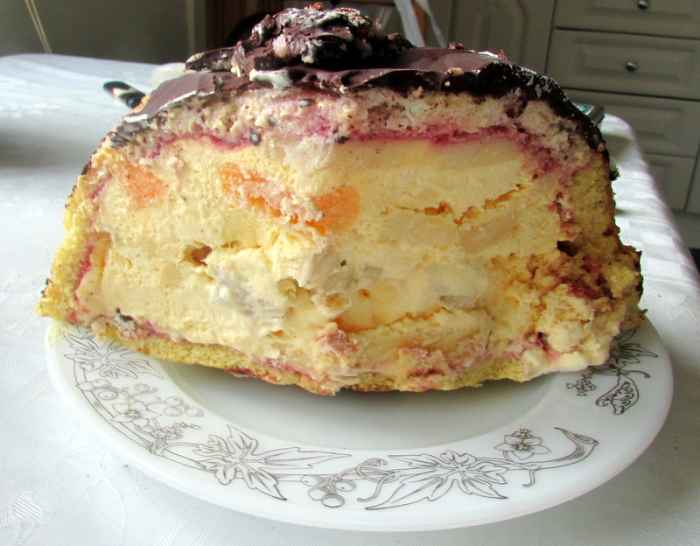
- When it has completely melted, pour it over the top of the cake.
Stage 5: Ready to Eat
- Cut the cake into pieces and add to small serving plates.
- Crumble some chocolate flake on top and add some whipped cream to each slice.
Learn how to make this ice cream sponge cake recipe at home.
L.M.Reid
Ice Cream Sponge Recipe
Comments
L M Reid (author) from Ireland on February 01, 2017:
Hello JR yes it tasted great too.
Karen thanks for the comment. It really was very easy to make and the fruit mixed in with the ice cream was refreshing
Karen Hellier from Georgia on January 30, 2017:
Wow, that looks amazing. Thanks for sharing it with us...the recipe AND the pictures!
JR Krishna from India on January 30, 2017:
Wow!! Nice....