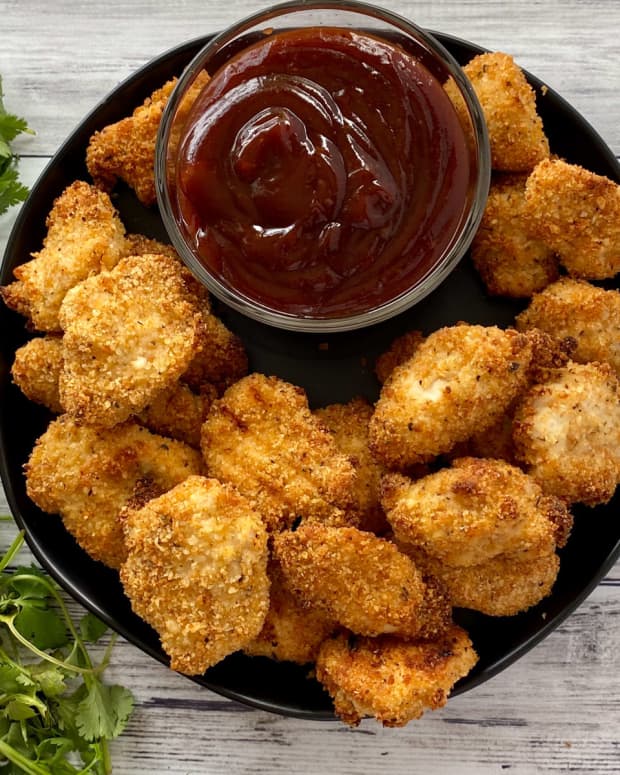
A Taste of Disney: Olivia's Cafe Buttermilk Fried Chicken
Alex is a self-proclaimed Disney expert who enjoys expanding her culinary skills in her free time.
Buttermilk fried chicken is a classic comfort food, best served with whatever sides you like best.
The Original
For those who have been lucky enough to dine at Olivia's Cafe and try their fantastic buttermilk fried chicken, this dish should be a comforting alternative. The chicken is tender and juicy, and the outside is delightfully crispy.
Cook Time
| Prep time | Cook time | Ready in | Yields |
|---|---|---|---|
1 hour 10 min | 15 min | 1 hour 25 min | 6 fried chicken breasts |
Ingredients
- 6 chicken breasts
- 1 1/2 cups buttermilk
- 3 cups flour
- 1 tablespoon salt
- 1 teaspoon black pepper
- 1/4 teaspoon cayenne pepper
- 3 cups vegetable oil, for frying
Instructions
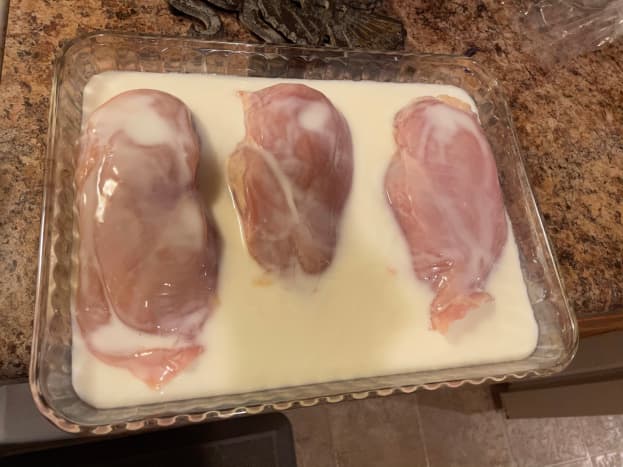
- Place the chicken breasts in a glass bowl and top with the buttermilk. Refrigerate for at least 1 hour. If you have thicker cuts it may be a good idea to extend that time.
- On a plate, combine the dry ingredients: flour, salt, pepper, and cayenne.
- Remove the chicken breasts from the buttermilk and allow them to drain before dredging in the seasoned flour. Ensure that all sides are properly covered. Shake off any excess flour.
- Heat the oil in a thick-bottomed pan with high sides. Bring the oil up to 350 degrees. Carefully place the chicken breasts in the oil. Make sure not to crowd the chicken. You may need to fry in two to three batches.
- Cook the chicken until the outside is golden brown, about 5 to 7 minutes on each side.
- Remove the chicken from the oil and allow it to drain on a paper-towel-lined plate.
Photo Guide


Deep-Frying at Home Is Easier Than You Think!
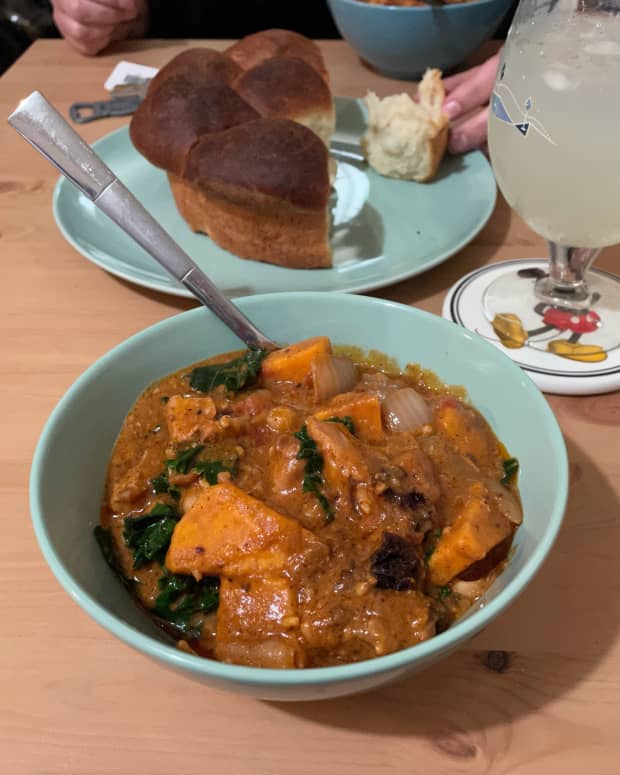
I had always been intimidated by making fried chicken at home. I had this idea that it would be a complicated process and would require technical skills beyond what I could manage. However, that was not the case. After the initial hour it took a mere four minutes to bread the chicken. The chicken cooked itselfall I had to do was flip each breast halfway through.
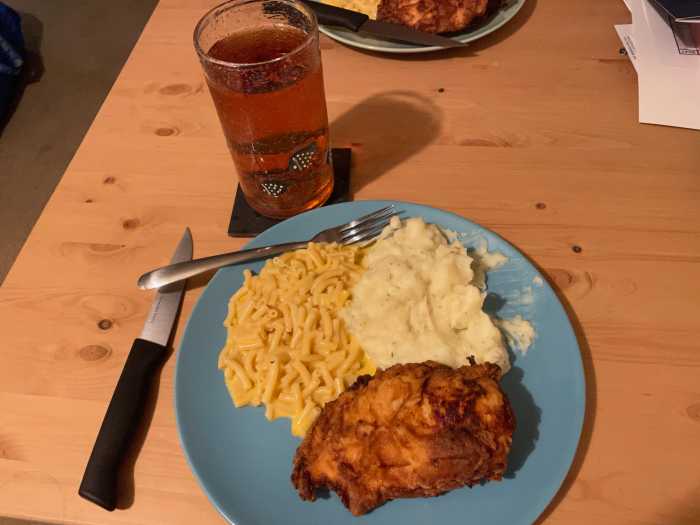
It made for a comforting dinner on a rainy day. We served it with mashed potatoes, mac and cheese, and iced tea. While I didn't get to have any reheated the next day I was told the breading didn't get too soggy and the meat was still tender and moist.
I did make a small change to the recipe. It called for vegetable oil for frying. A little over a year ago I had cut certain oils from my diet and vegetable oil was one of them. I used coconut oil instead. When the oil was heating and while the chicken was cooking there was a sweet smell. However, there was no sweet or coconut flavor to the chicken. In addition to being healthier I have found that coconut oil tends to have a drier feeling to the outside of fried foods. They just feel lighter. Less greasy.
The Cook Book
Tweaks for Next Time
The next time I make this dish I will add a little more spices—maybe some garlic powder and onion powder. I think I will also make sure that I pick thinner cuts of meat. I also would love to try this with this recipe with drumsticks or thighs; however, having the bone in the meat will increase the cooking time. I also think this chicken would be delightful with collard greens or Brussels sprouts.
Definitely a Make-Again Recipe
I would most definitely I will make this recipe again. My boyfriend did mention that, while the chicken was tender and moist in the thickest parts it did not have as much flavor as the thinner parts. The breading doesn't have as much flavor as the fried chicken from some fast food places, but adding a bit more seasoning would change that. It also isn't as crispy as fried chicken that I am used to, but I kind of liked it better since there was more meat and less breading.
Comments
Nyesha Pagnou MPH from USA on January 27, 2021:
Thank you for sharing the recipe. The chicken looks good!